

This page is available to Managers and above. (Permission
manage: Owner or Manager)1) Overview
Space Management is the positioning workspace where you draw and edit zones and points directly on the store plan.2) Before You Start
Space Management works against the plan and locators registered in GeoSpace. All the items below must be complete before you can edit zones and points on your actual store plan.If these are not complete, buildings and floors may not appear, or you may see
‘Building without linked plan’ or ‘Positioning space connection error’. Check the
integration status in Settings · Positioning Integration.
3) Screen Layout
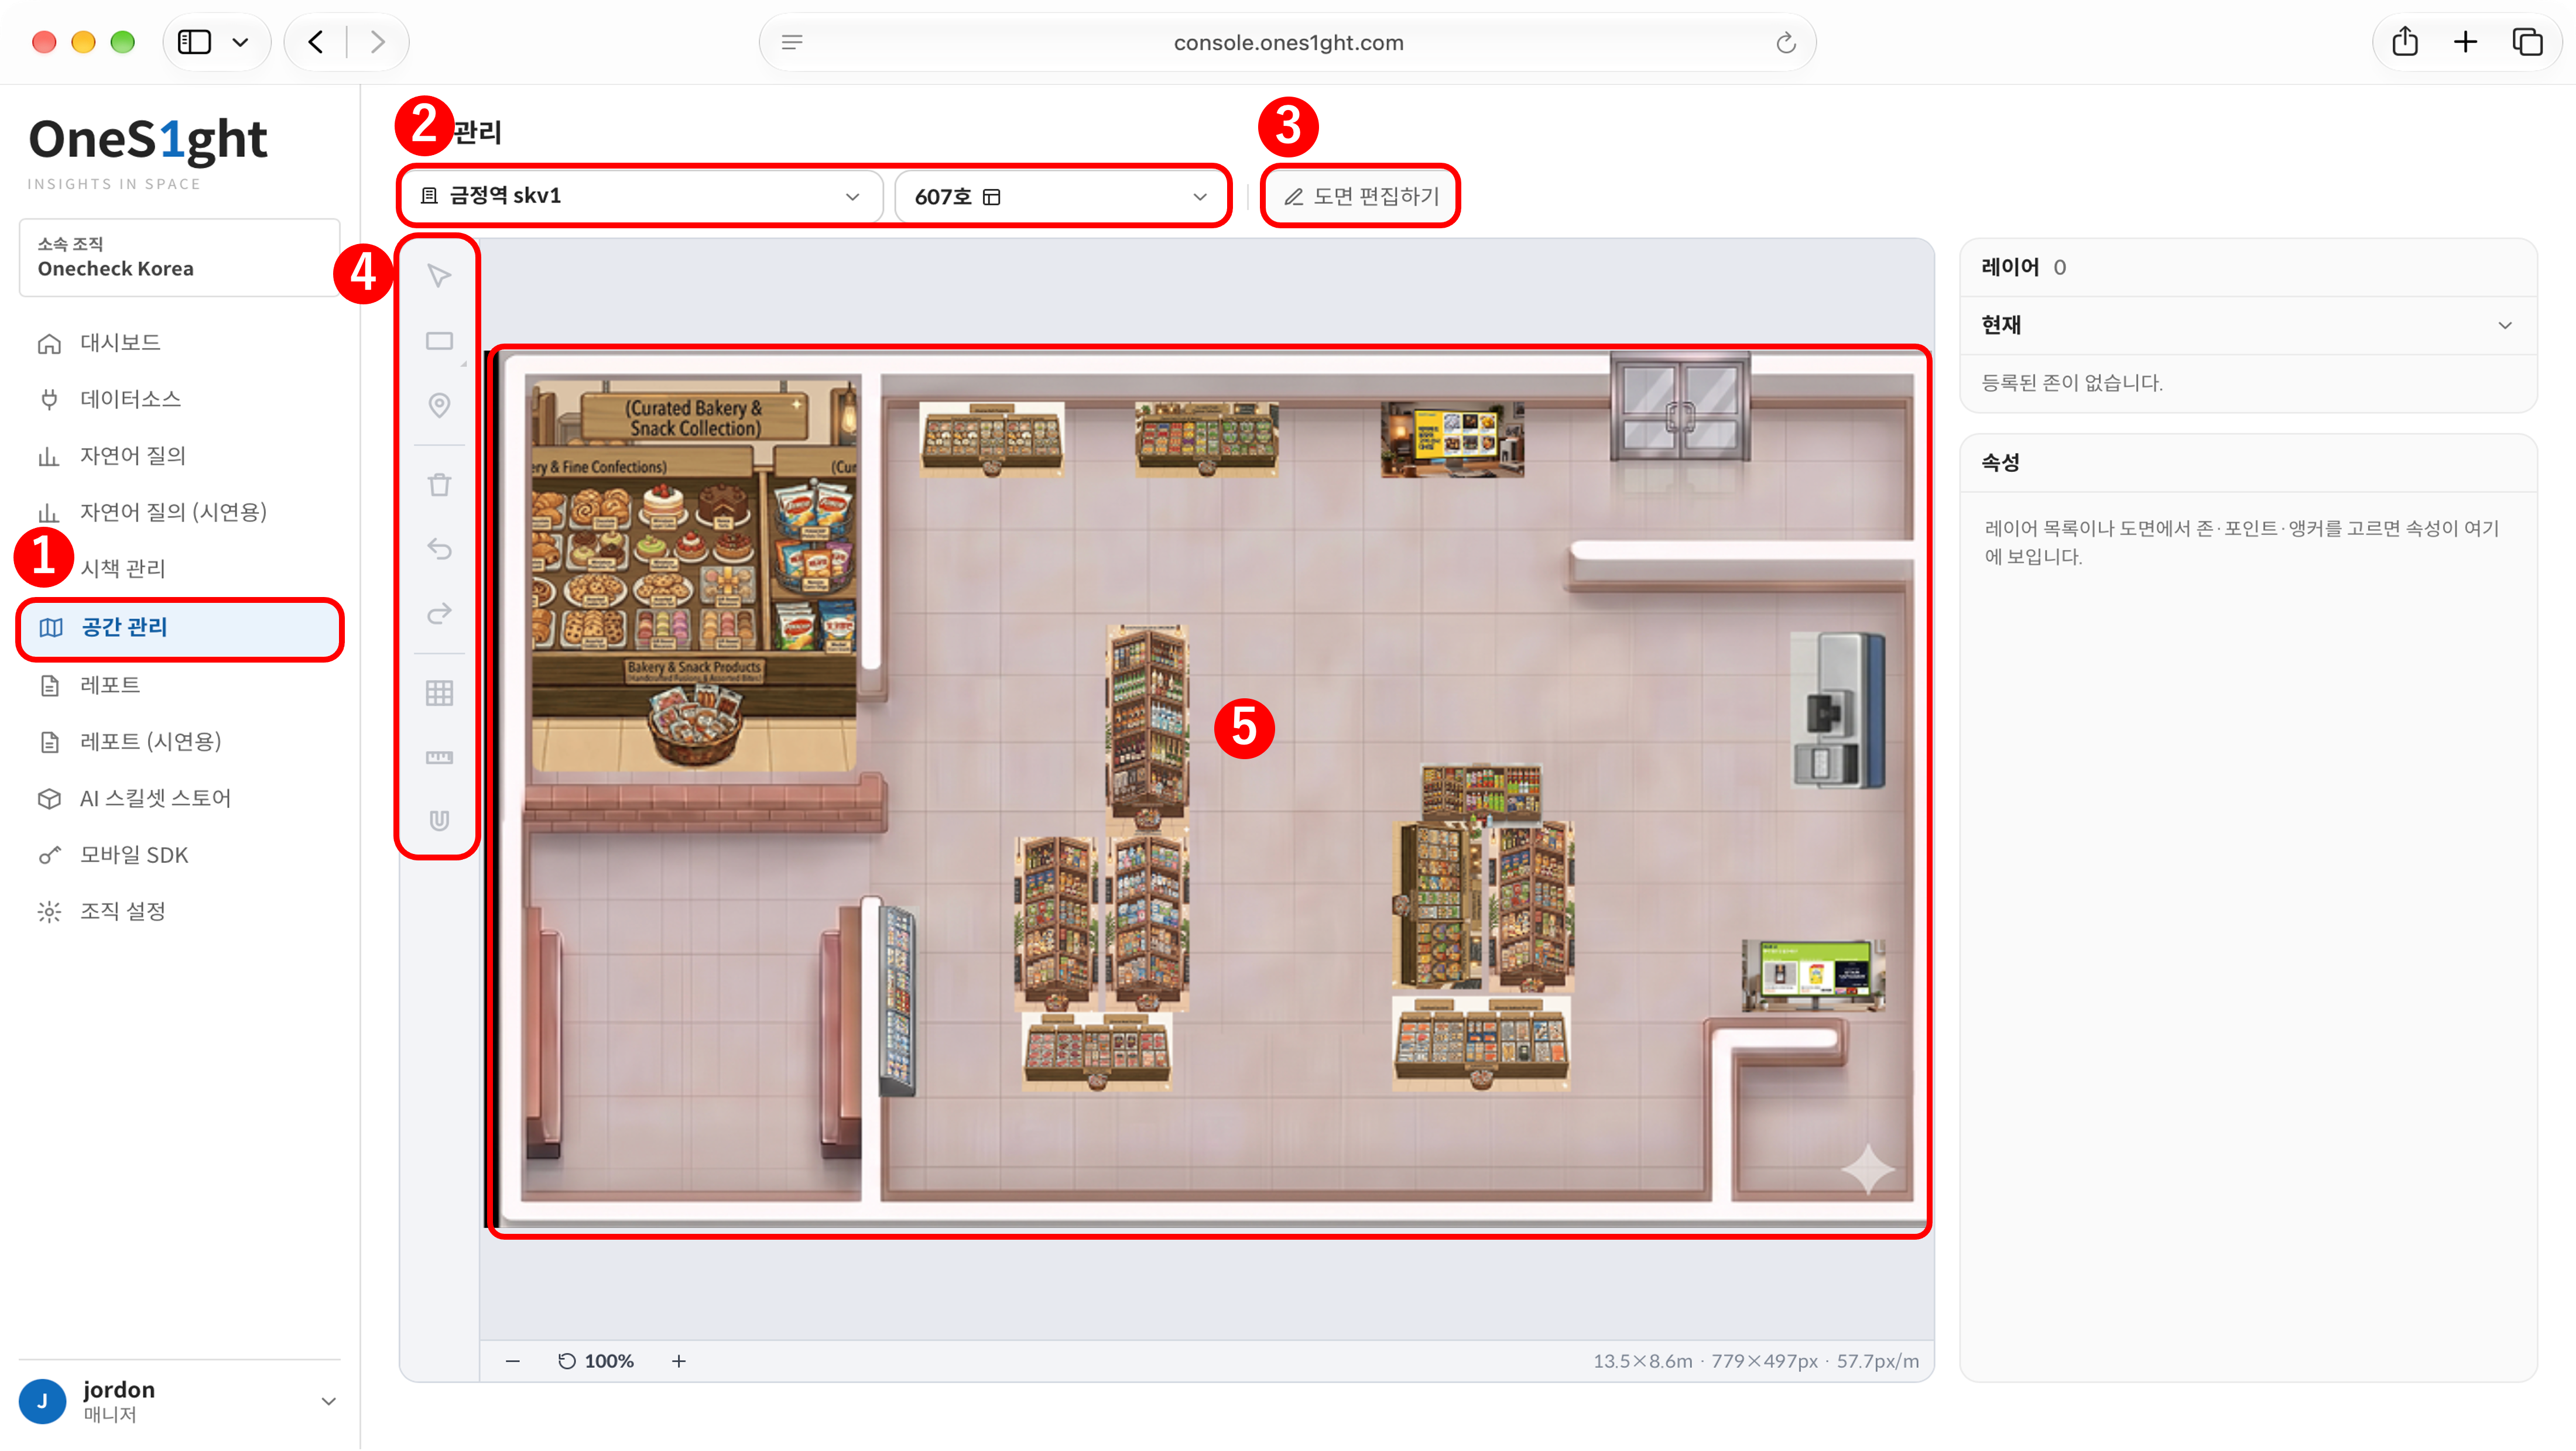
console.ones1ght.com),
then go to [Spaces] in the console sidebar.If this is your first OneS1ght login, complete Getting Started (invitation · login) first. ② Building and floor selection Select a building and floor at the top to display that floor’s plan. ③ [Edit floor plan] Clicking it activates edit mode, where you can draw and modify zones and points.
Even if ‘No anchors are registered on this floor’ appears, you can still set up zones.
⑤ Plan canvas
The area where the store plan is displayed. Zoom (+ · −) and the scale are shown, and zones and points are edited on the plan.
⑥ Layers · Properties panel
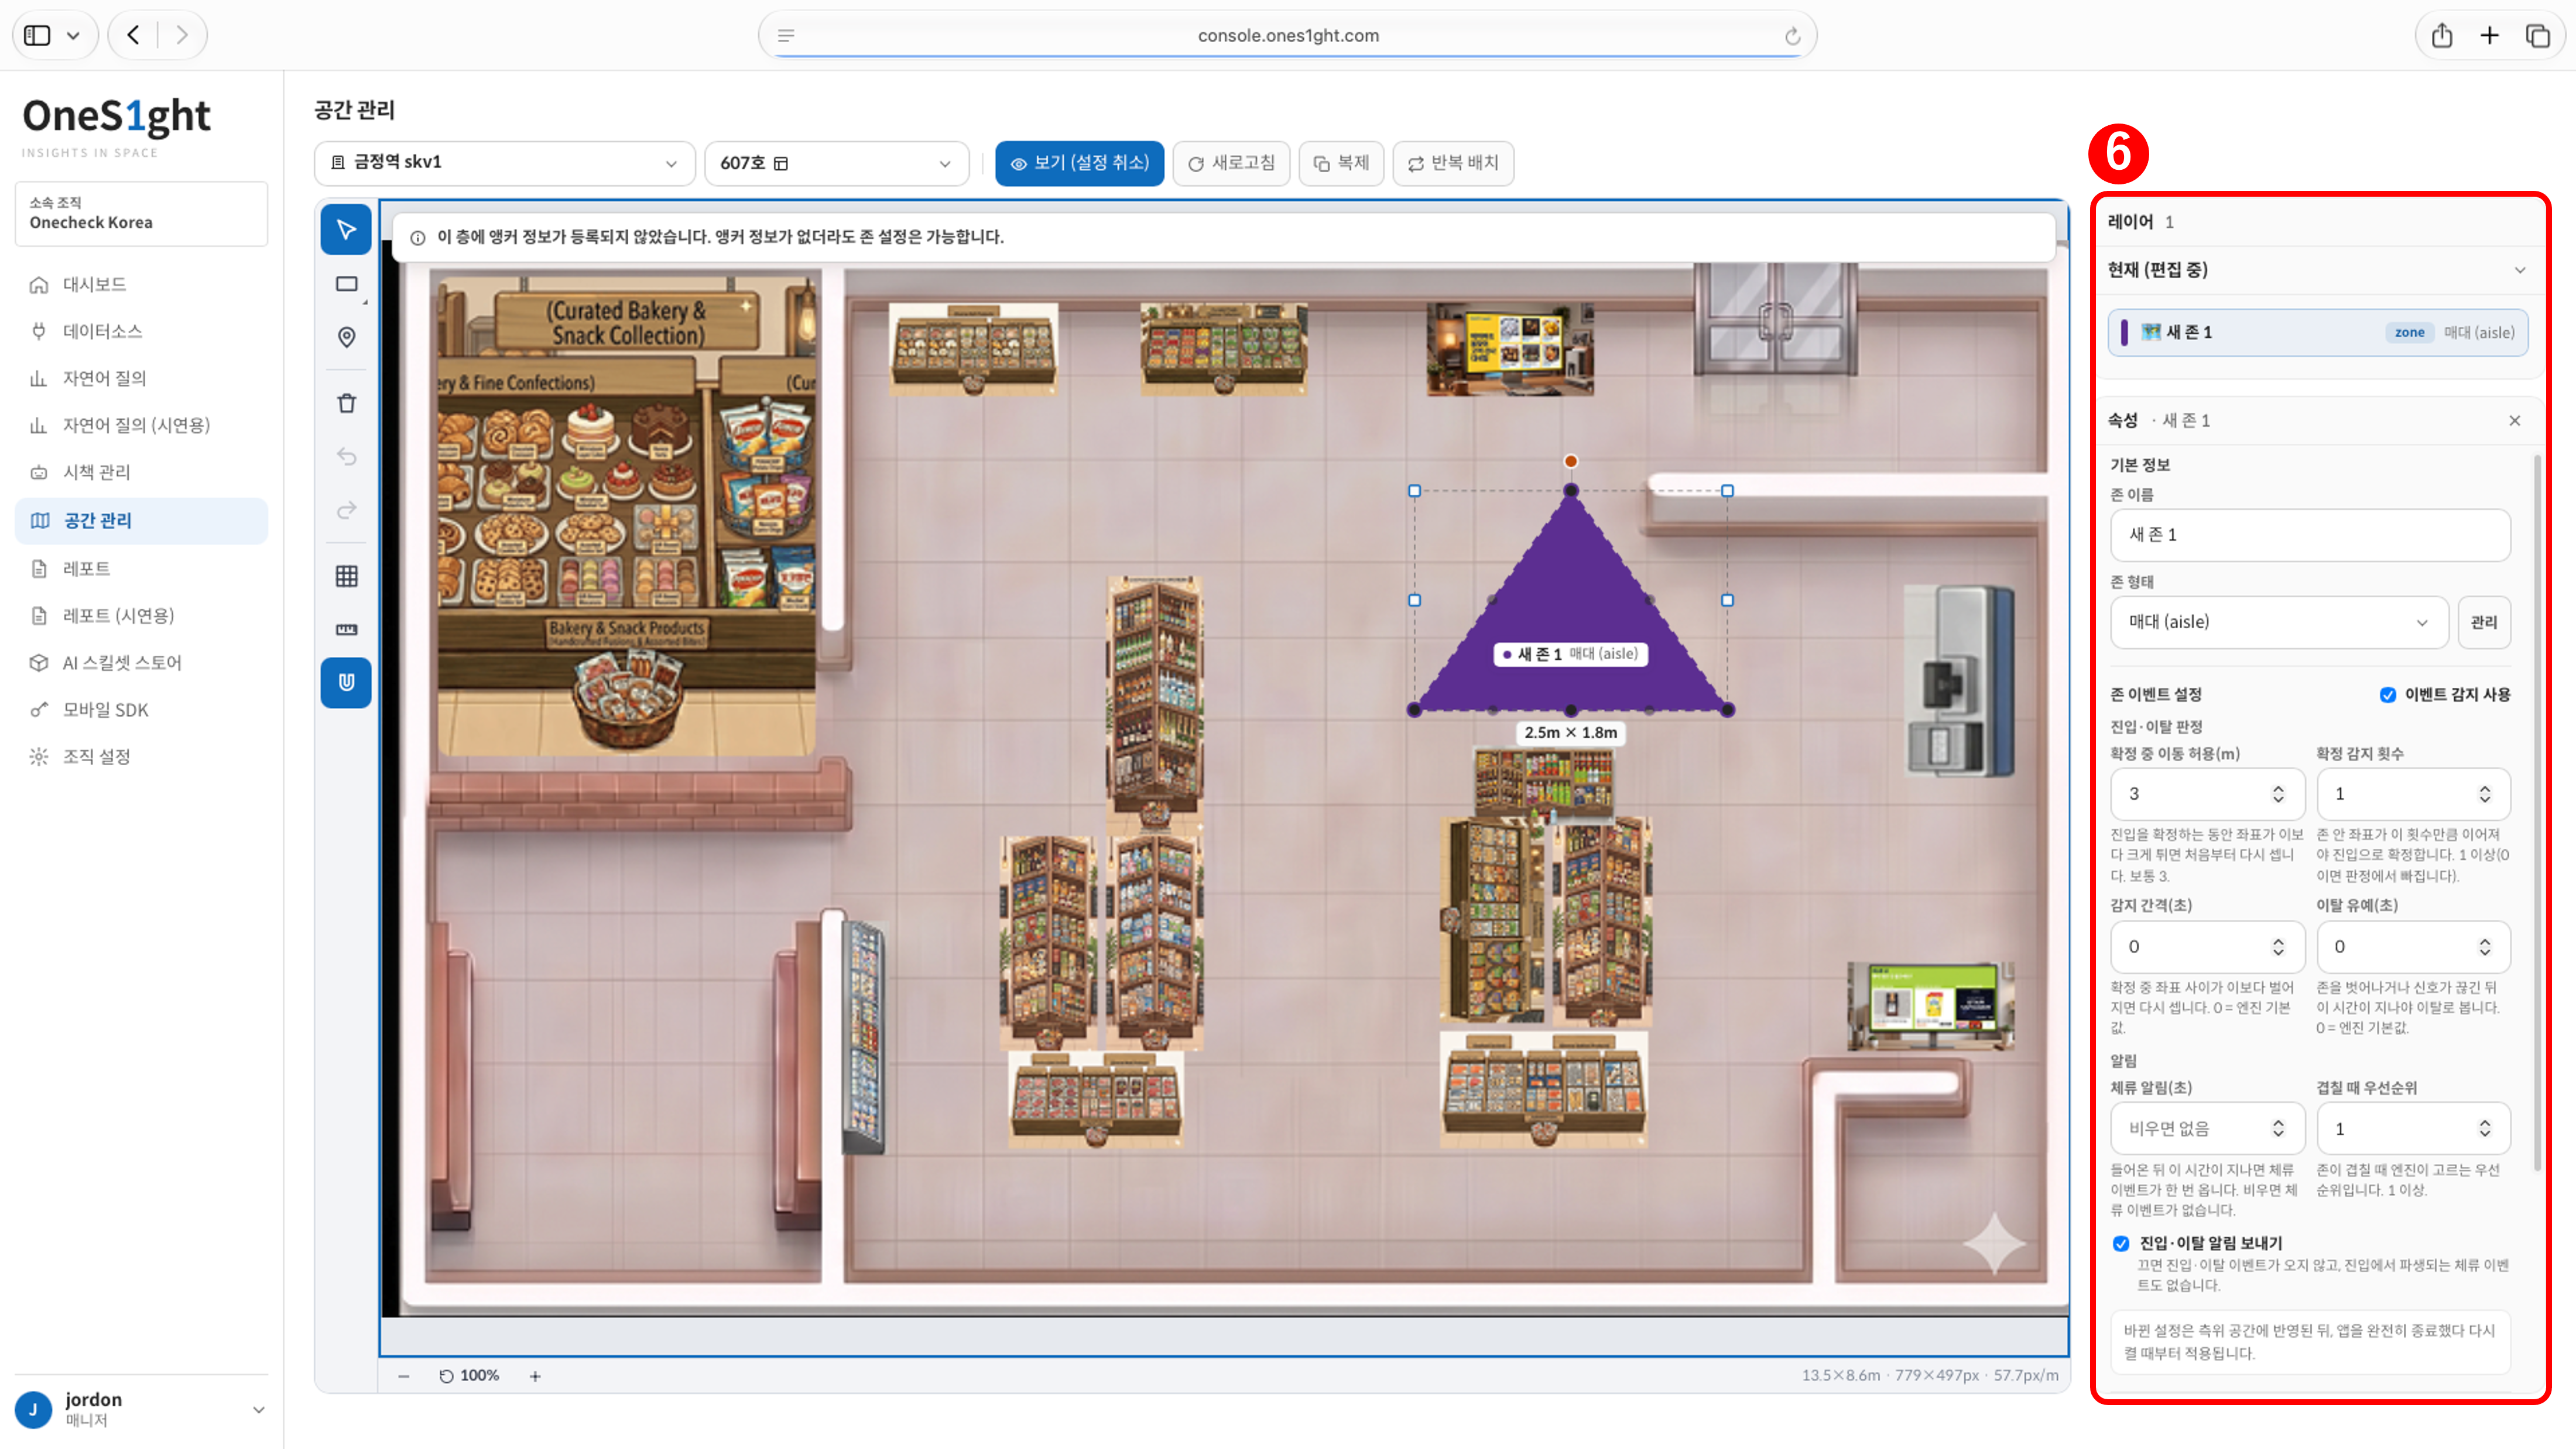
The Properties panel activates when a created zone is selected.
Zone types
- Select [Add new type…] to create your own types for the organization.
4) Creating a Zone
Click [Edit floor plan] to activate edit mode, then proceed.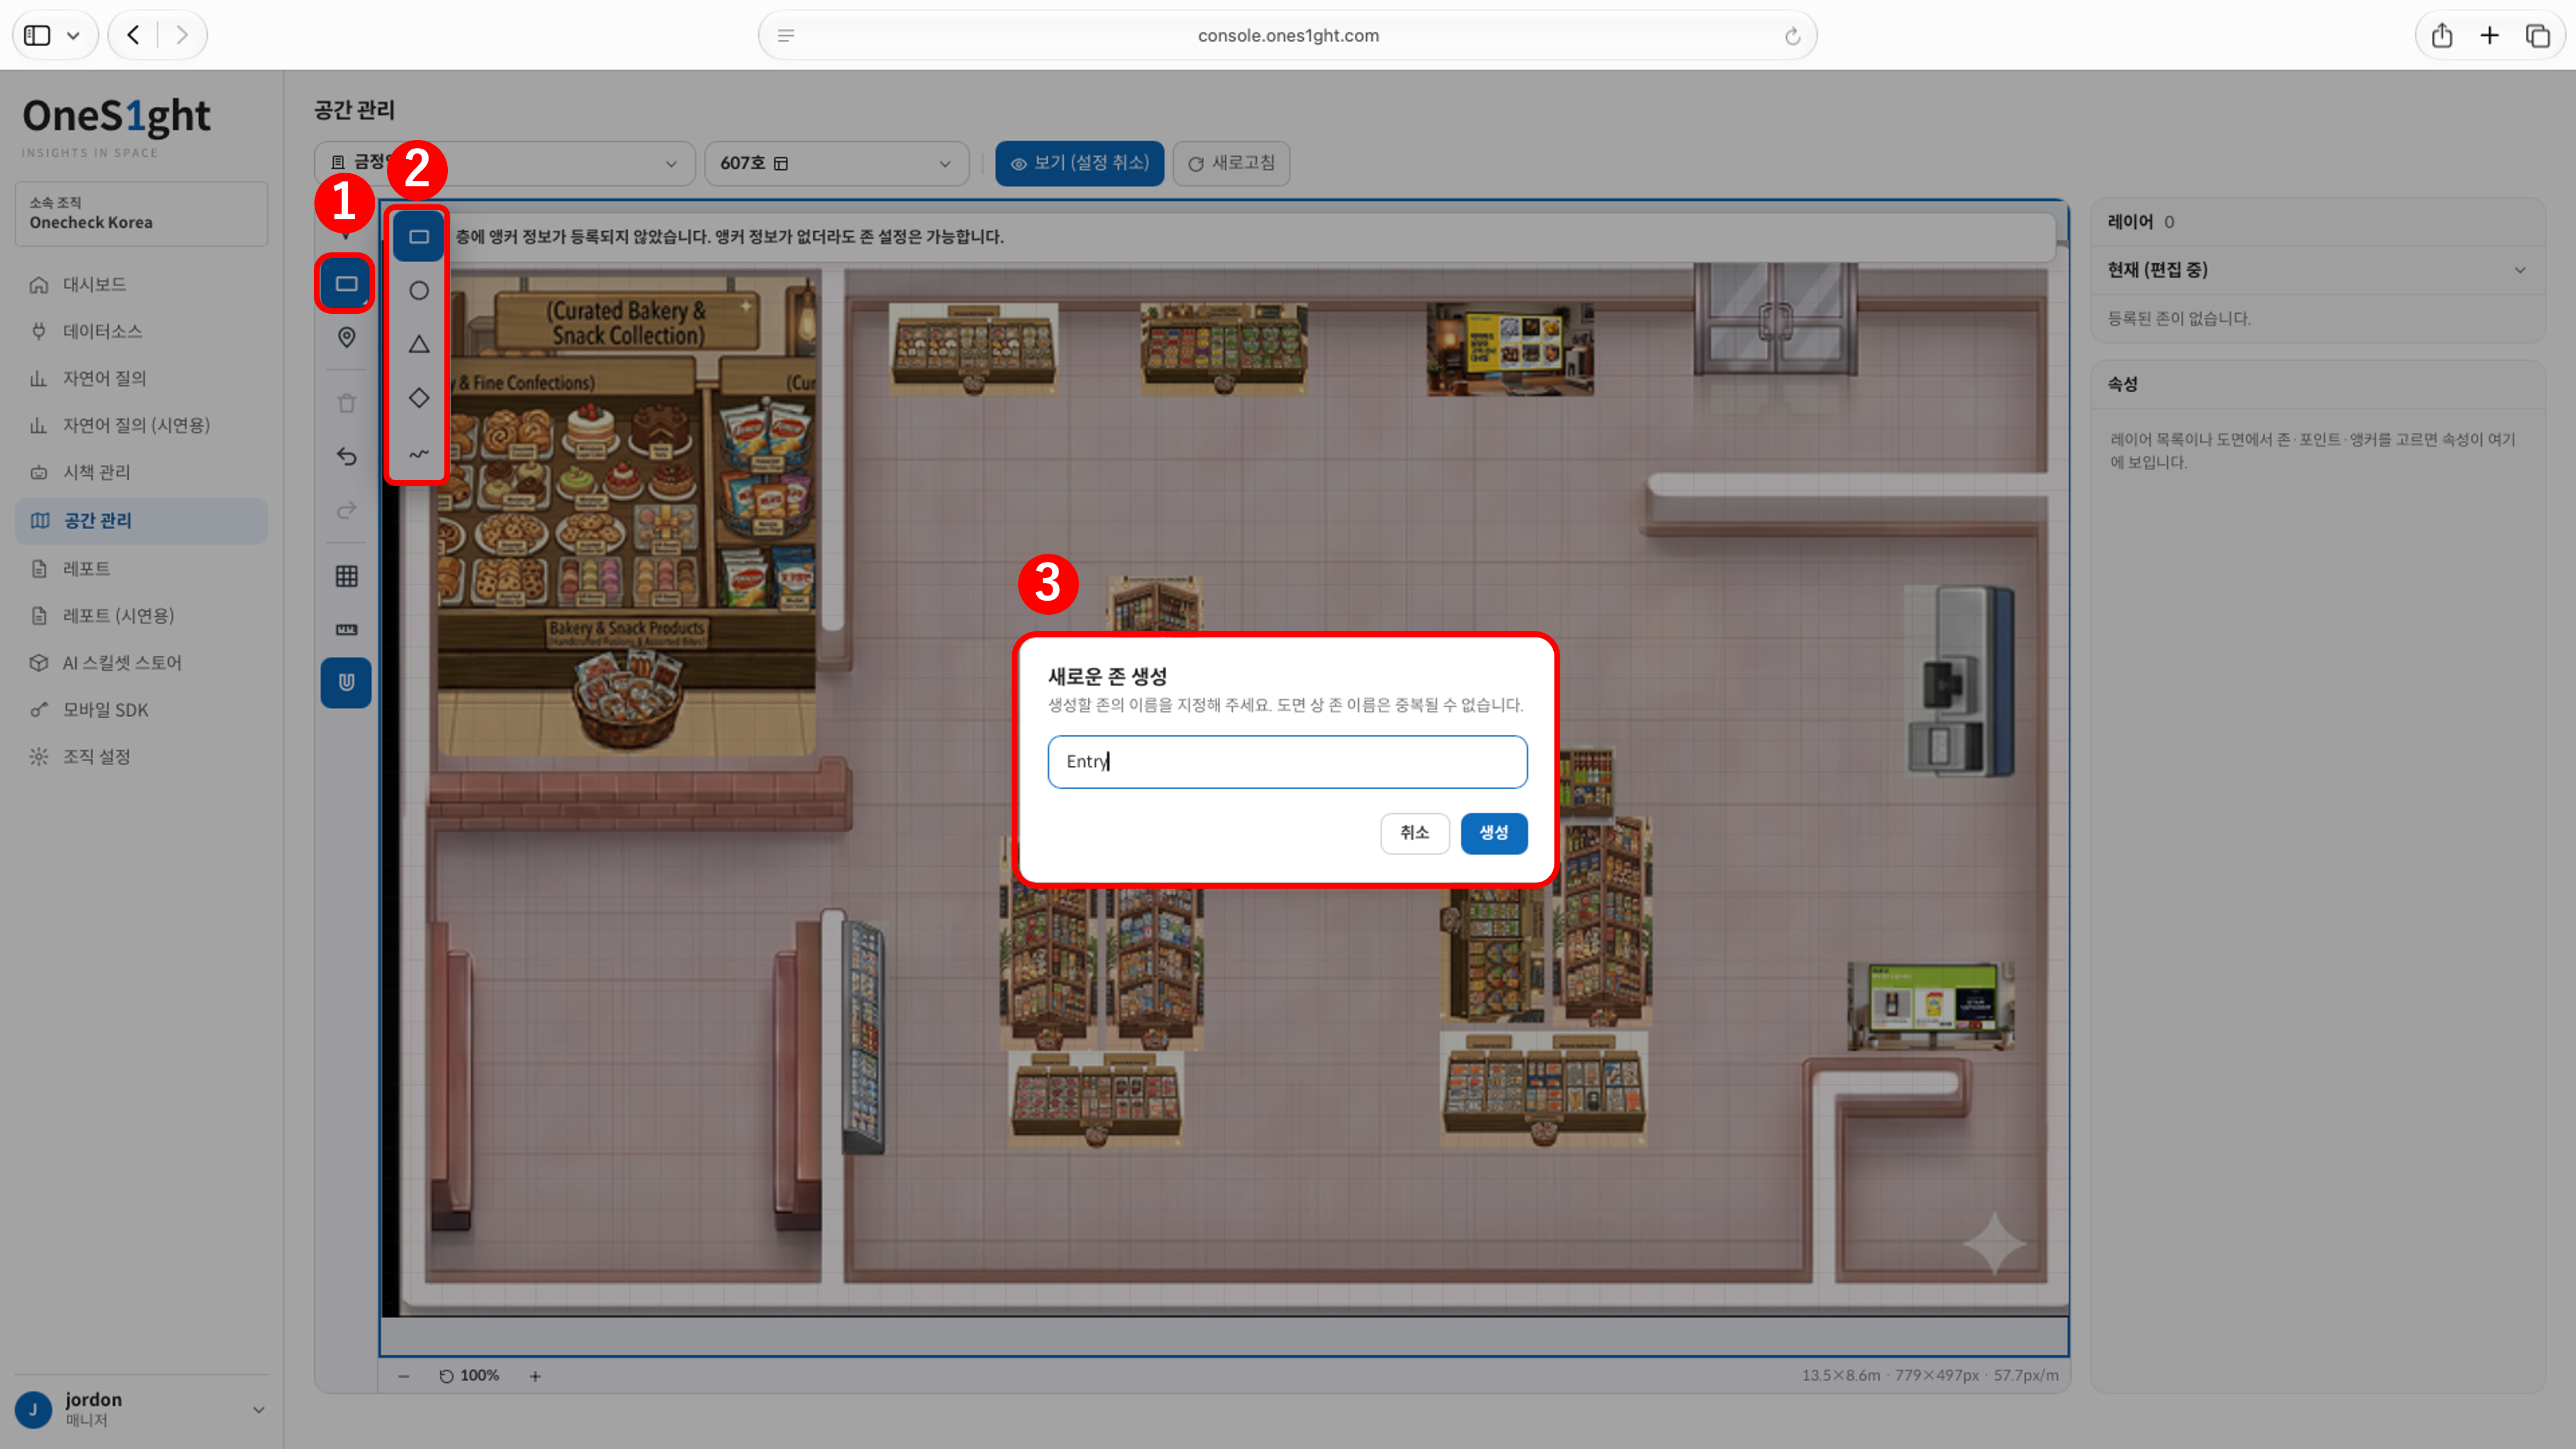
- Click [Draw Zone].
-
Pick a shape, then choose where to create the zone on the plan canvas and drag to draw it.
- For irregular shapes pick Freehand; to keep things aligned, turn on Snap.
- For a freehand shape, place 3 or more points along the area you want, then double-click at the last point or click the first point to close the area. Closing it opens the same ‘Create new zone’ popup as in step 3.
-
In the ‘Create new zone’ popup, enter a zone name (e.g., Entrance, Checkout, A-1) and click [Create].
Zone names cannot be duplicated on the same floor.
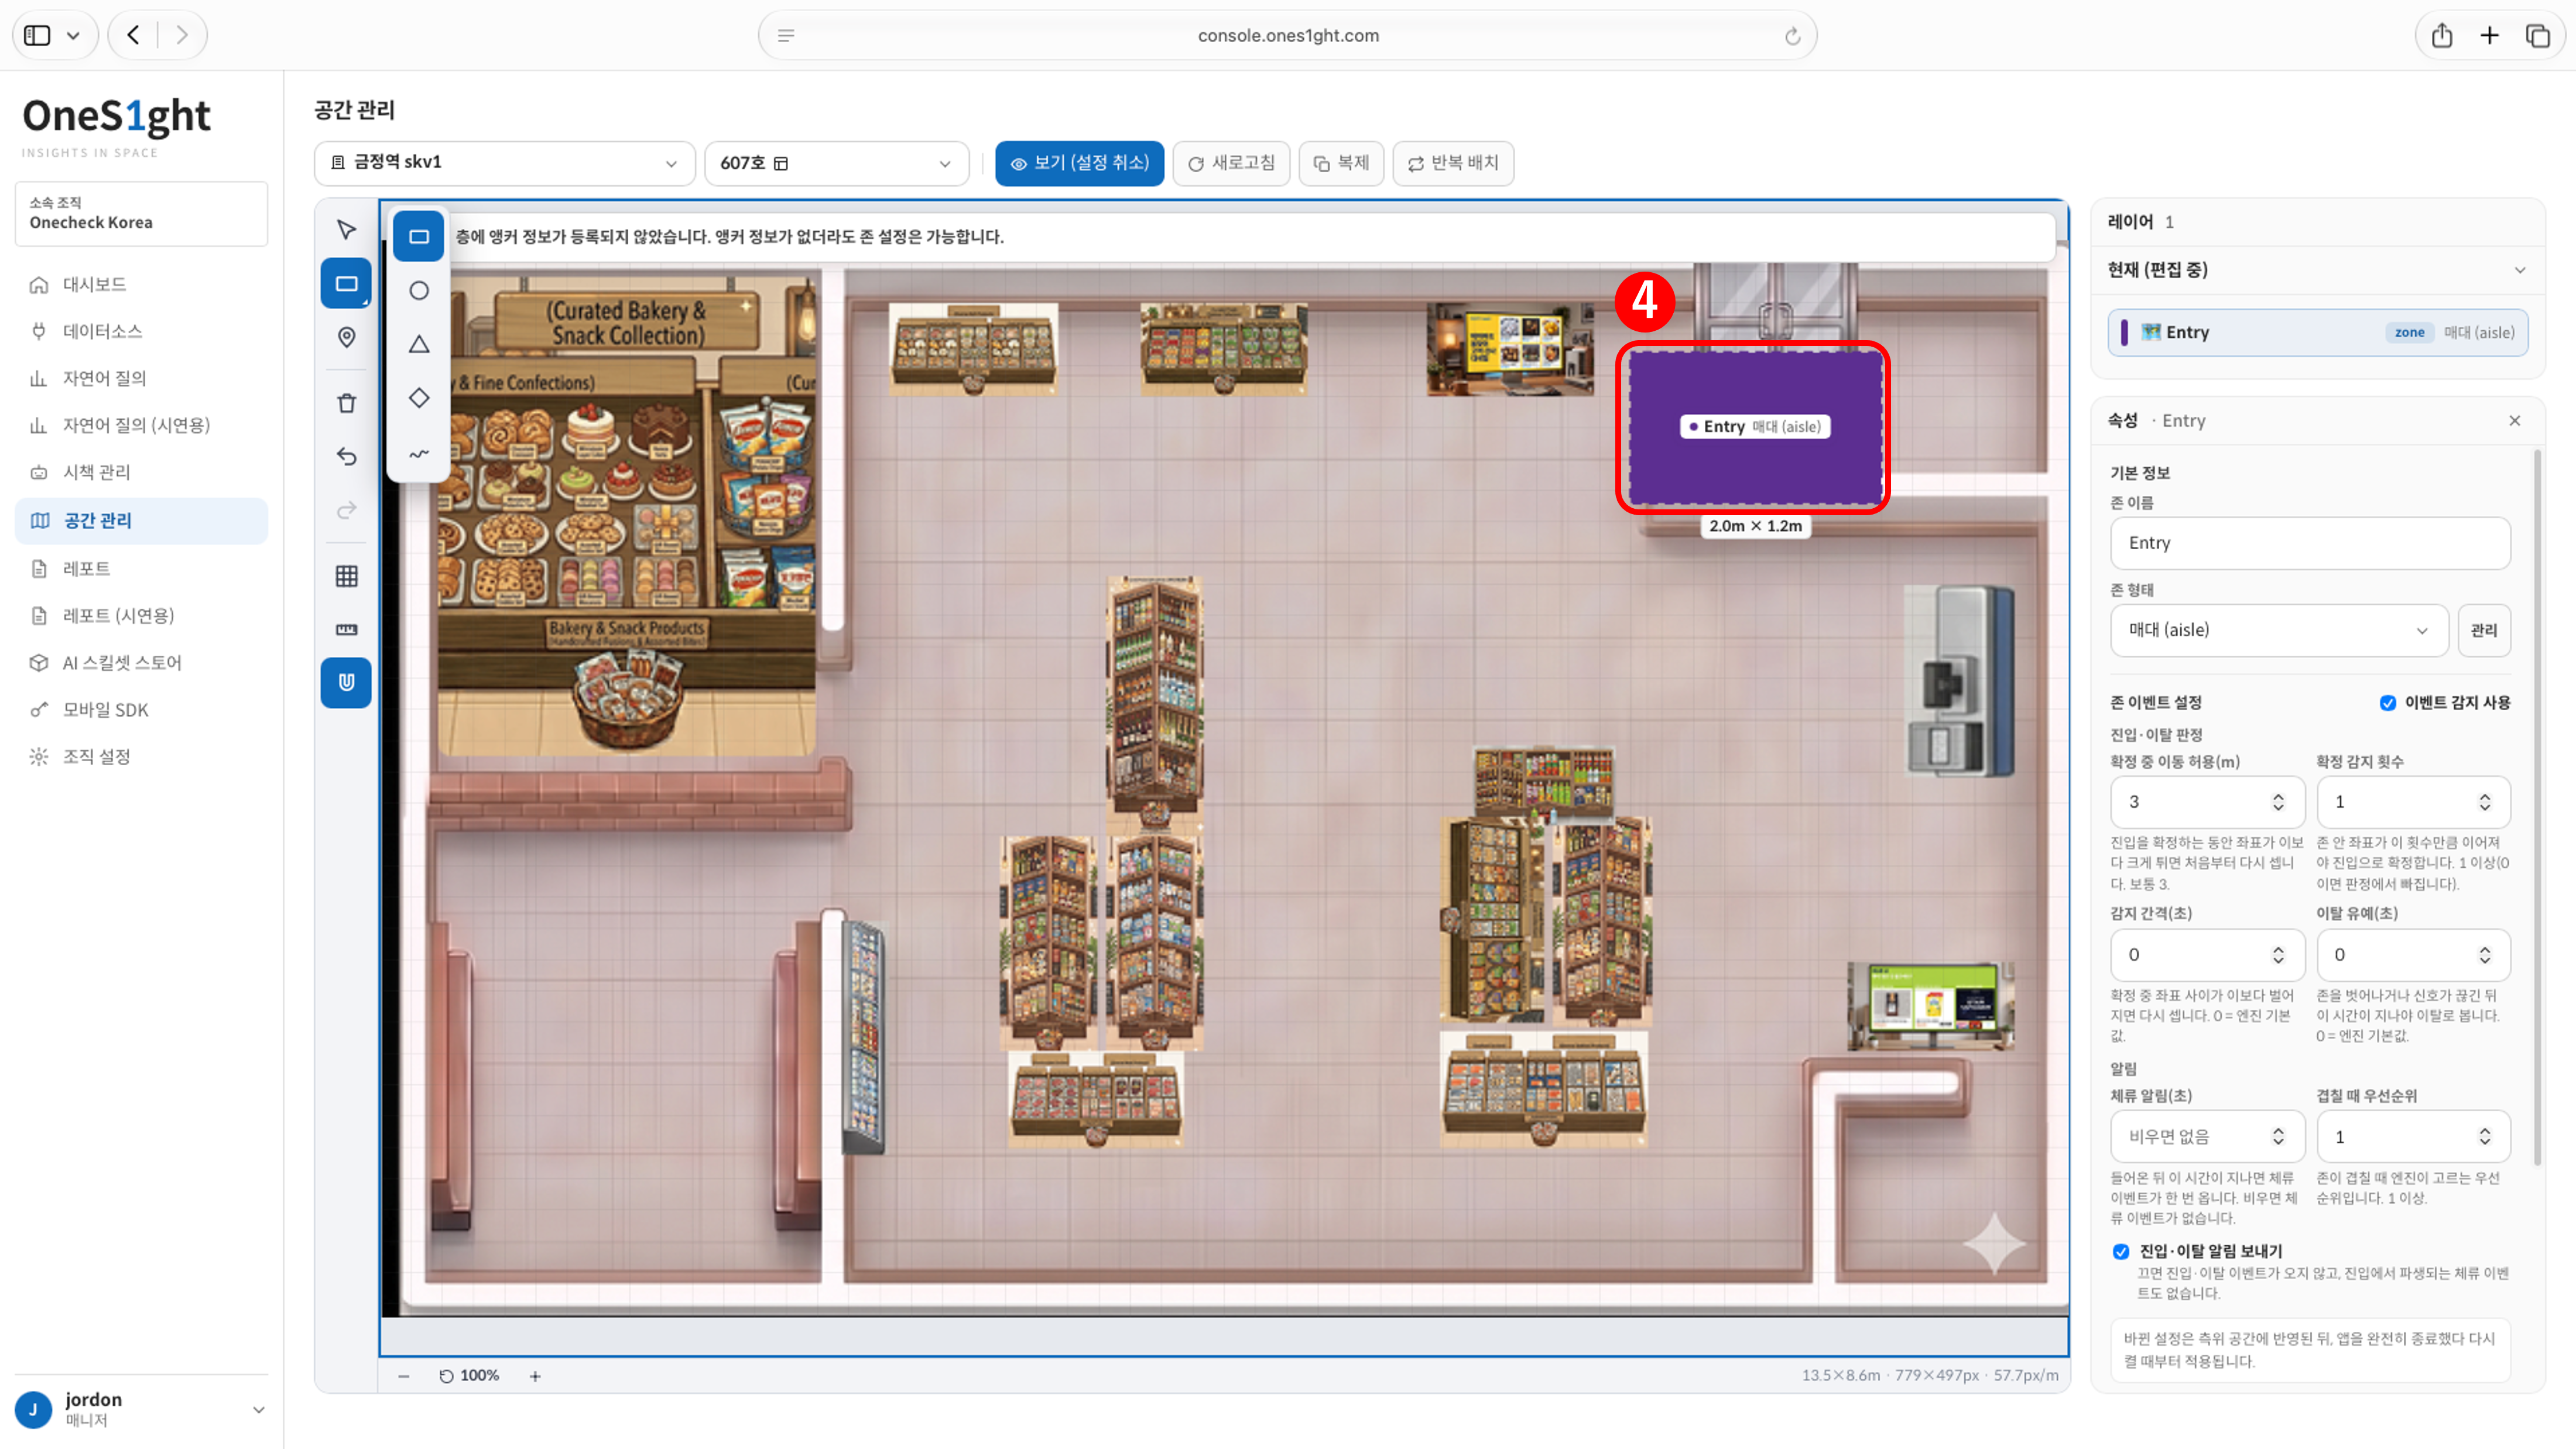
- Confirm the created zone
- Confirm the new zone appears on the plan and in the layer list. The canvas shows the zone’s real size (e.g., 2.0 m × 1.2 m), so you can check its extent.
- To select a zone, the editing tool on the left must be the Select tool. Clicking the zone opens the Properties panel on the right.
- Zones are created with the default type Aisle (
aisle); change it to match the purpose. - The zone event settings work with their defaults. See 5) SDK Area Detection for what each field means.
A selected zone can be adjusted with the mouse.
- Select inside the zone and drag to move it.
- Drag the corner handles to change its size and shape.
Edits such as moving and resizing only reach GeoSpace (the positioning space) once you click [Save (N)] at the top.
Until saved, they stay ‘Unapplied’ on this screen only; the number in parentheses is the count of unapplied changes.
5) SDK Area Detection
Selecting a zone shows the zone event settings in the Properties panel on the right. These are the criteria the app SDK uses to detect entering and exiting the zone, passed through the SDKZone fields.
The defaults work as they are.
If entries are slow to confirm, increase Movement allowed while confirming;
if enter and exit keep alternating at the boundary, increase Exit grace.
If a zone is too small, positioning error can cause repeated enter and exit events.
Define zones around where a person stands and stays, not around a single shelf.
6) Connection Status
Checklist
Once all items below are confirmed, zone editing is complete.