

1) Access
Go to GeoSpace (geospace.geoplan.io).
2) Account Registration
First-time users register through an email invitation. Invited users need no separate sign-up: log in with the invited Google or Microsoft account and start right away.- Only business Google Workspace or Microsoft (Teams / Entra ID) accounts are supported.
- If you have not received an invitation, contact onesight-support@onecheck.co.kr.
You must log in within 14 days of the invitation; after 14 days the invitation expires.
If it has expired, ask your administrator to invite you again.
3) Adding Users
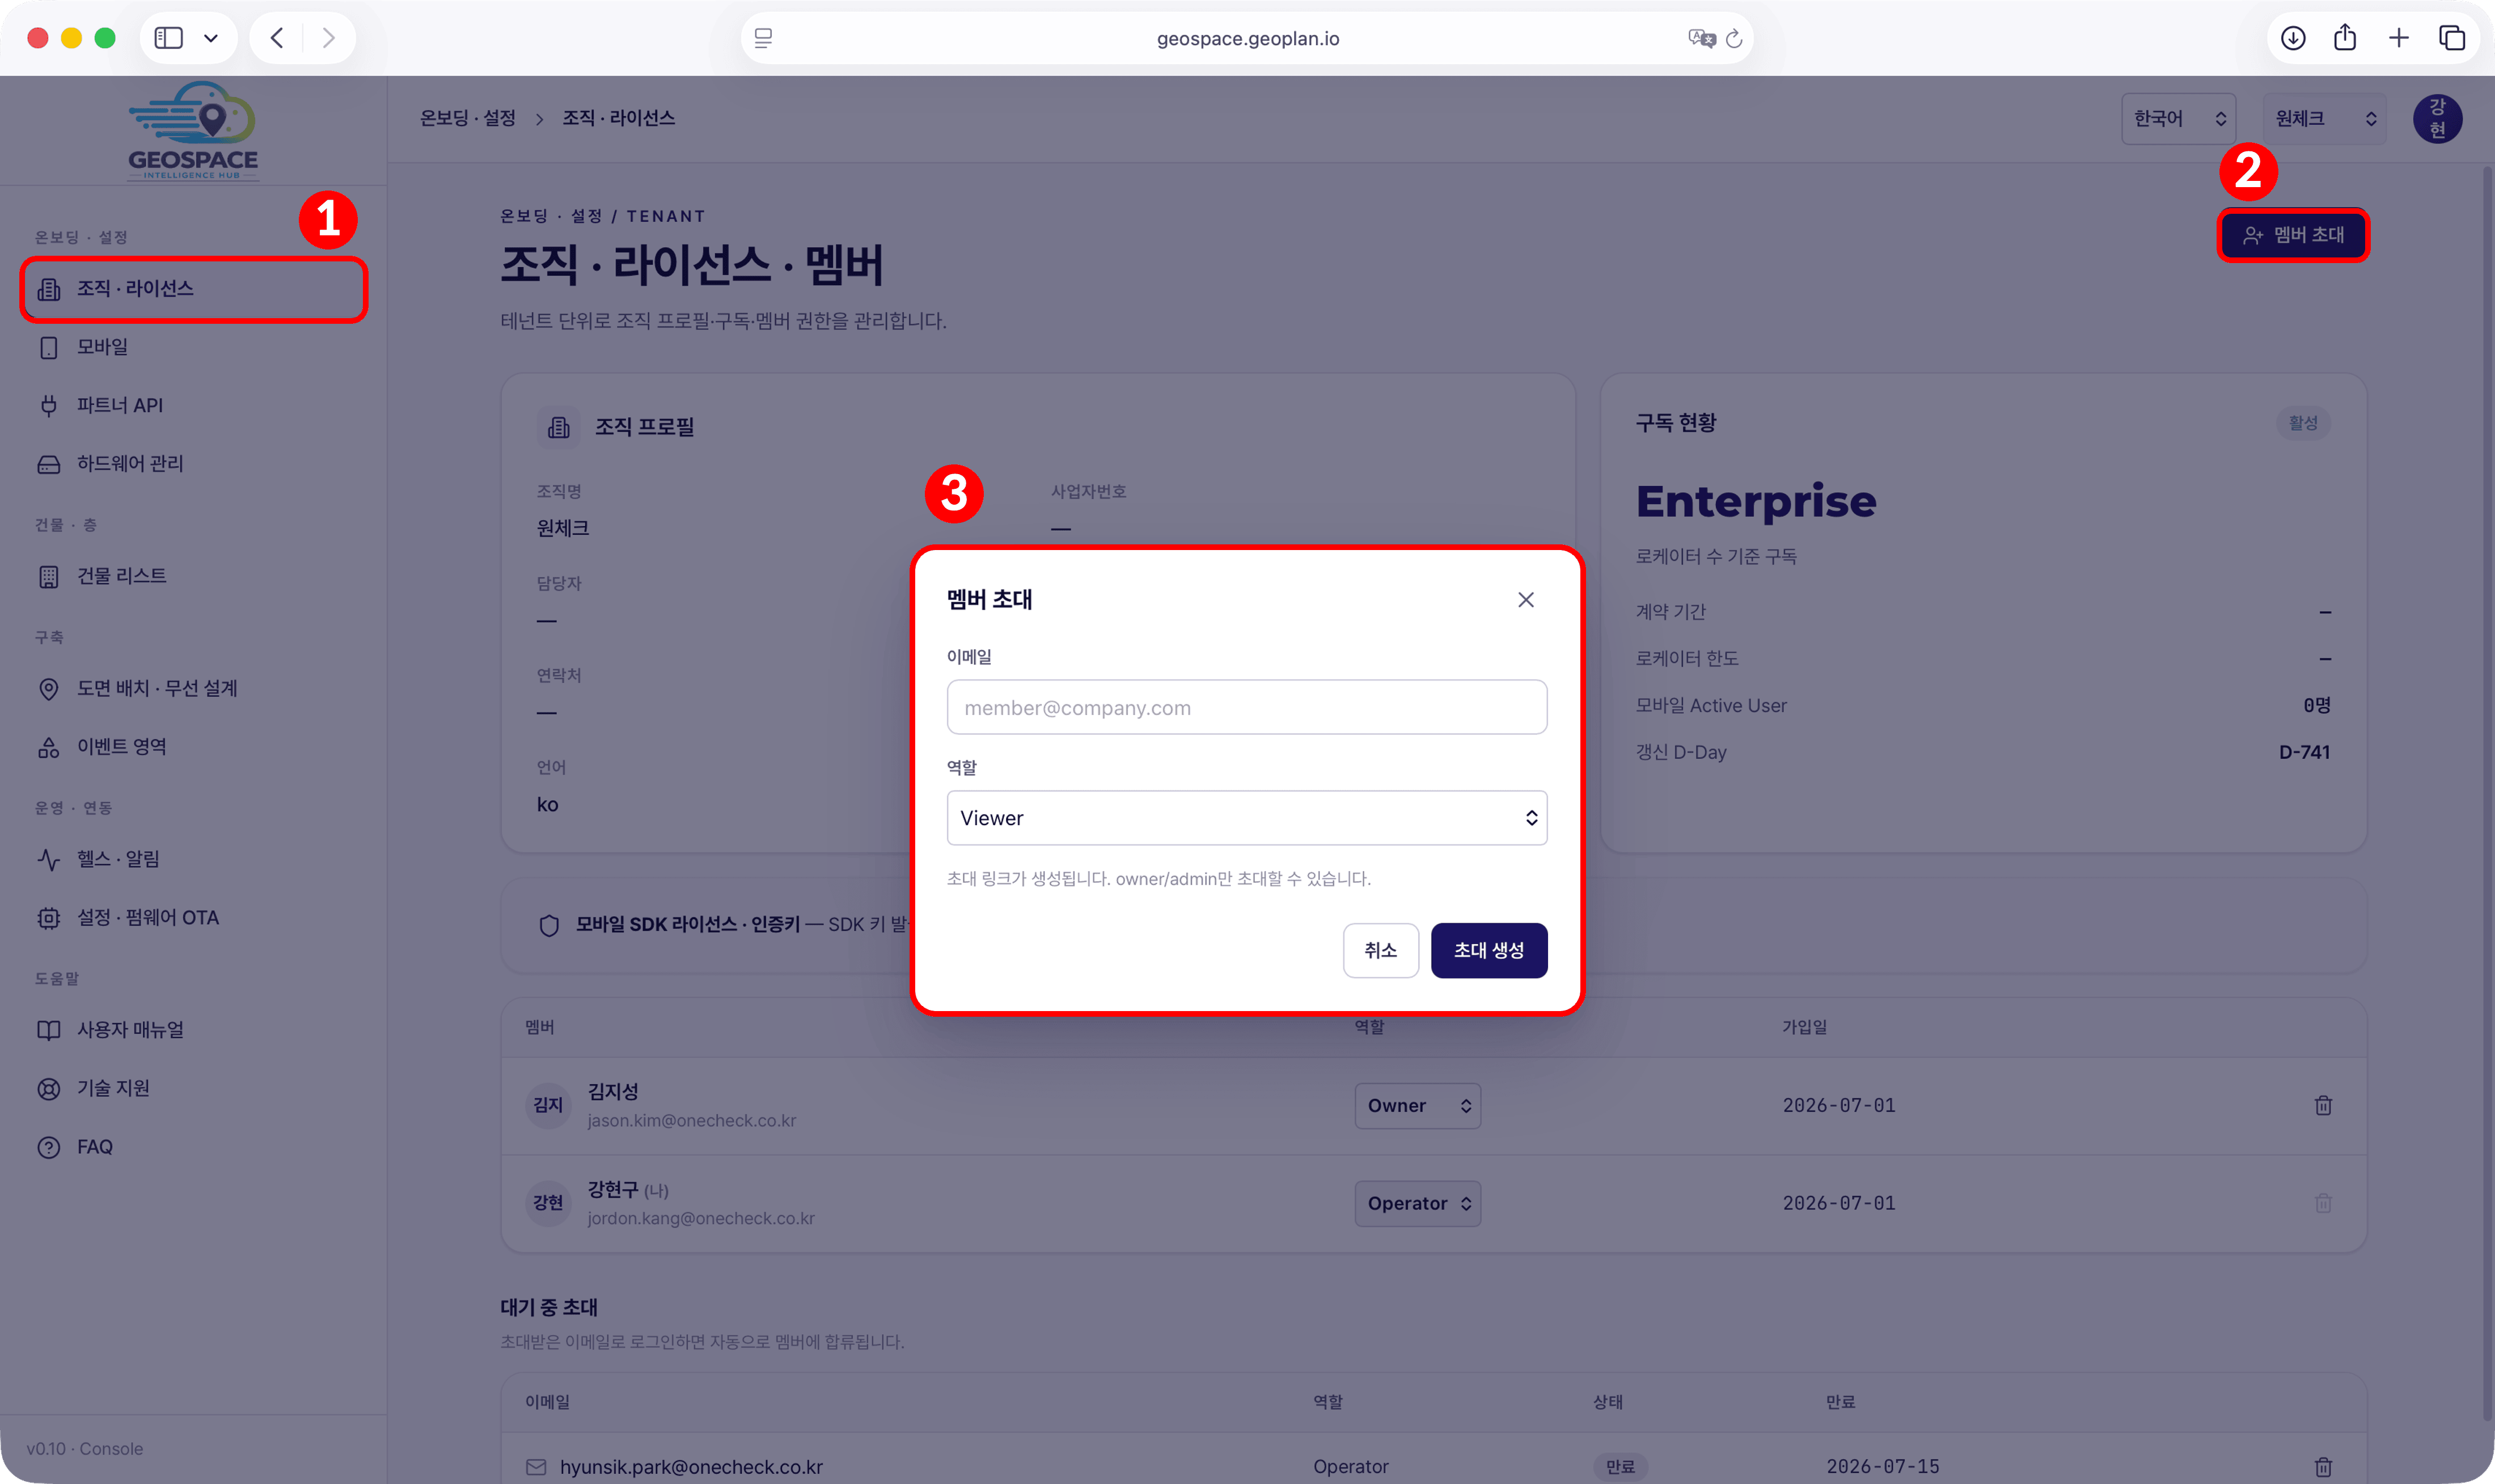
Note that GeoSpace roles (
OneS1ght roles (
admin · operator · viewer) use different names fromOneS1ght roles (
owner · manager · viewer).Only owner or admin roles can invite members.
Registered members can have their role changed or be removed from the list.
4) Checking the License
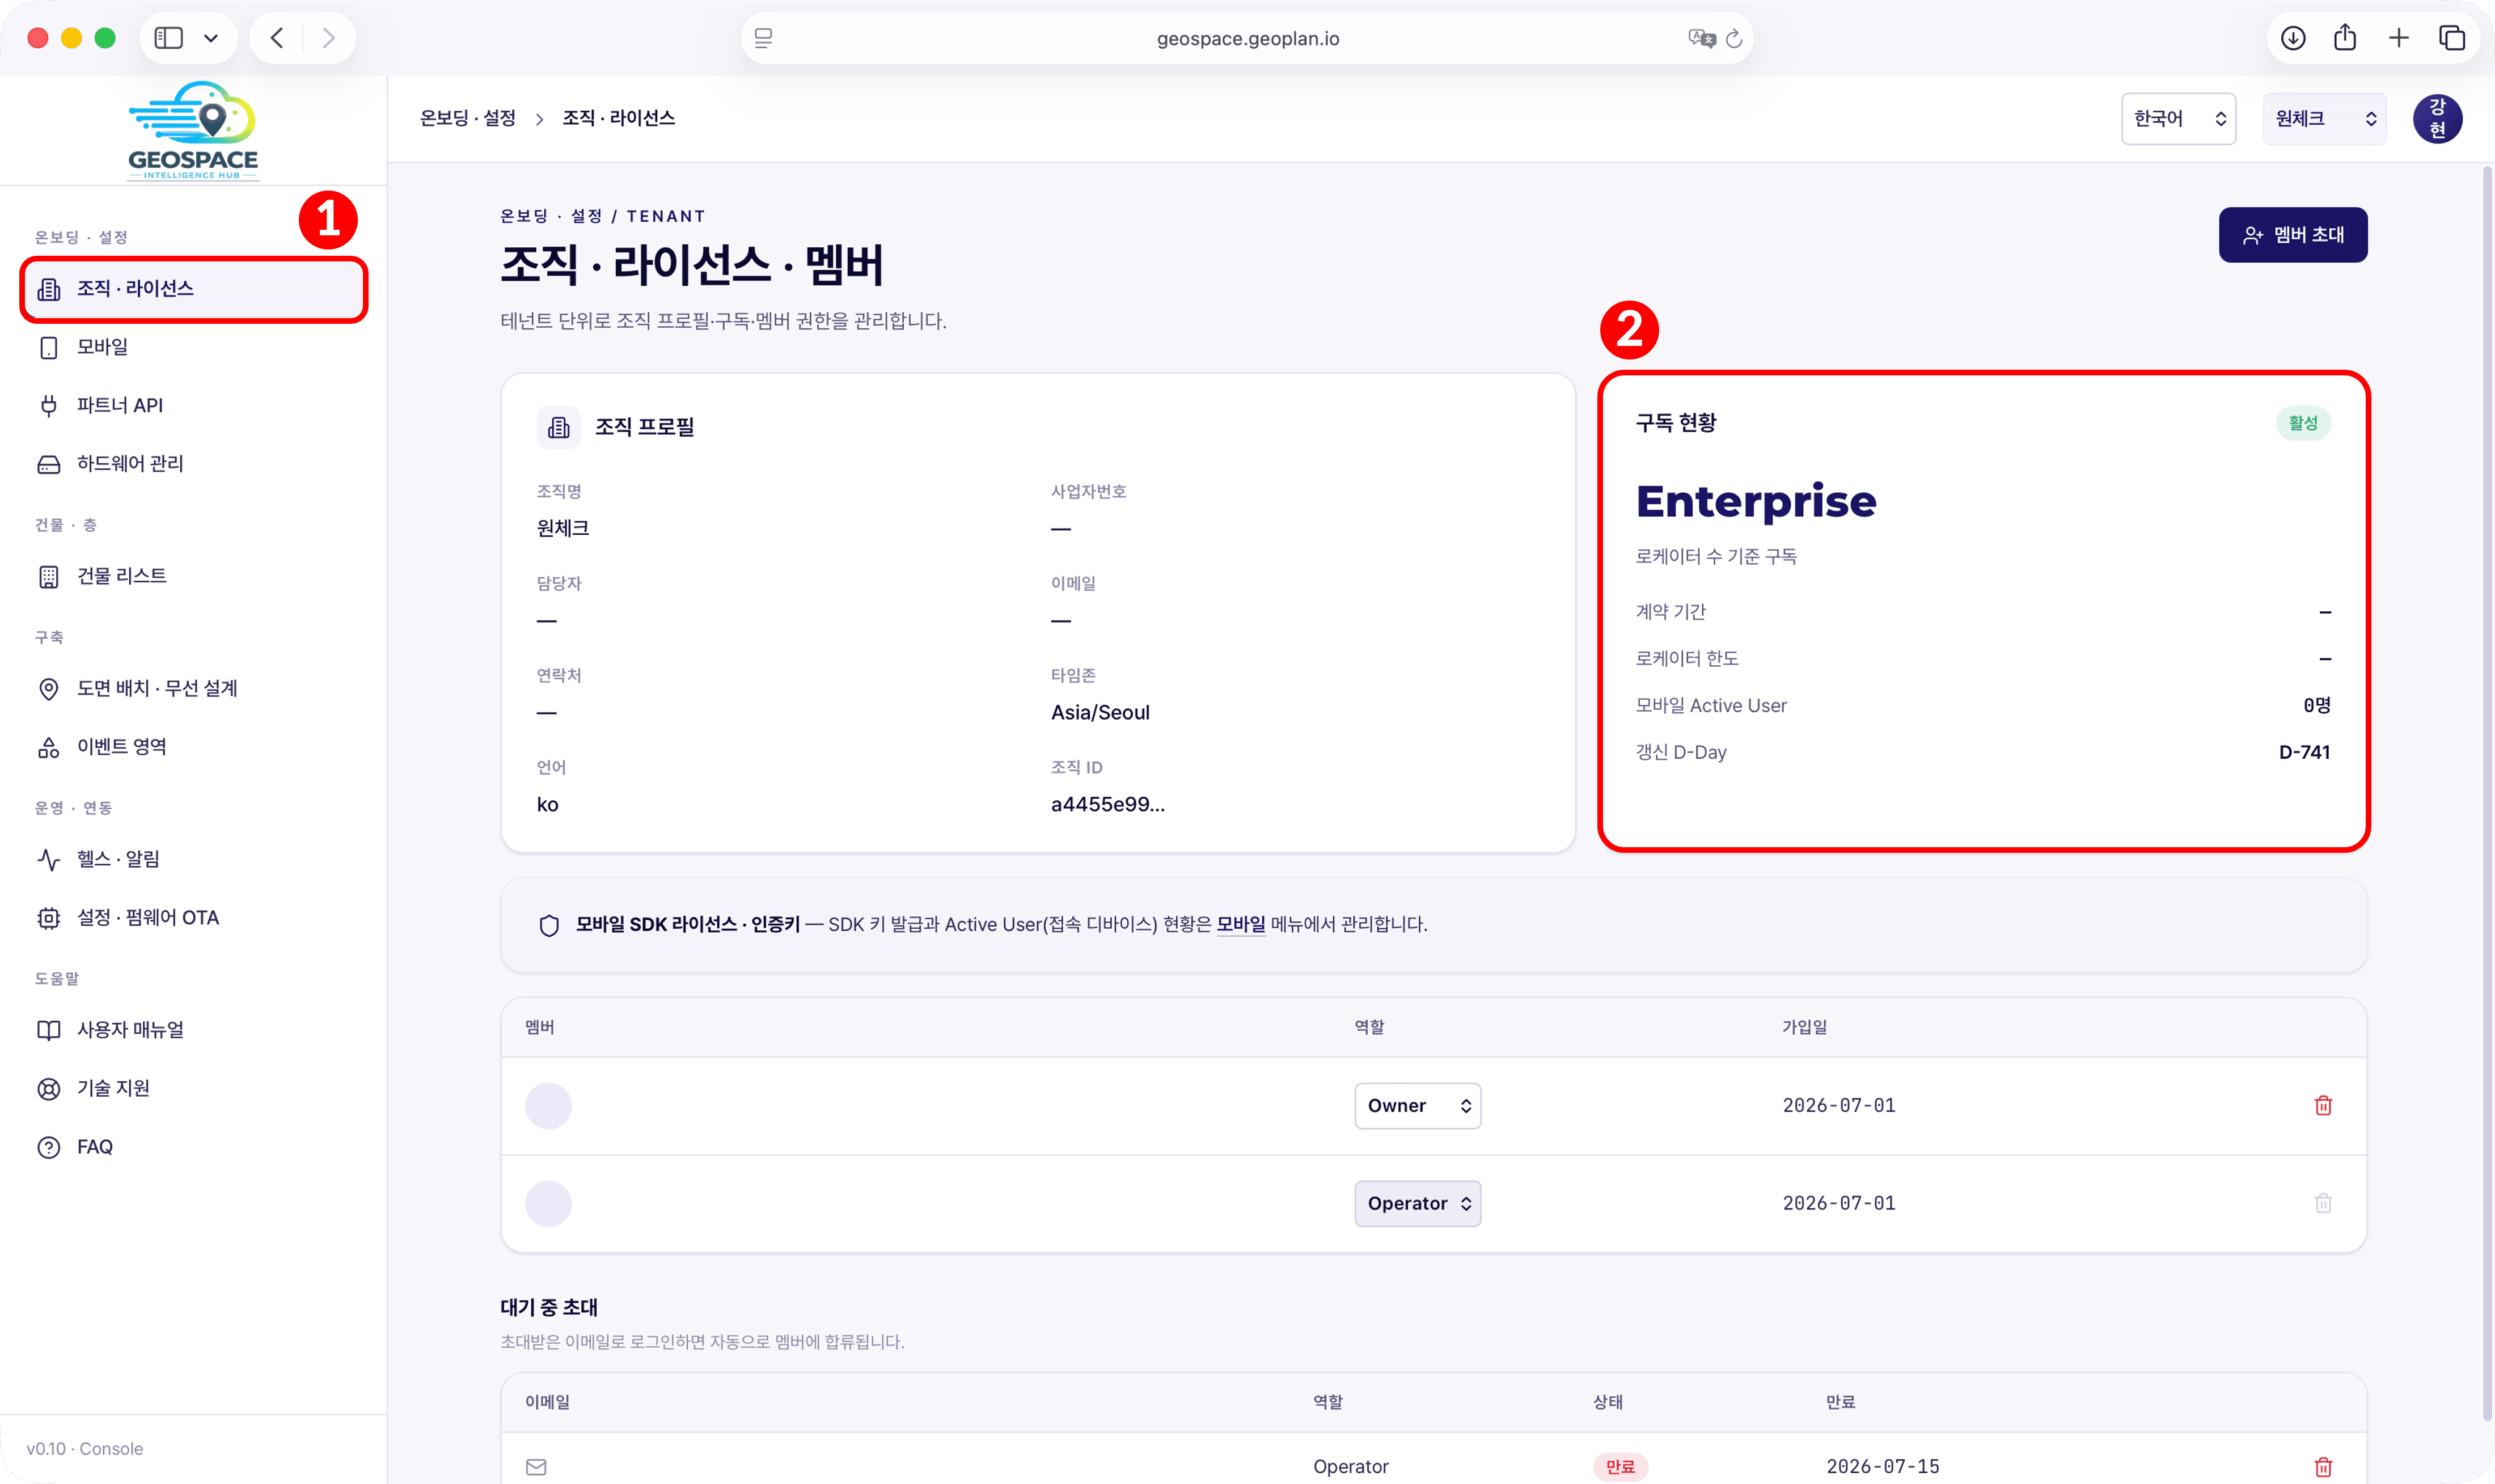
- If the displayed license information differs from your contract,
contact onesight-support@onecheck.co.kr.
5) Language
You can switch the language (한국어 / English / 日本語) at the top right.Checklist
Once all items below are confirmed, you can move on to the next step.