

- For this manual (AN-500), uploads go to the two cards above (UWB Module and Geo Anchor(A01)). The other model cards are not used.
- Update targets are locators that have completed 5. Hardware Registration.
Firmware files are provided by your contact. Do not upload any file other than the one provided.
If you have not received the file, contact onesight-support@onecheck.co.kr.
If you have not received the file, contact onesight-support@onecheck.co.kr.
1) Updating the Firmware
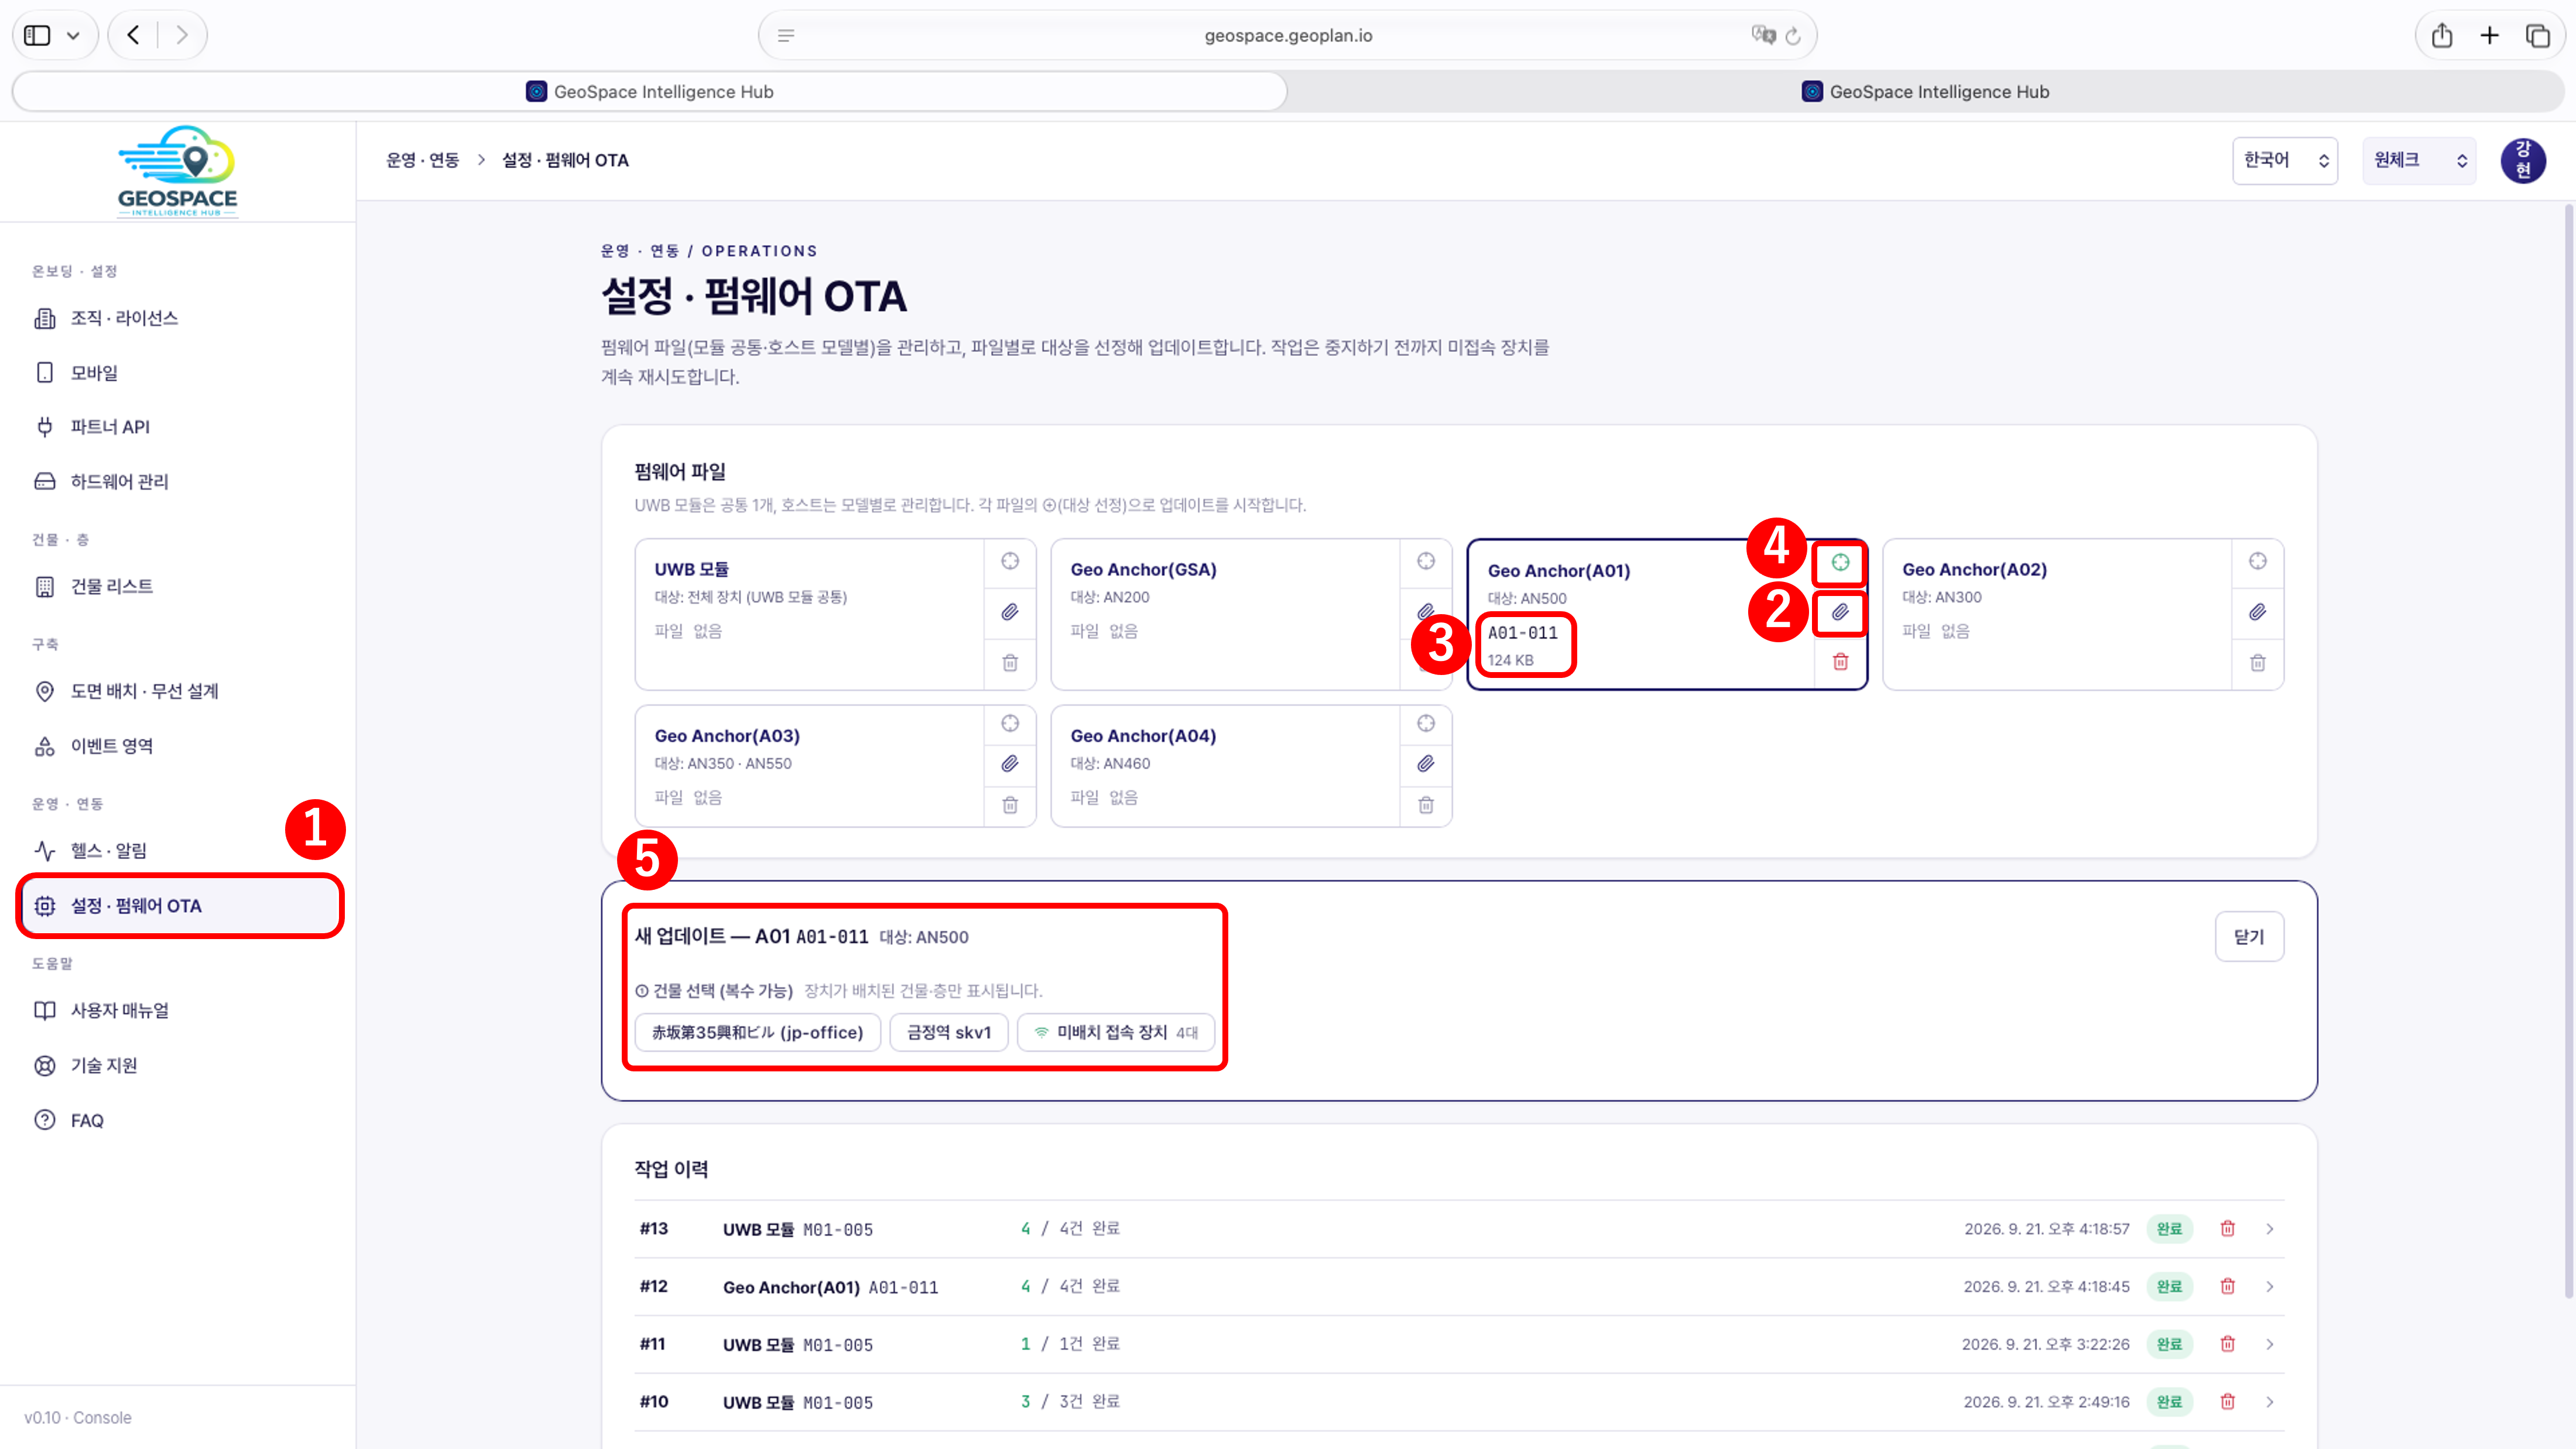
- Open the [Settings · Firmware OTA] menu in GeoSpace.
- Click the paperclip (attach file) button on the firmware card to update and upload the provided firmware file (bin). (See the table above for each card’s target and file name.)
-
When the upload completes, the file name and size appear on the card as a label. (e.g.,
A01-011· 124 KB) - Click the ⊕ (select targets) button on the card.
- Confirm the ‘New update’ panel appears at the bottom of the screen. The panel title shows the selected file name and target model (e.g., Target: AN500).
-
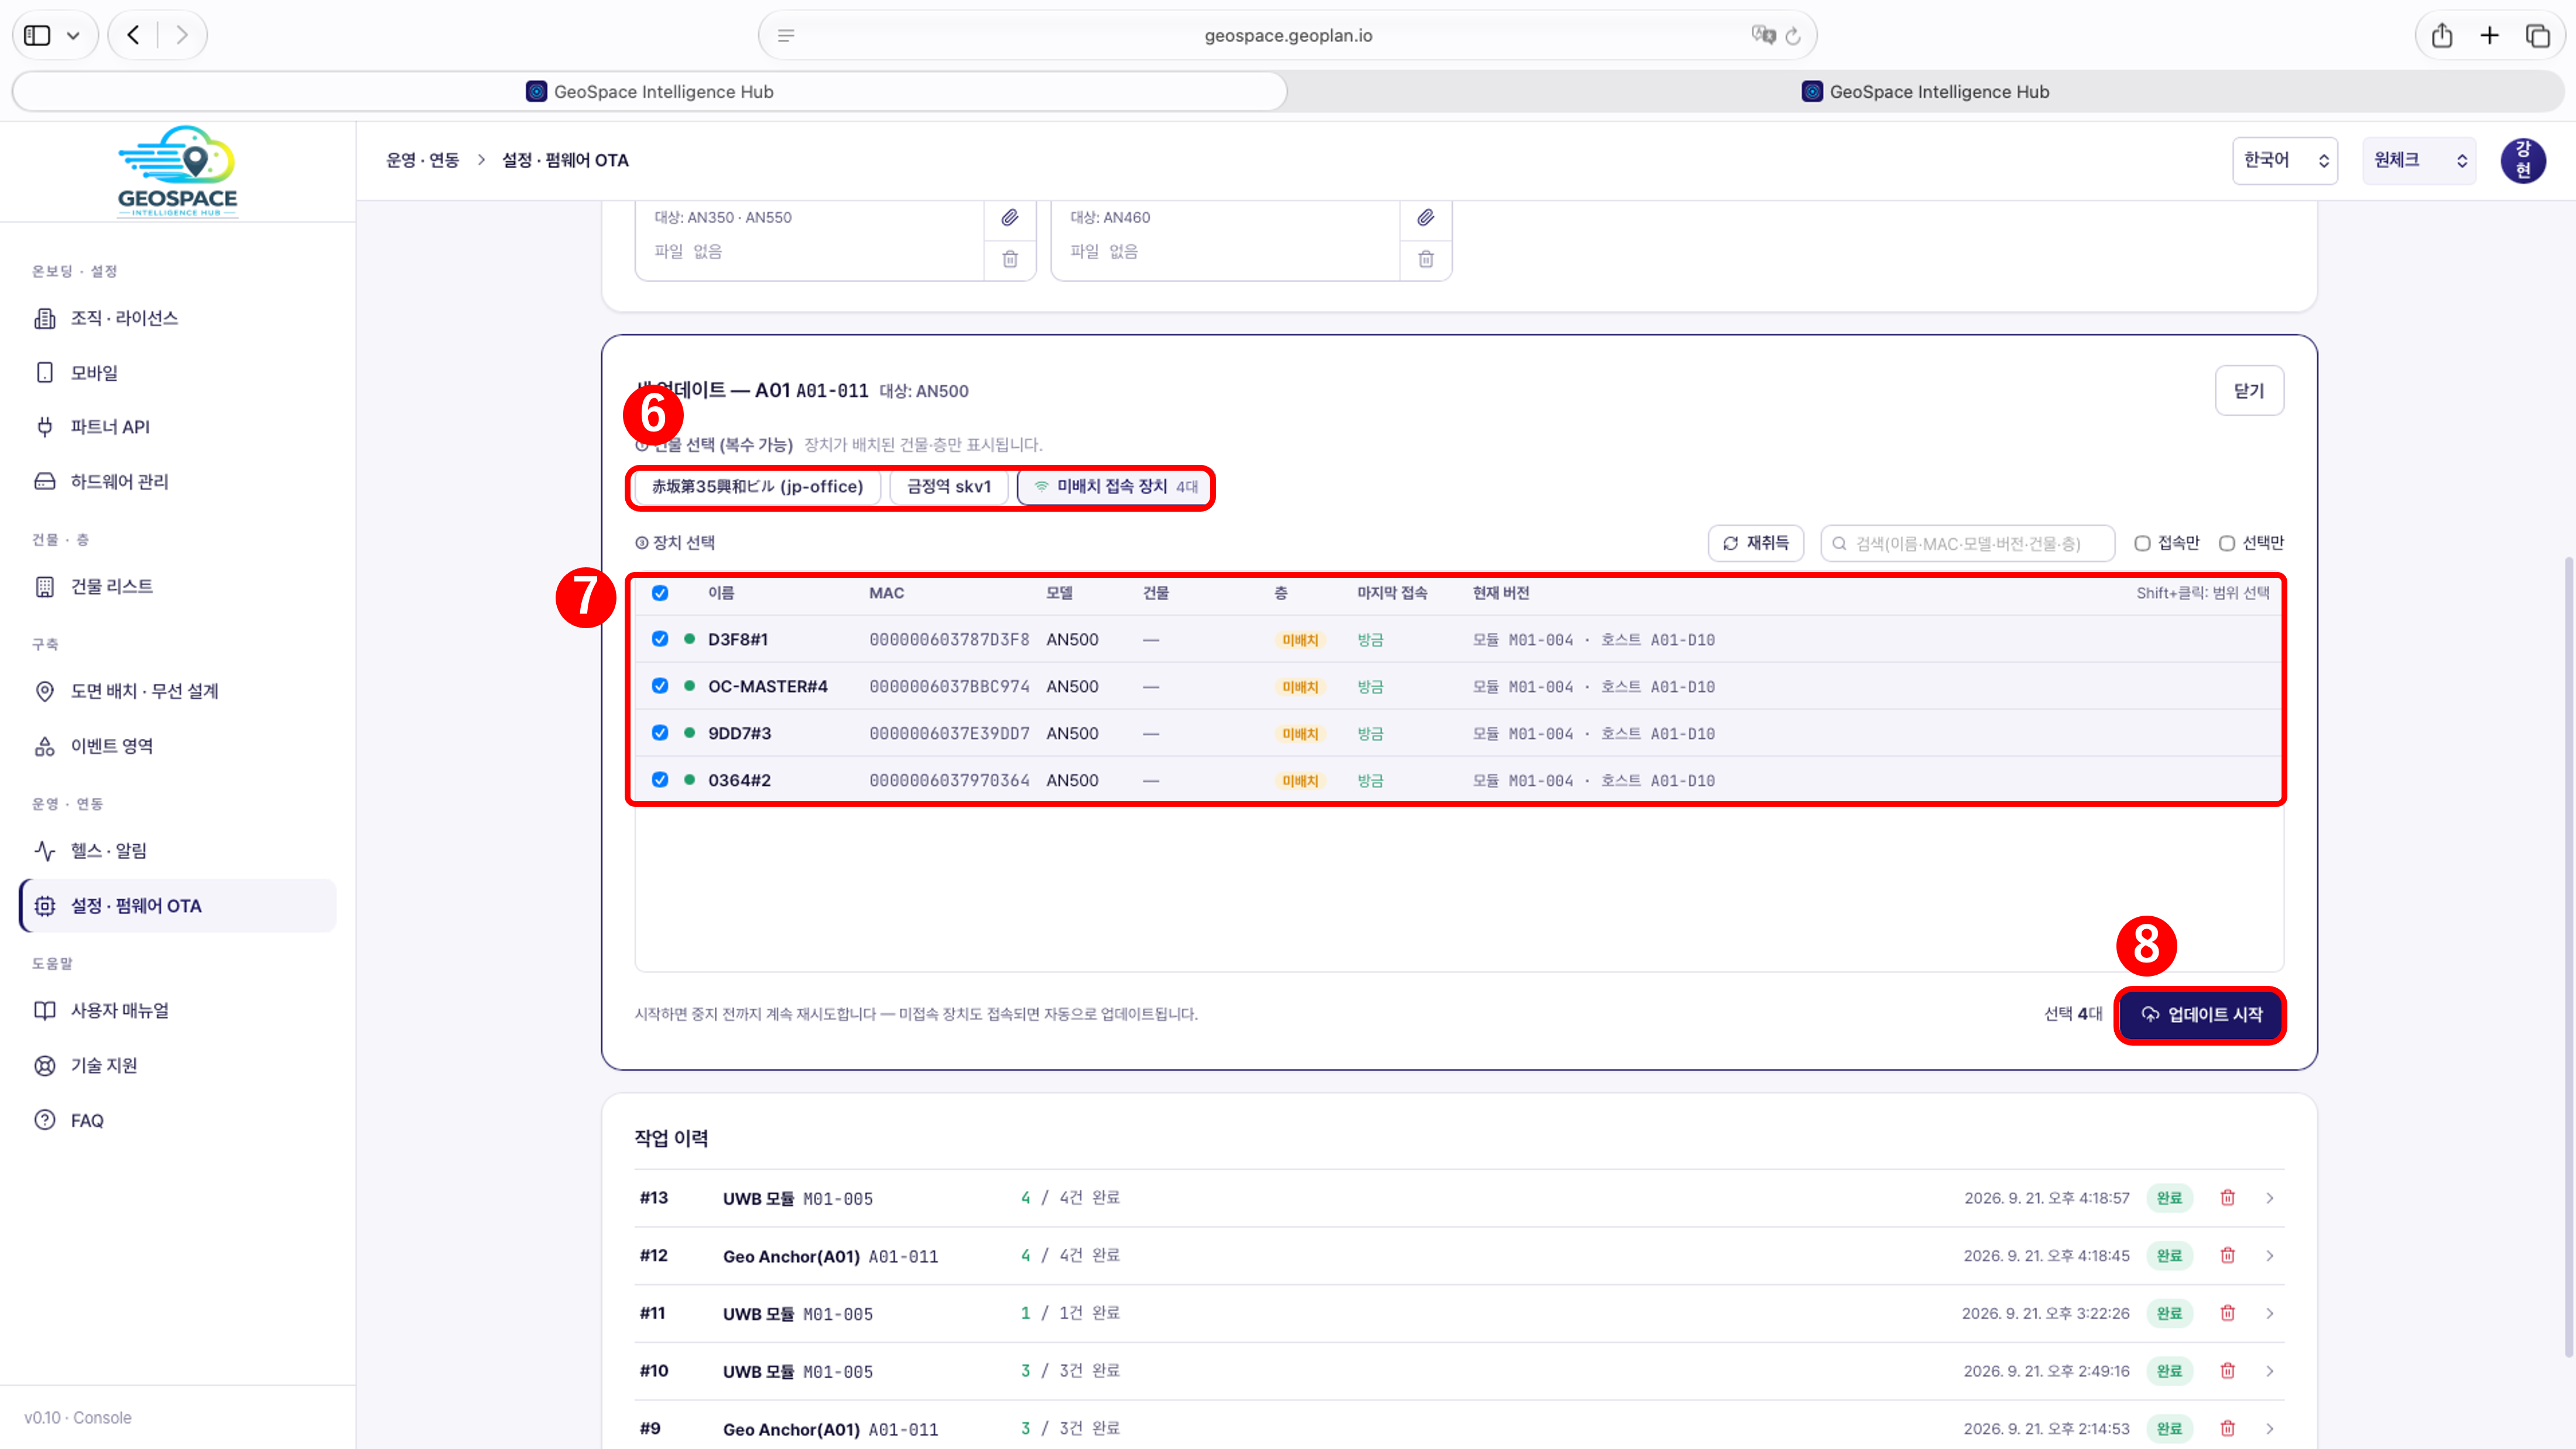
Under building selection, select the cards containing the devices to update. (Multiple selection allowed)
- Building name cards: devices placed on that building and floor. (Only buildings and floors with placed devices are shown.)
- Unplaced connected devices: devices that are connected but not yet placed on a building or floor.
- Selecting cards lists the matching locators in the device selection list below.
-
In the device selection list, check the devices to update.
- ‘Current version’ shows each device’s module and host firmware versions. (e.g., module
M01-004· hostA01-D10) - If the list does not refresh, click [Refresh]. You can search by name, MAC, model, version, building, or floor, and Shift+click to select a range.
- ‘Current version’ shows each device’s module and host firmware versions. (e.g., module
-
Click [Start Update].
- Once started, it keeps retrying until stopped; disconnected devices are updated automatically once they connect.
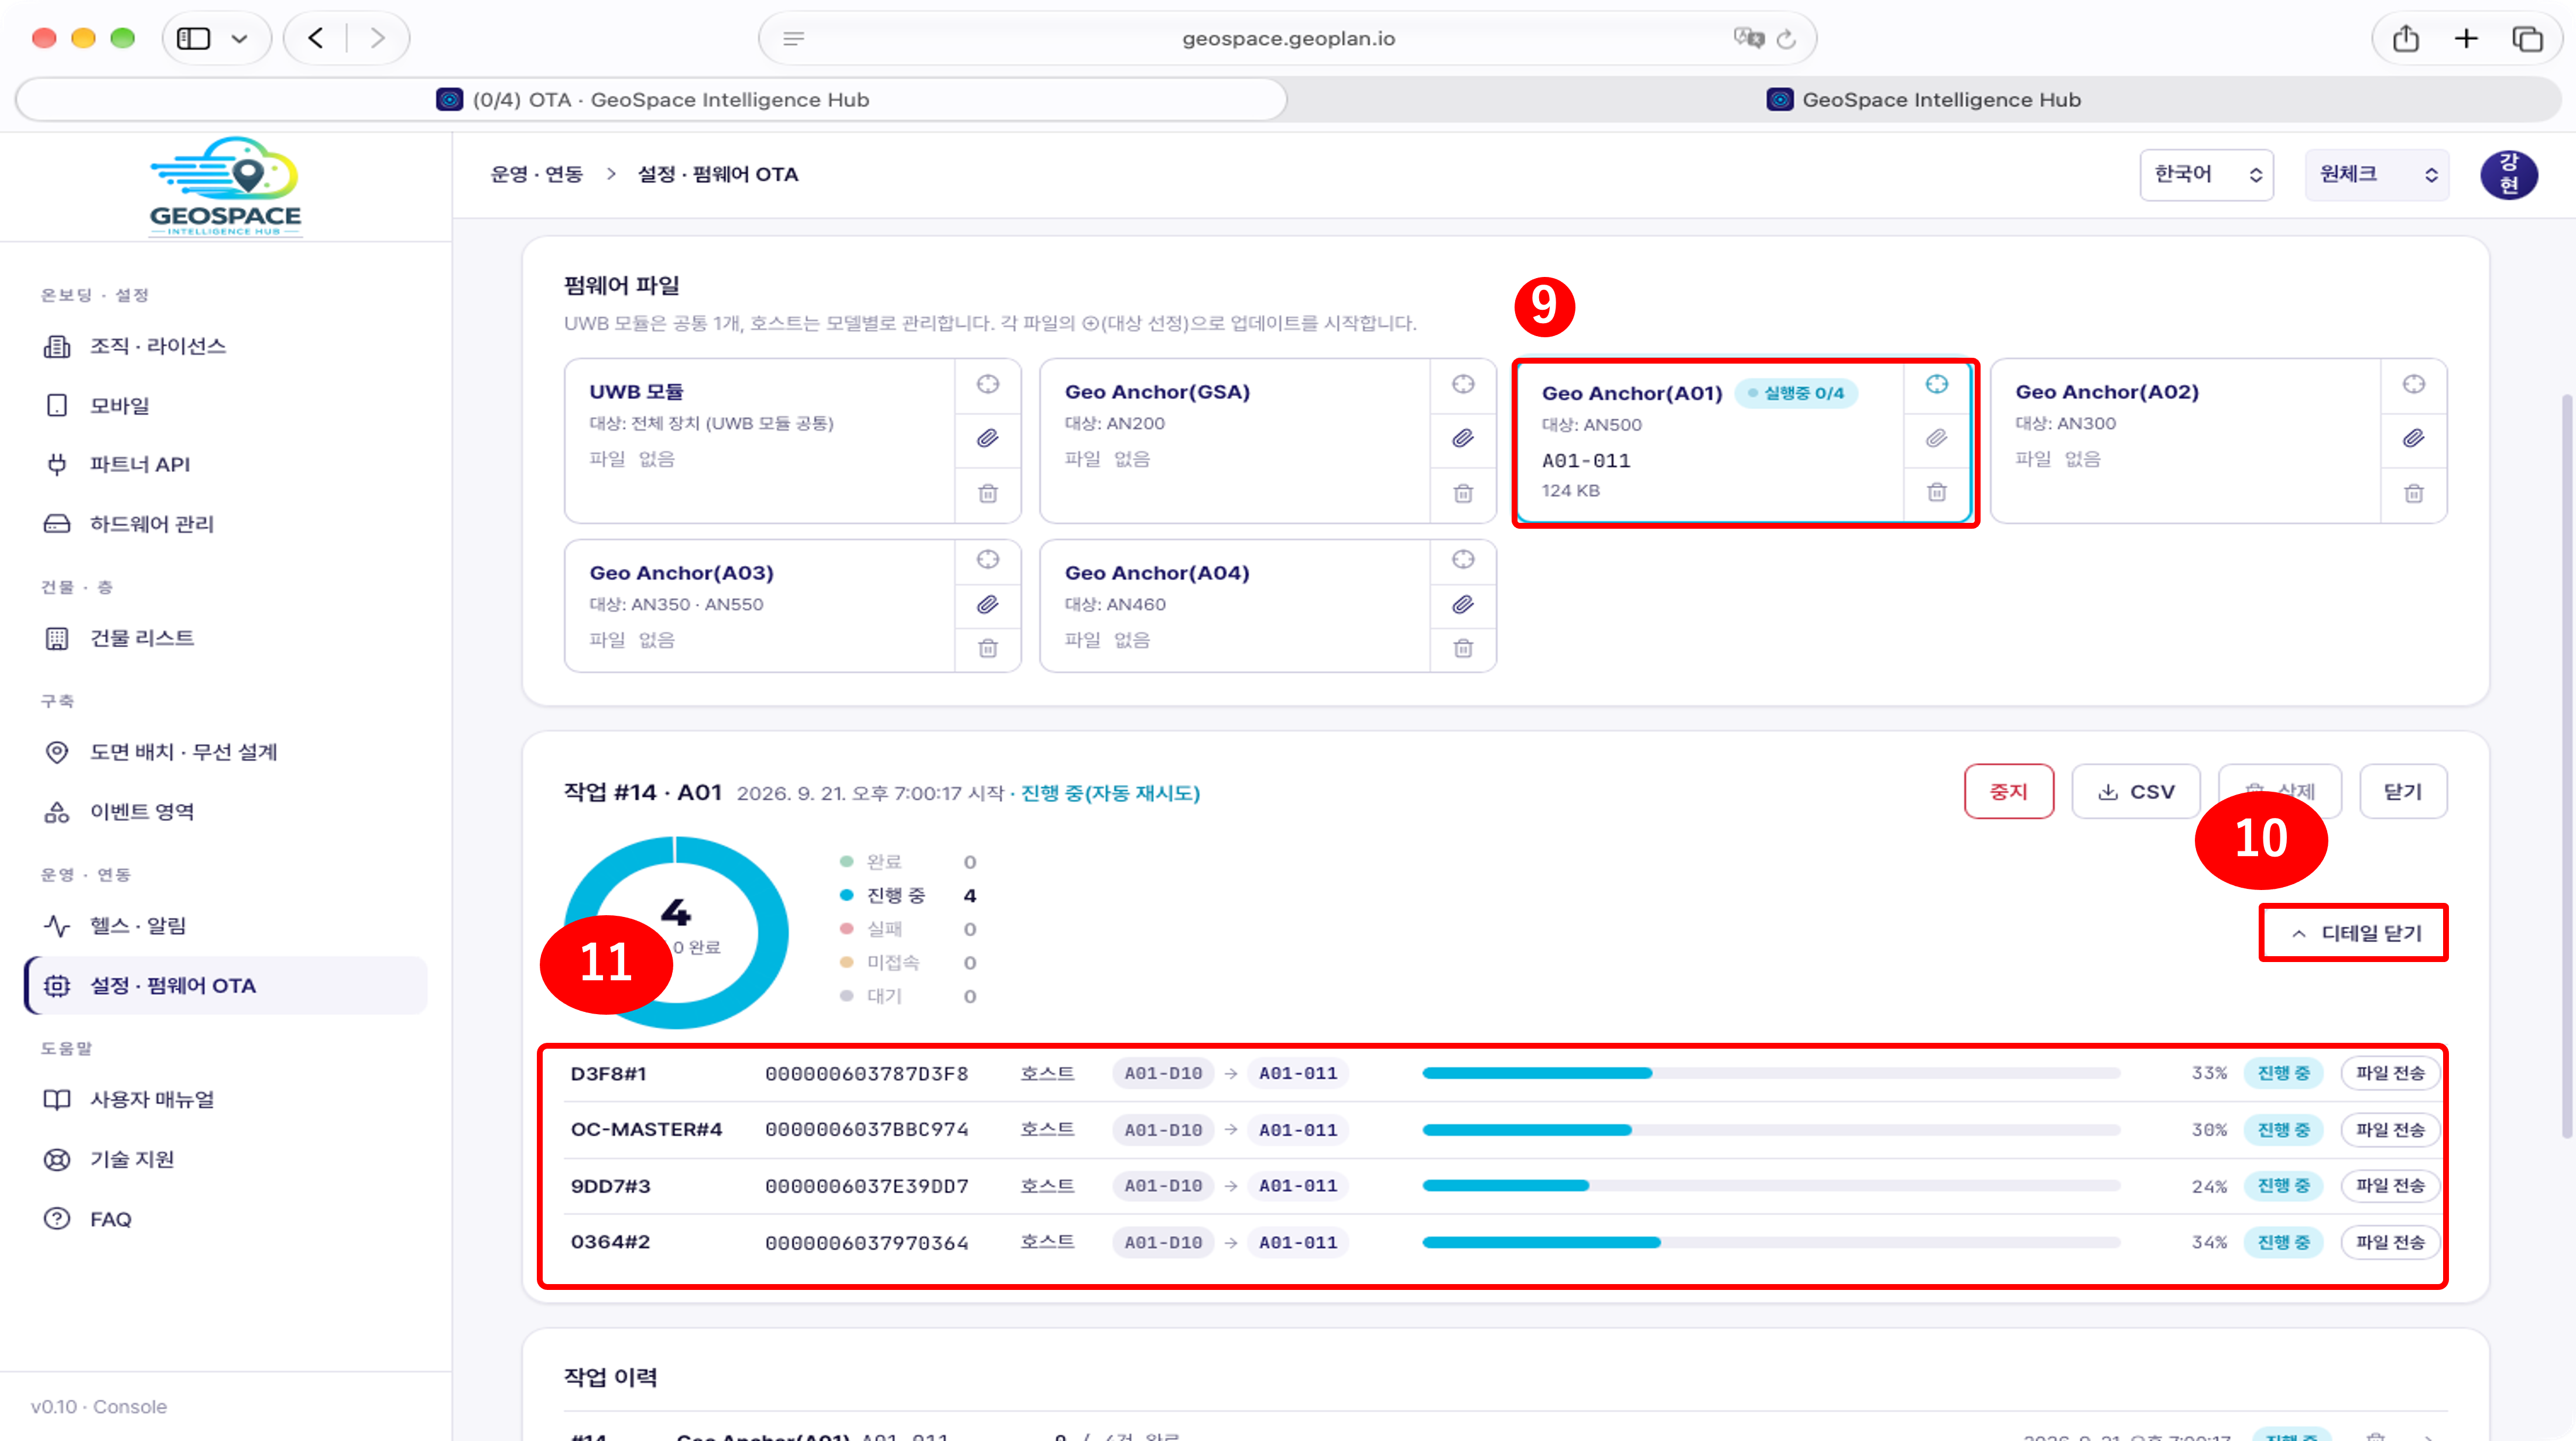
- Once the update starts, a ‘Running n/N’ badge appears on the firmware card.
-
The job panel shows the job number, start time, and counts by state (Completed · In progress · Failed · Disconnected · Waiting).
Use [Hide details]/[Show details] to collapse or expand the per-device progress list.
- To abort the job, click [Stop].
-
In the per-device progress list, watch the version change (e.g.,
A01-D10→A01-011) and progress (file transfer %) and wait until it completes. Completed jobs show as ‘Completed’ in the job history below.
While an update is in progress, locator LEDs may blink and positioning may not work smoothly.
Check positioning after the update completes.
2) Confirming the Result
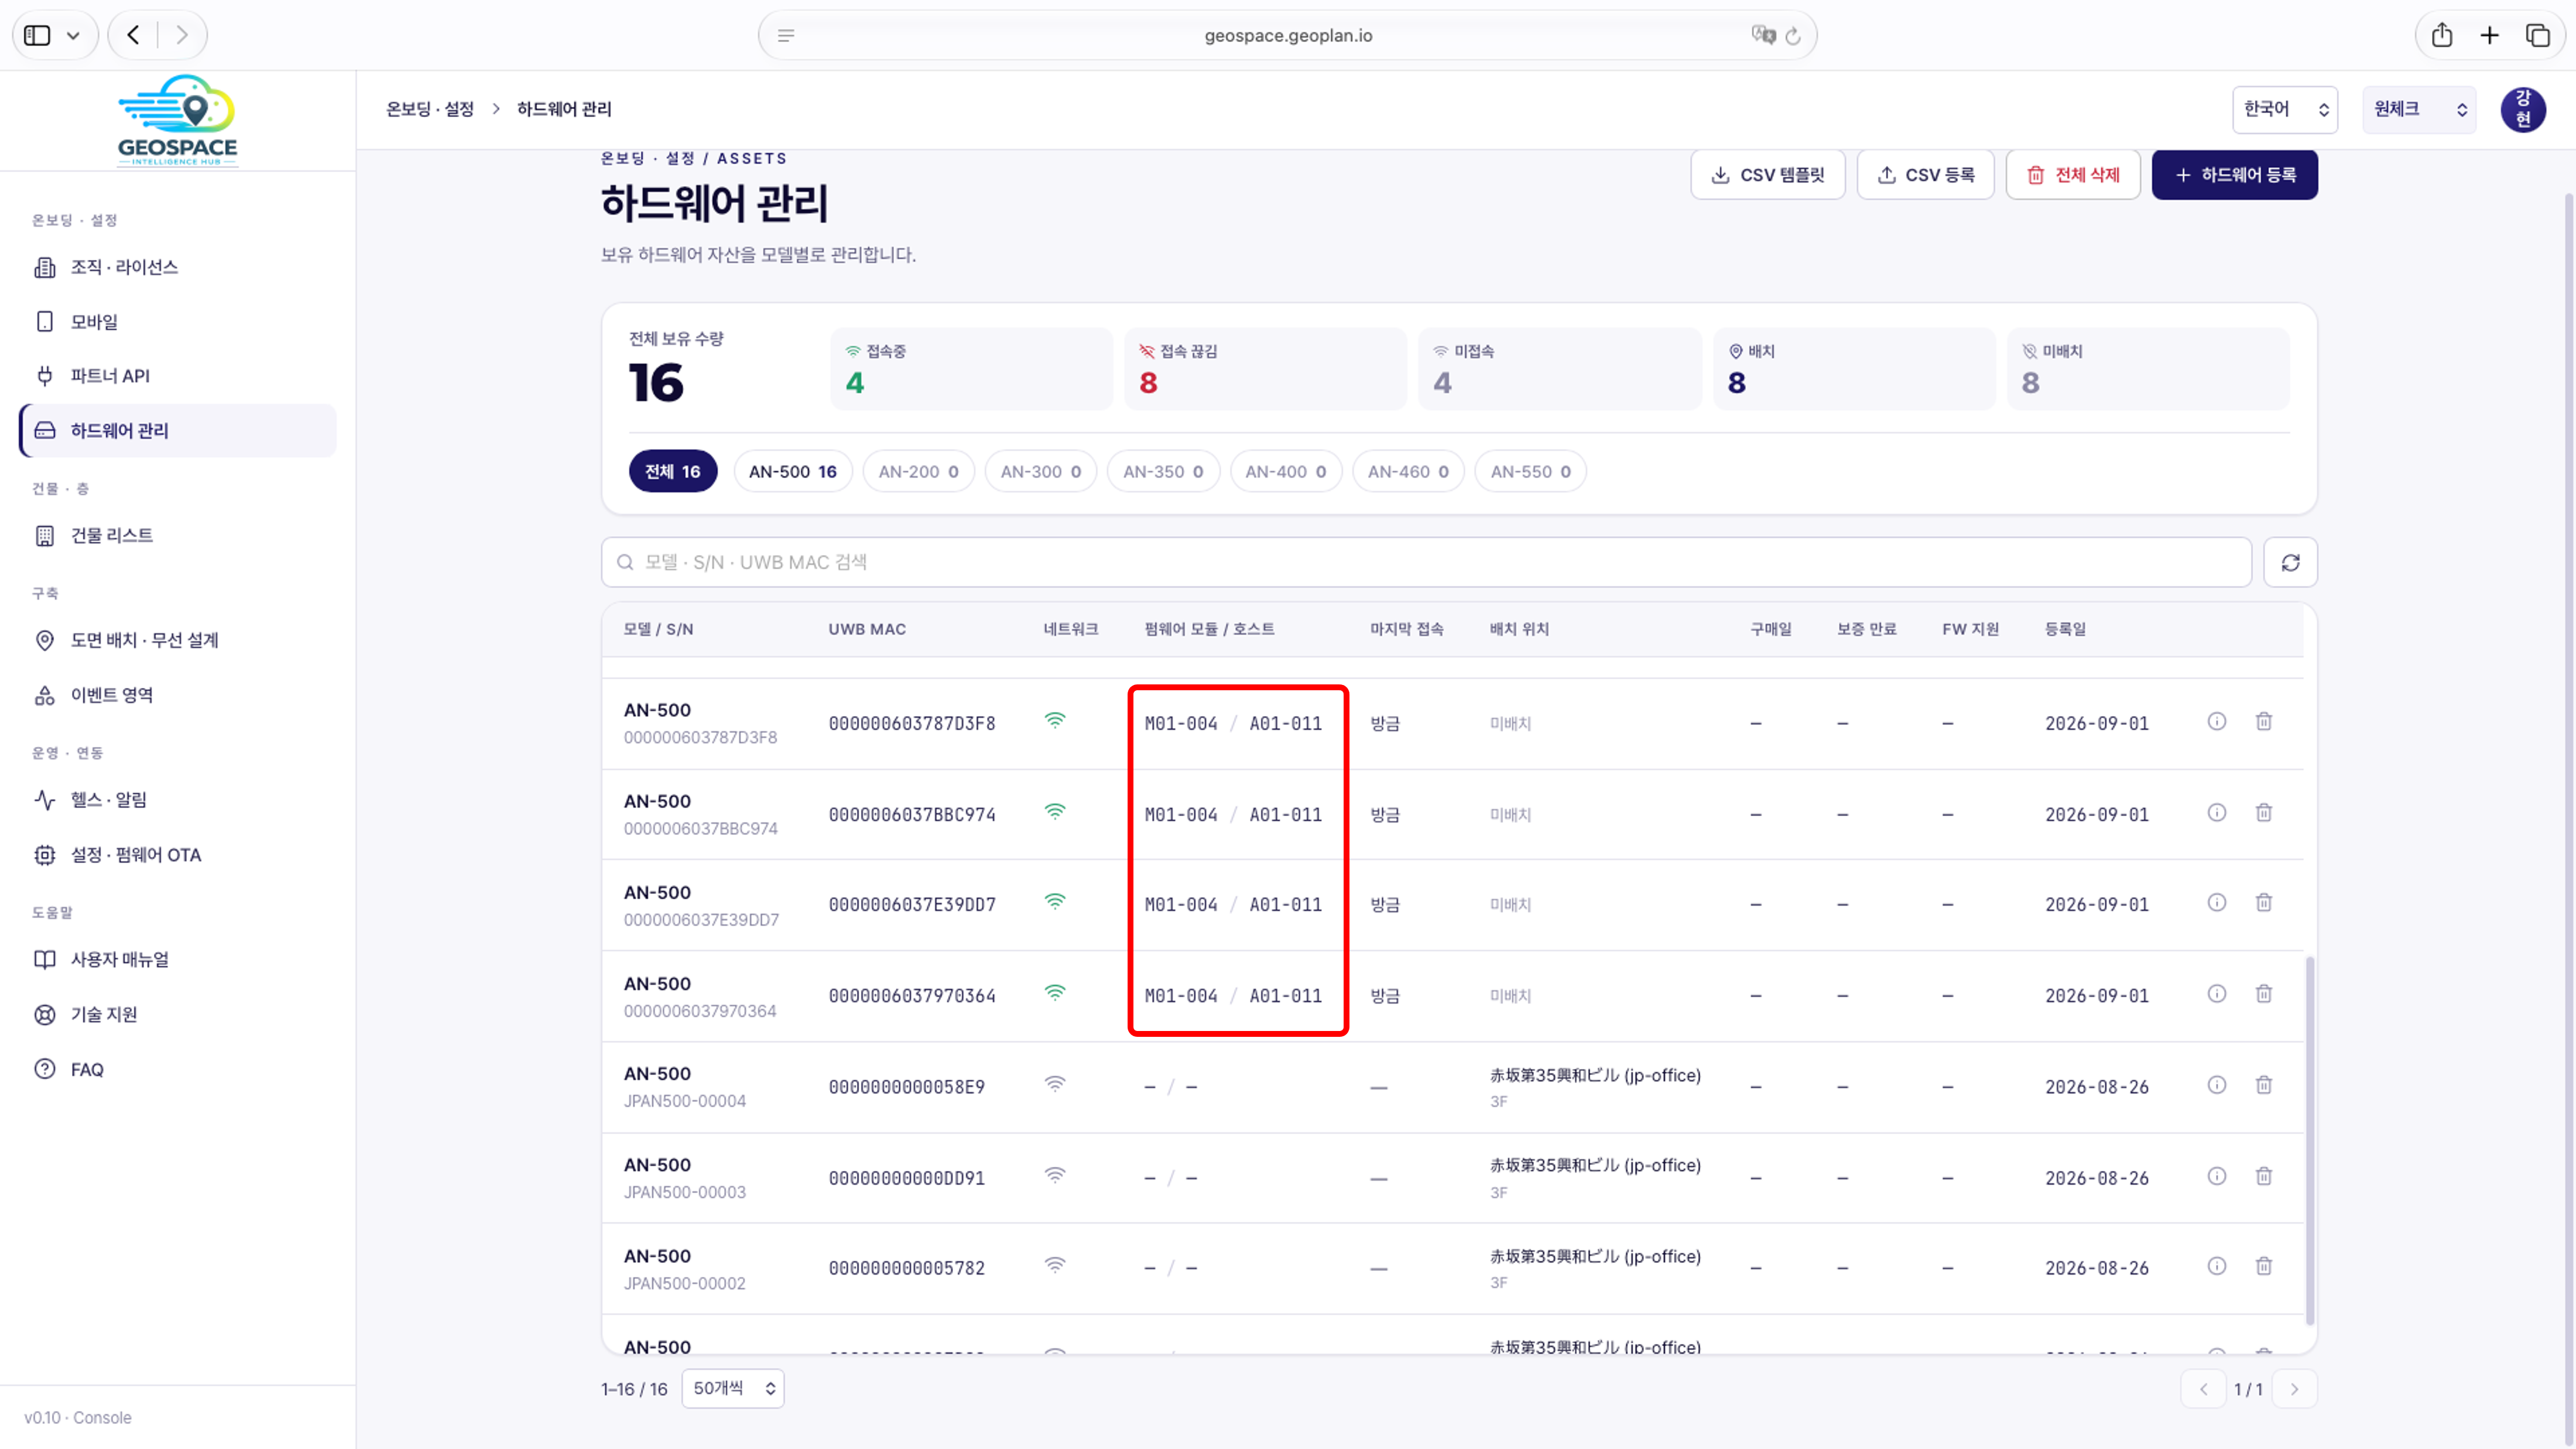
M01-004 / A01-011).
- Whether positioning still works properly after the update is confirmed in 8. Verification.
Checklist
Once all items below are confirmed, the firmware OTA is complete.