

1) Issuing a Partner Key
The partner key (gpk_...) is the tenant authentication key OneS1ght uses to fetch
building, plan, and zone information from GeoSpace.
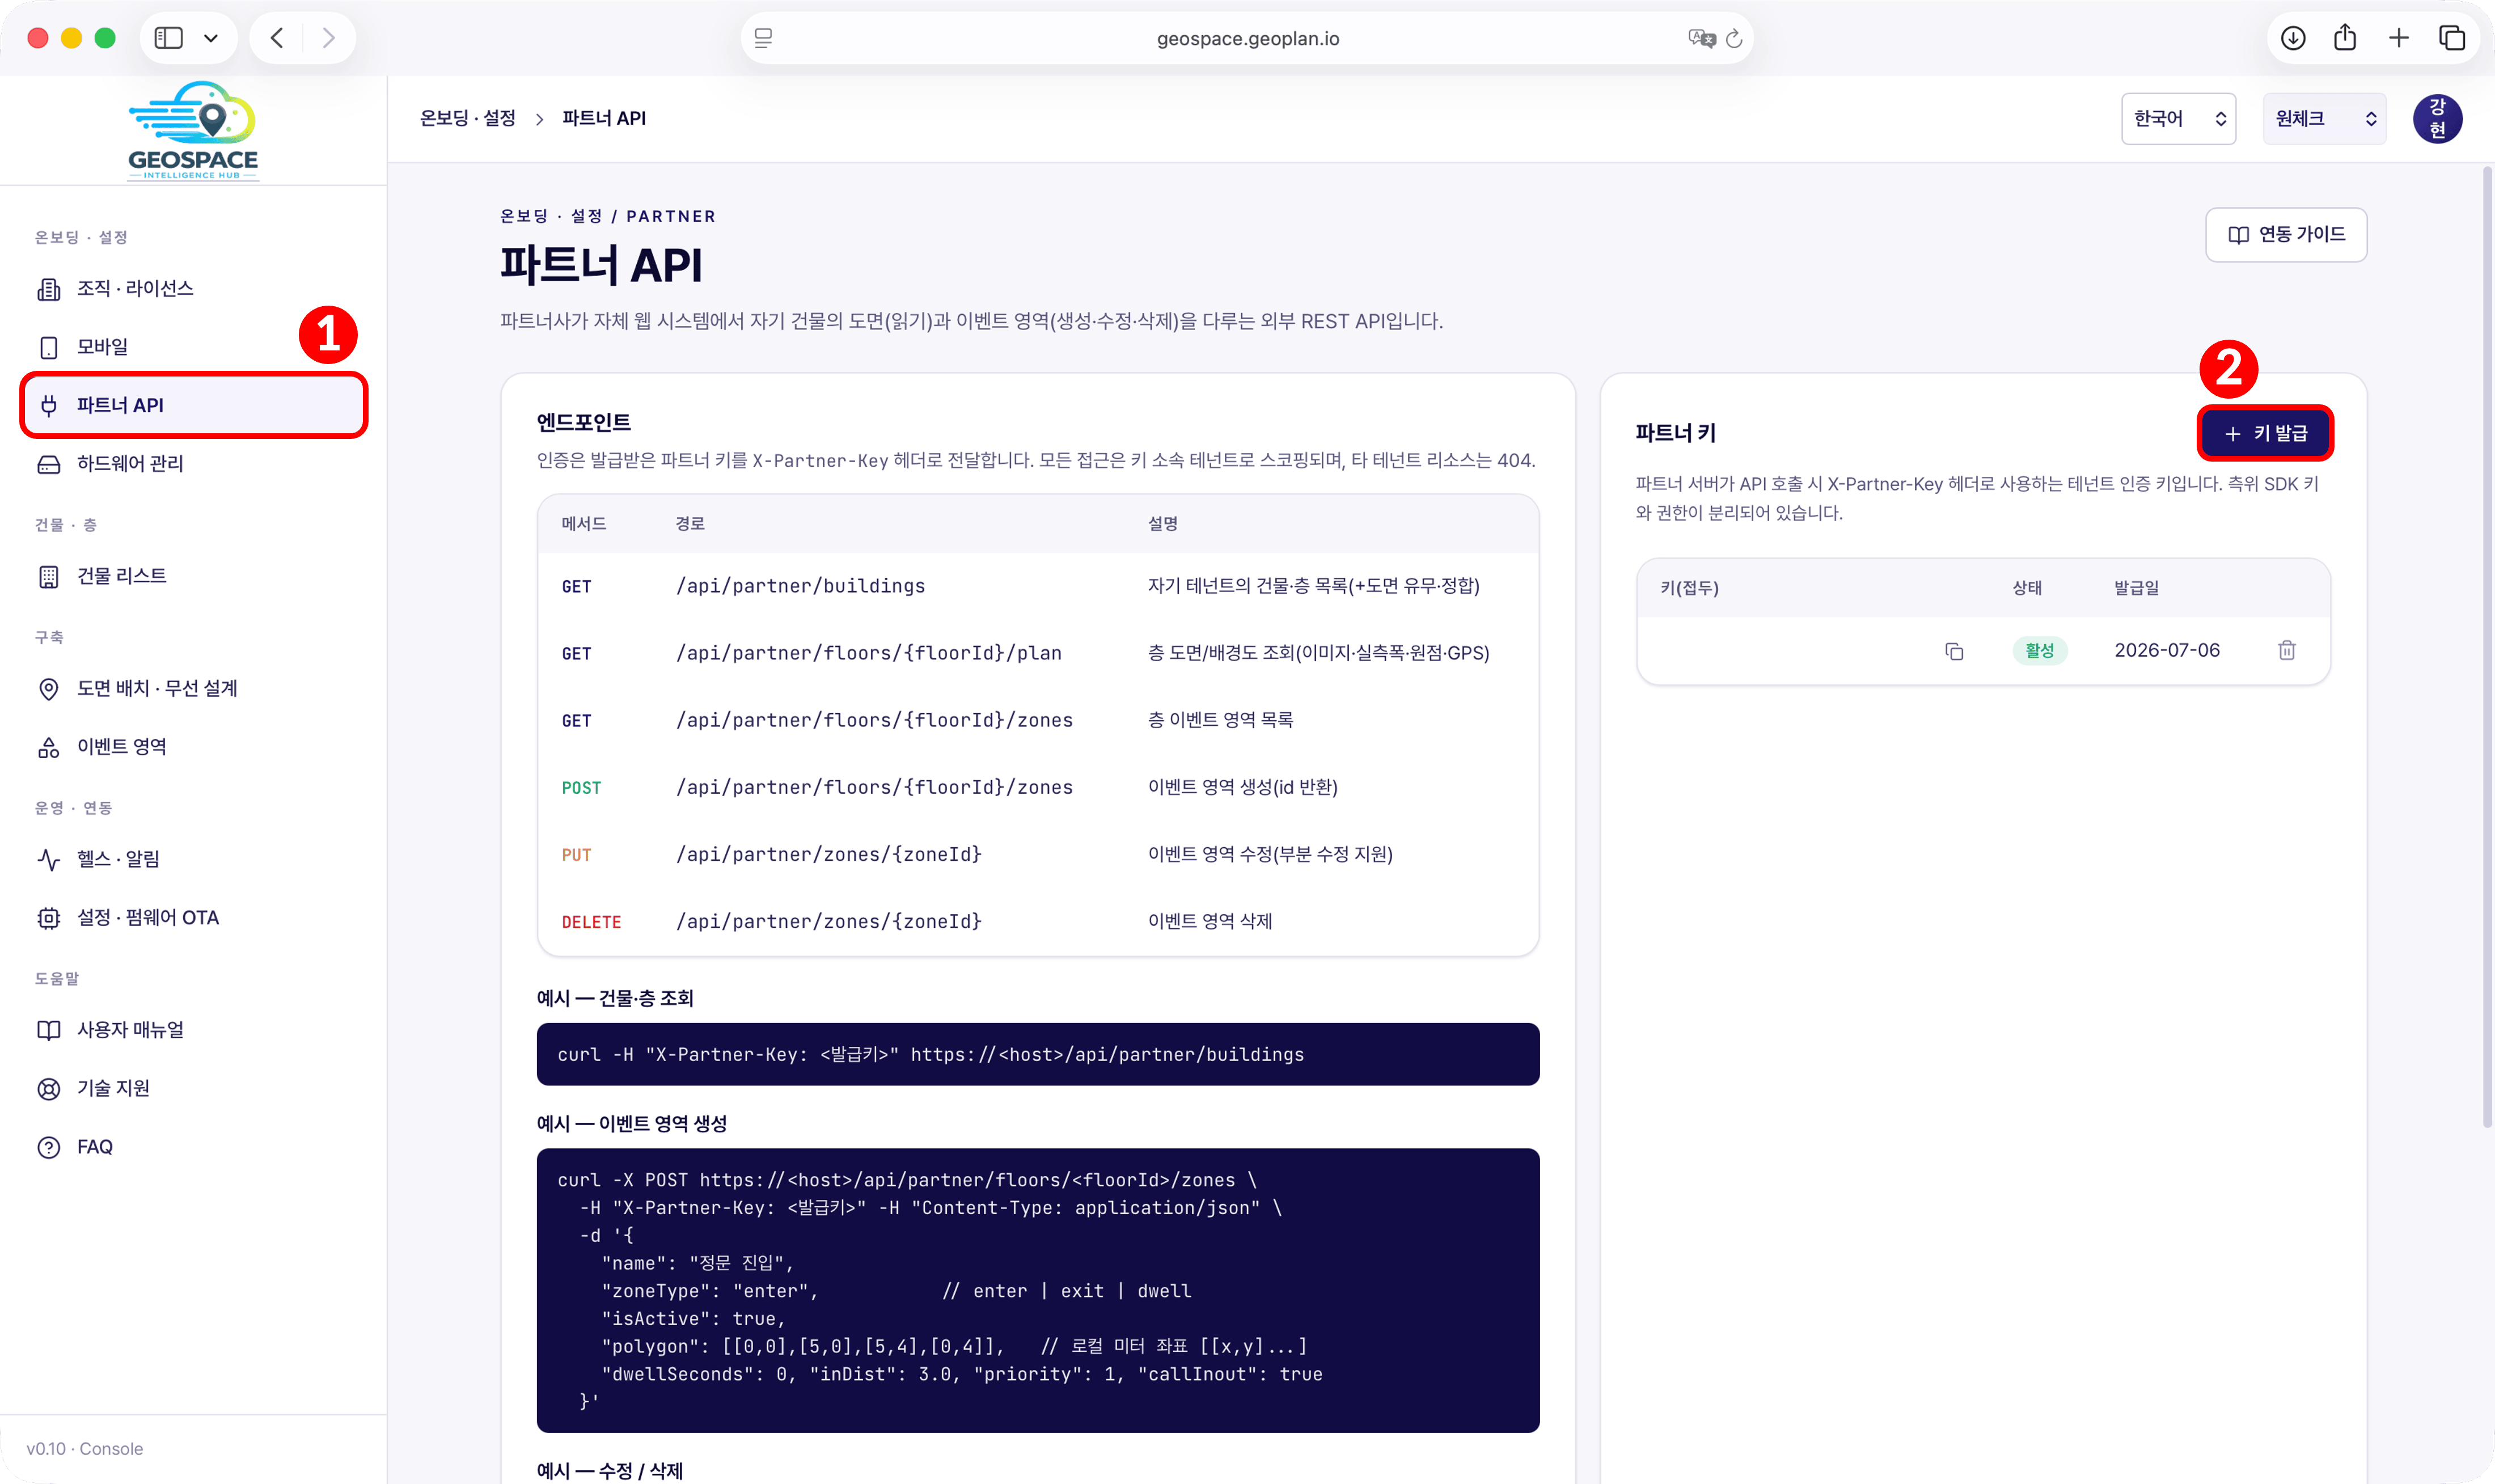
gpk_...) is generated, copy it.
You can view the key value again at any time in the Partner API menu.
2) Issuing an SDK Key
The SDK key (gsk_...) is the authentication key OneS1ght uses to look up anchor and session information in GeoSpace.
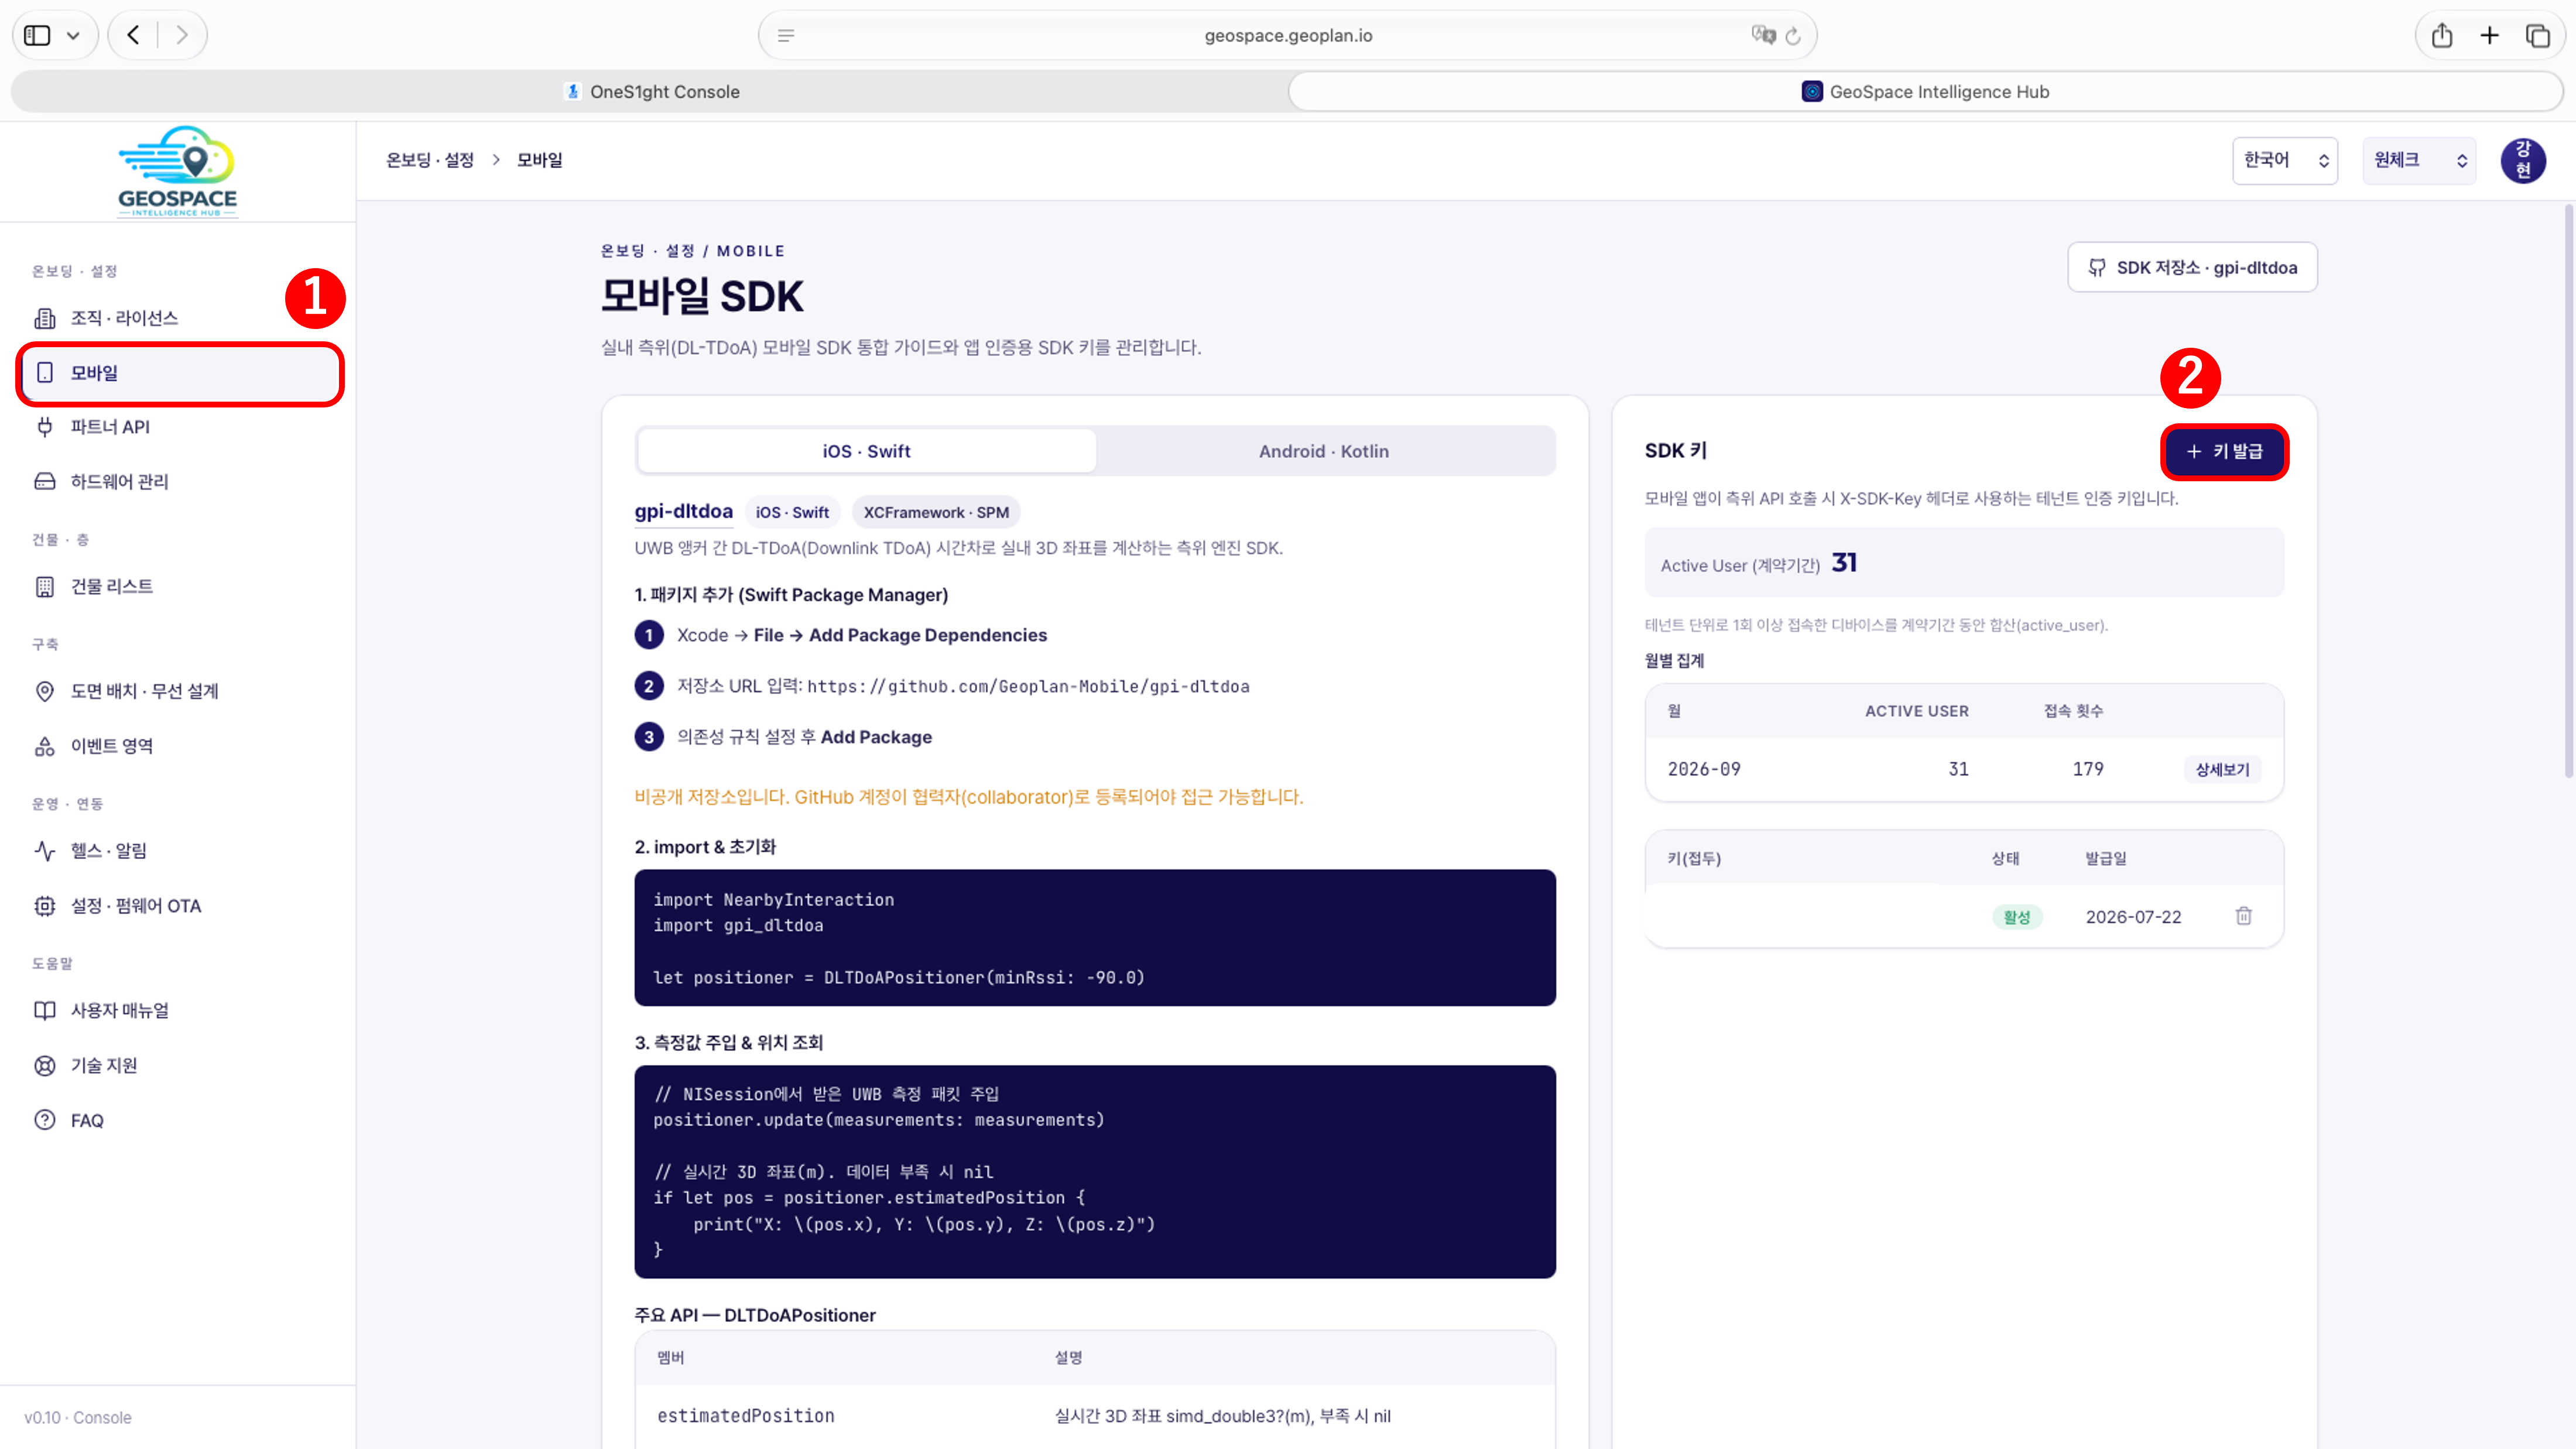
3) Registering in OneS1ght
Follow the steps below to register the partner key and SDK key in OneS1ght and set up the GeoSpace integration.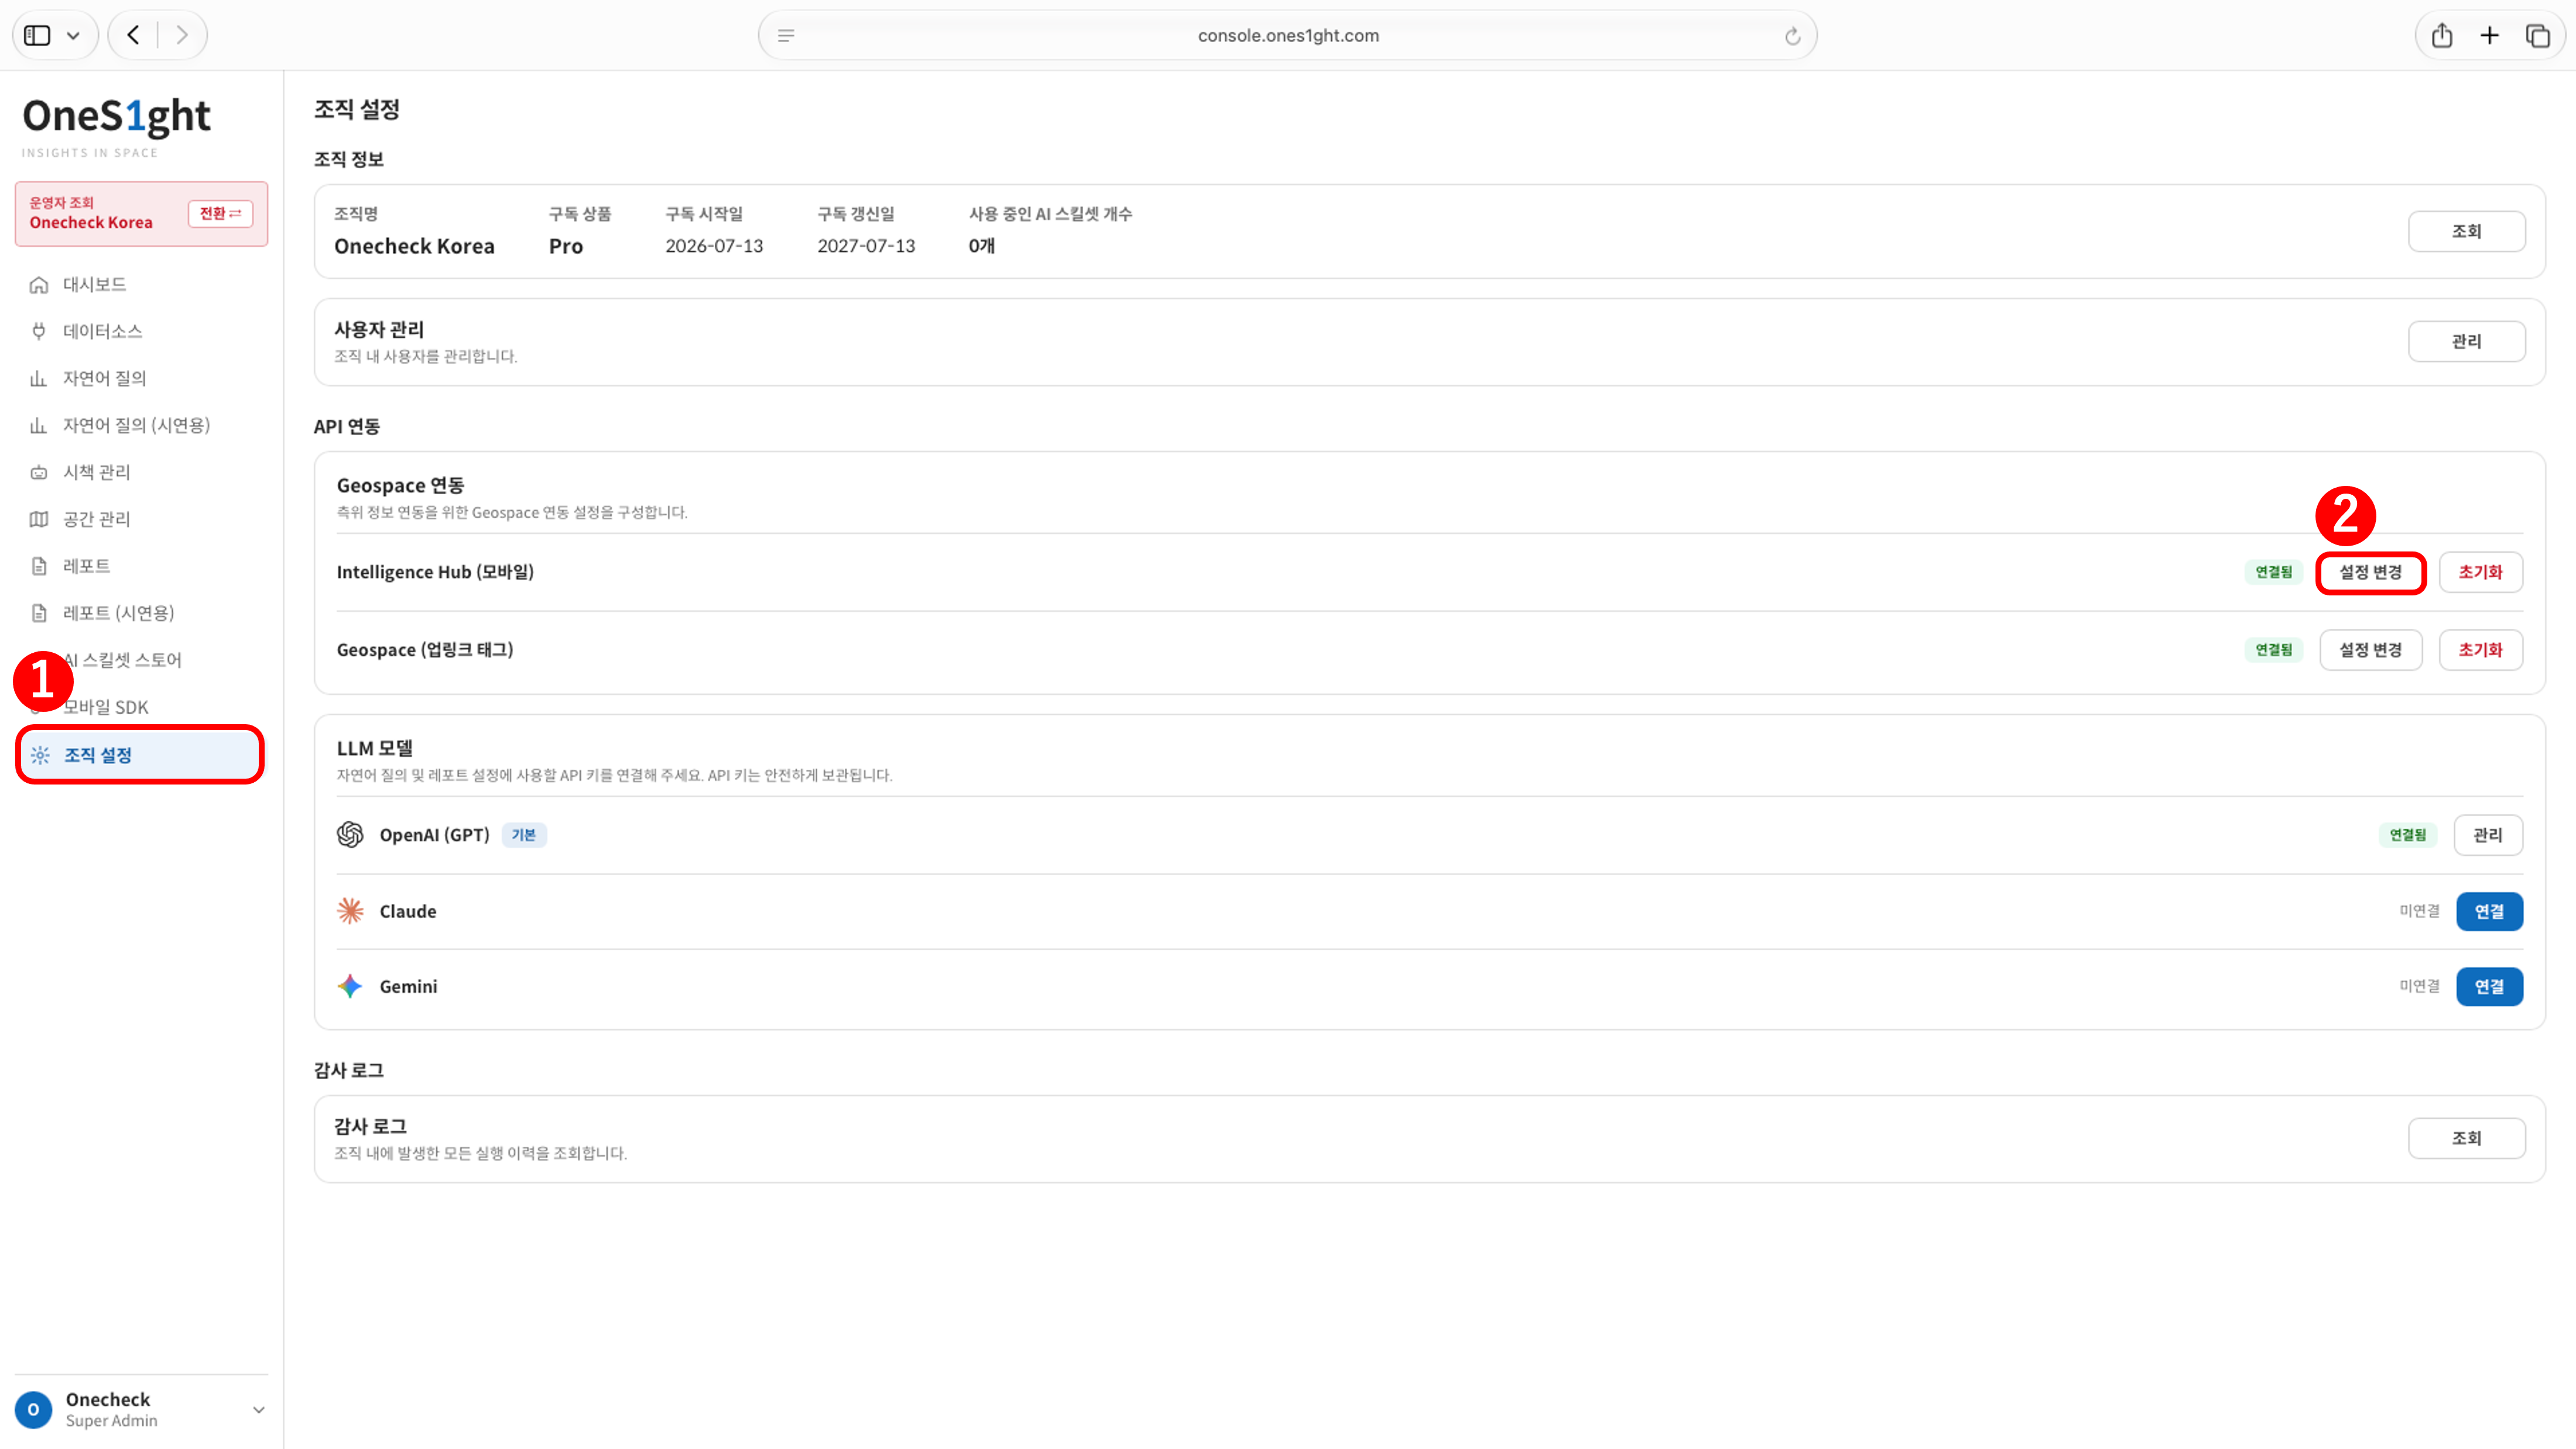
-
Log in to OneS1ght (
console.ones1ght.com). If this is your first OneS1ght login, complete Getting Started (invitation · login) first. - In the OneS1ght sidebar, go to [Organization settings]. Under API integrations, in Geospace Integration, click [Edit settings] for Intelligence Hub (Mobile) to open the ‘Manage Geospace integration’ popup.
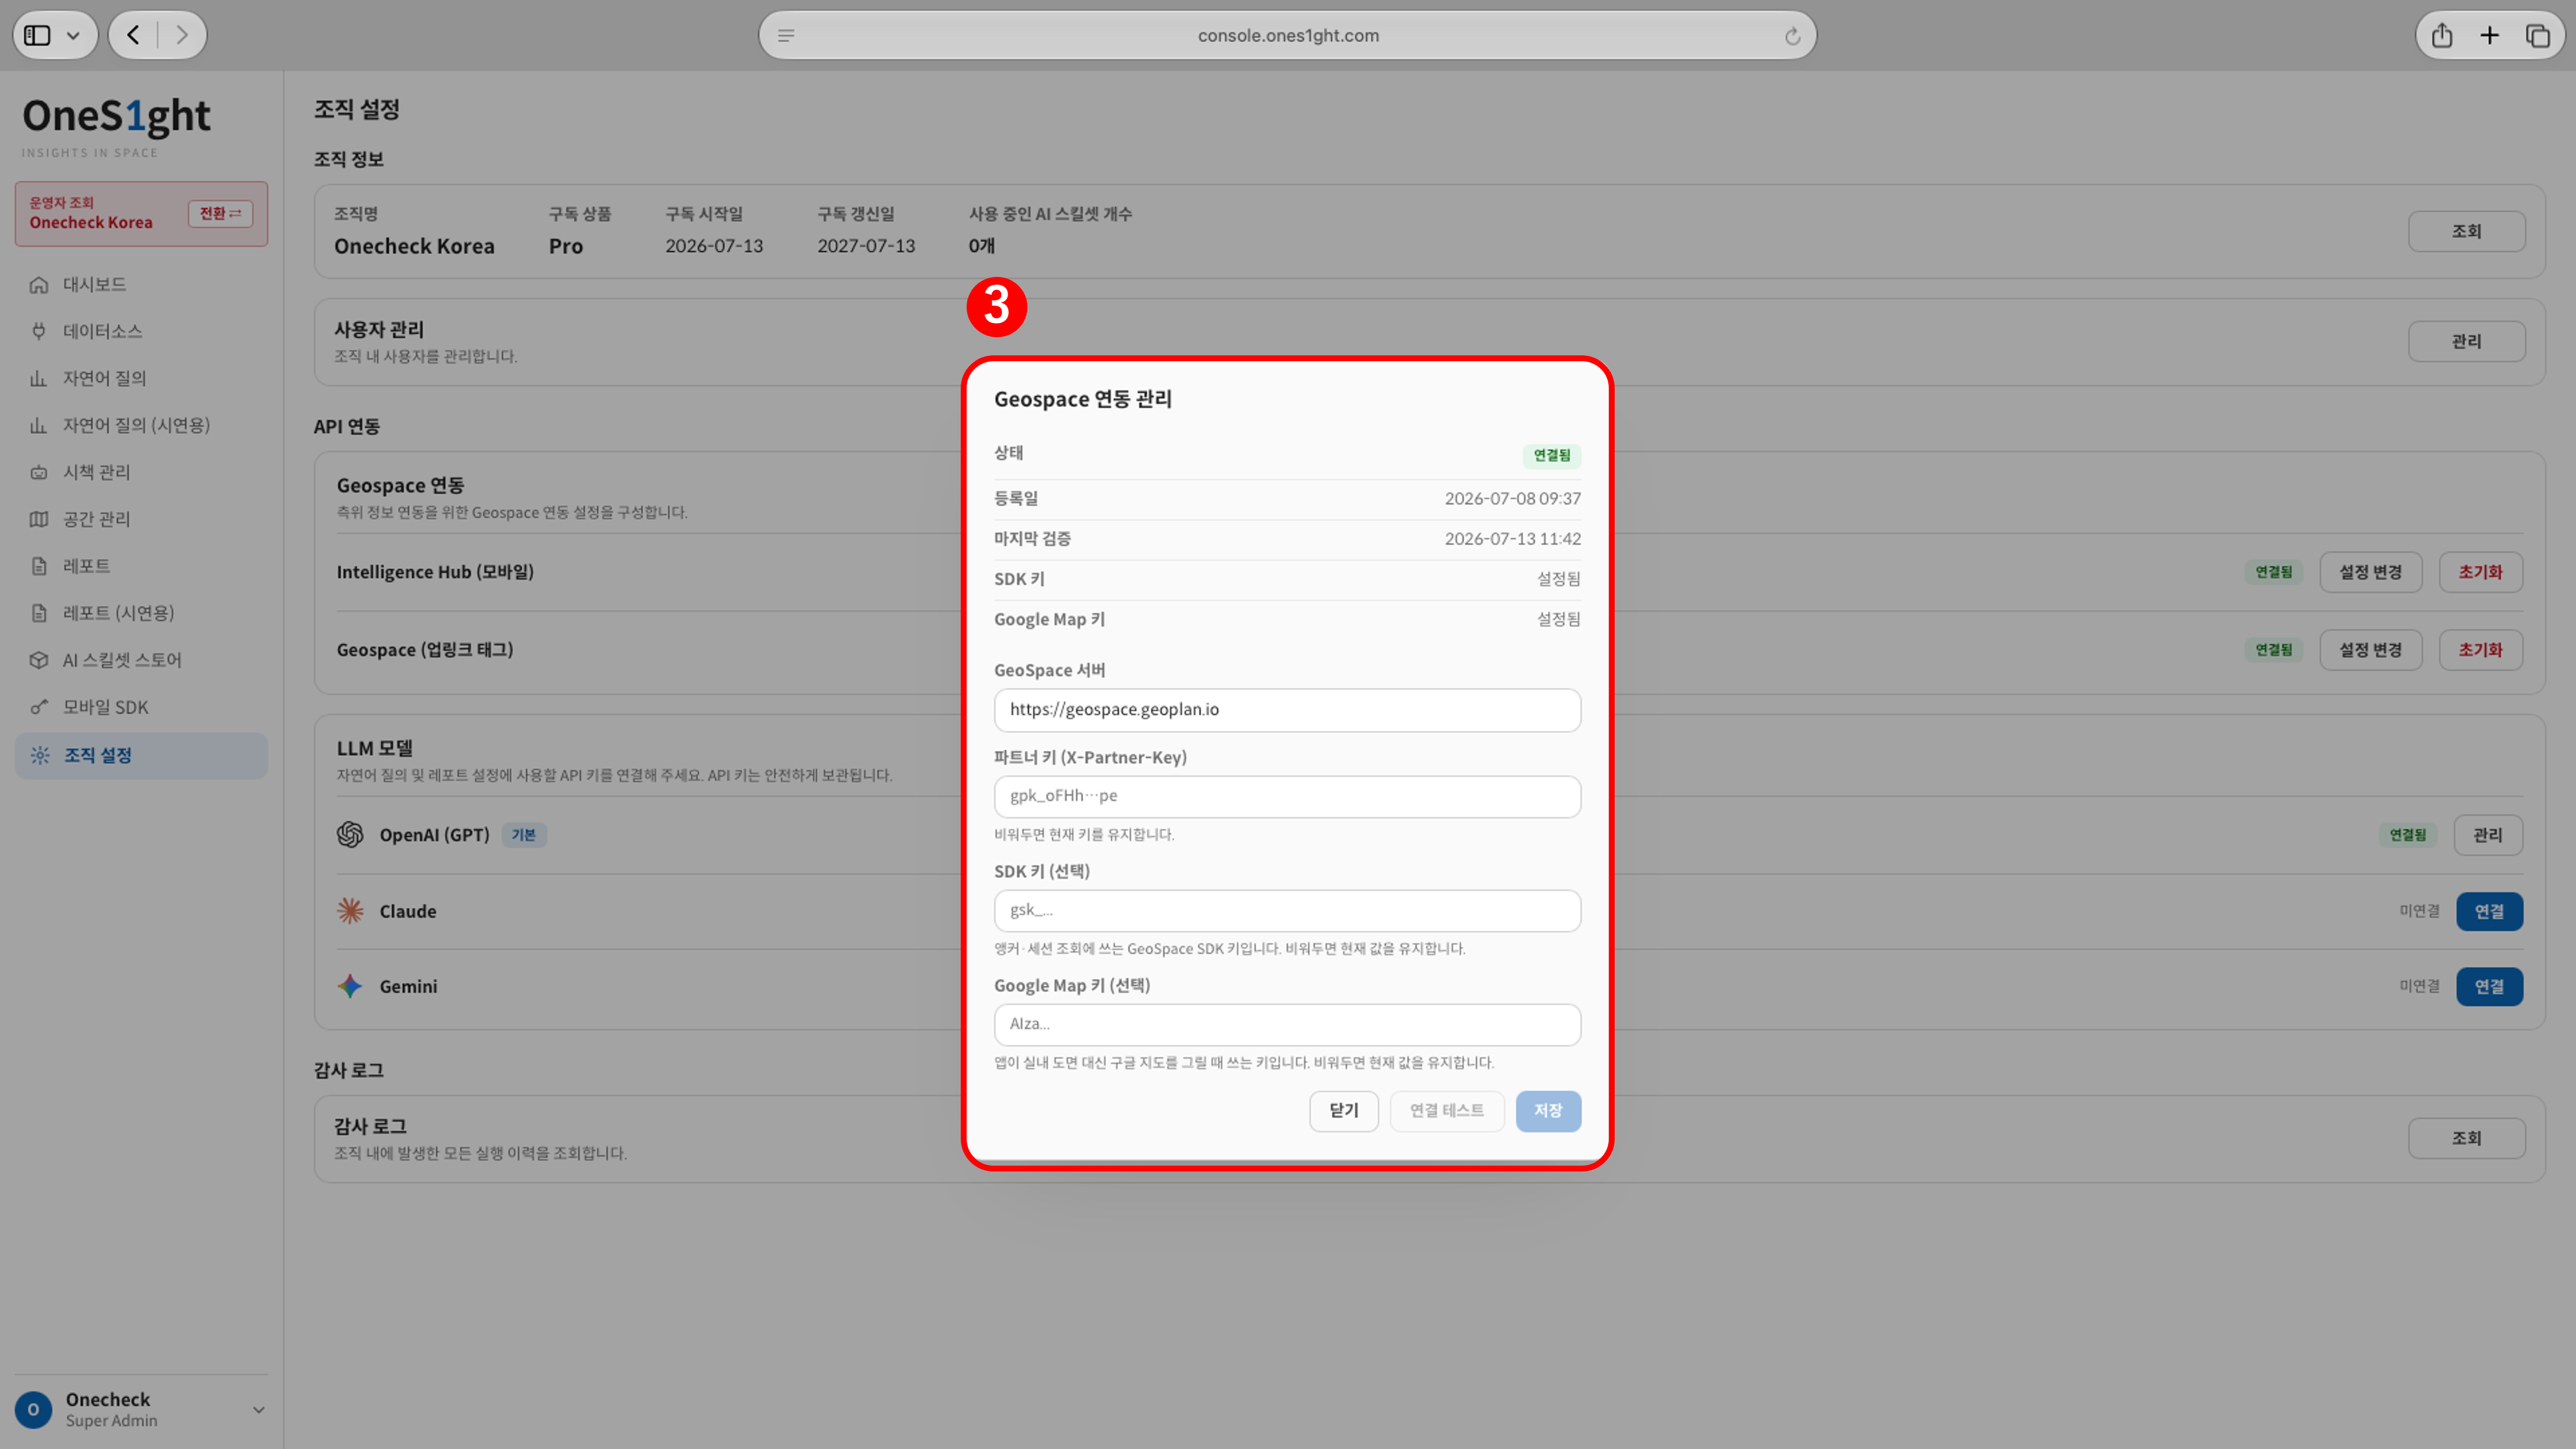
- Fill in the fields below and click [Save]. After clicking [Save], confirm the status at the top of the screen shows ‘Connected’. Once it shows ‘Connected’, the integration is set up.
If your organization already has a partner key registered, you may leave the partner key field blank.
Saving with a blank value keeps the existing key.
Issuing and registering the partner key are separate tasks.
If the key is issued but not registered, the integration status shows as Not connected, and Space Management cannot show your actual store plan.
- Issuing: generating the integration partner key in GeoSpace
- Registering: entering the issued partner key in OneS1ght and saving it
If the key is issued but not registered, the integration status shows as Not connected, and Space Management cannot show your actual store plan.
Checklist
Once all items below are confirmed, you can move on to the next step.