> ## Documentation Index
> Fetch the complete documentation index at: https://docs.ones1ght.com/llms.txt
> Use this file to discover all available pages before exploring further.
# Build Roadmap
> All seven stages of an indoor positioning build — from unboxing the hardware to a position appearing in the app — on one page. Use it to see which stage you are on.
This page is **the full map for anyone building indoor positioning for the first time**.
Follow it in order and you end up with your own position showing as a dot on the app screen.
 **If you want to know what positioning is first,** read the [Positioning Integration Overview](/en/positioning-overview).
If the terms (anchor, UWB, zone) are unfamiliar, they are collected in [Concepts & Glossary](/en/concepts).
## What to prepare before you start
Without these three things you will stall partway through. **Secure them before you begin.**
Both services are **invite only**. There is no self sign-up, so if you have not been invited,
contact `onesight-support@onecheck.co.kr` first.
| Console | Used for | Role required |
| ---------------------- | ------------------------------------ | --------------------- |
| **GeoSpace** (partner) | Buildings, floor plans, anchor setup | `admin` or `operator` |
| **OneS1ght console** | Integration, zones, SDK keys | `owner` or `manager` |
The two consoles use different role names. GeoSpace uses `admin · operator · viewer`,
the OneS1ght console uses `owner · manager · viewer`.
| Item | Quantity | Notes |
| ------------------------------------ | ----------------------- | ------------------------------------------------------------------------------------- |
| AN-500 anchor | **4 or more** | Based on a rectangular placement enclosing the detection area |
| Power adapter · cable | One per anchor | USB-C · **5V/3A** · 3 m or longer recommended |
| Power strip | One per anchor position | For corners with no outlet nearby |
| Double-sided tape · ladder | — | For wall mounting (the default for a permanent install) — **either this or** a tripod |
| Tripod | 4 | For temporary installs and demos (no wall damage) — **either this or** wall mounting |
| Tape measure or laser distance meter | 1 | For measuring coordinates |
The AN-500 anchors and power adapters are **supplied by OneS1ght when you adopt the service** — confirm quantities and delivery dates with your contact.
You prepare the rest (power strips, tripods, tape measure, tape) on site. The full list is in [Before You Install](/en/geospace/site-survey#3-what-to-bring).
You need a floor plan in PNG or JPG. It must **match the real layout of the space**,
and it has to show a stretch of known real-world length — a wall or a column — so you can set the scale.
You do not need an existing plan — if the store is a simple rectangle, **drawing a single rectangle to the measured proportions in PowerPoint or Excel and saving it as a PNG** is enough.
The details are in [Before You Install · Prepare the floor plan](/en/geospace/site-survey#4-prepare-the-floor-plan).
| Item | Requirement |
| ------ | ----------------------------- |
| Device | iPhone 12 or later (UWB chip) |
| iOS | 27.0 or later |
Check the iOS version under **Settings → General → About**, and if it is below 27, update it under **Settings → General → Software Update**.
iPhone 11 and earlier have no UWB chip, so **positioning does not work.**
You will use this device for the verification stage, so have it ready in advance.
## The seven stages
Each stage is **a prerequisite for the next one**. Do not skip ahead — work through them in order.
| Stage | What you do | Where | Done when |
| -------------------------------------------------------------------------- | -------------------------------------------------------------- | ------------------ | ----------------------------------------------------------------------- |
| **1** [Before You Install](/en/geospace/site-survey) | Survey the site, decide anchor positions | On site | Width and depth are measured and four anchor spots are chosen |
| **2** [GeoSpace Setup (Account)](/en/geospace/onboarding) | Log in to GeoSpace, check the organization and license | GeoSpace | You can select a tenant and work in the UI |
| **3** [Build Spaces (Buildings · Floor Plans)](/en/geospace/spaces) | Create buildings and floors, upload the plan and set its scale | GeoSpace | The distance between two points on the plan matches reality |
| **4** [Anchor Installation · Coordinate Measurement](/en/geospace/install) | Register hardware → mount anchors → measure coordinates | On site + GeoSpace | 4 units registered and powered on, 4 coordinate pairs recorded |
| **5** [Floor Plan Placement · Cluster](/en/geospace/placement) | Enter coordinates, assign master and session | GeoSpace | You have clicked through `[Apply to devices] → [Done]` |
| **6** [Positioning Connection · Key Issuance](/en/geospace/connect) | Issue a partner key → register it in the console (SW pairing) | GeoSpace + console | The console badge reads **Connected** and your real floor plan is shown |
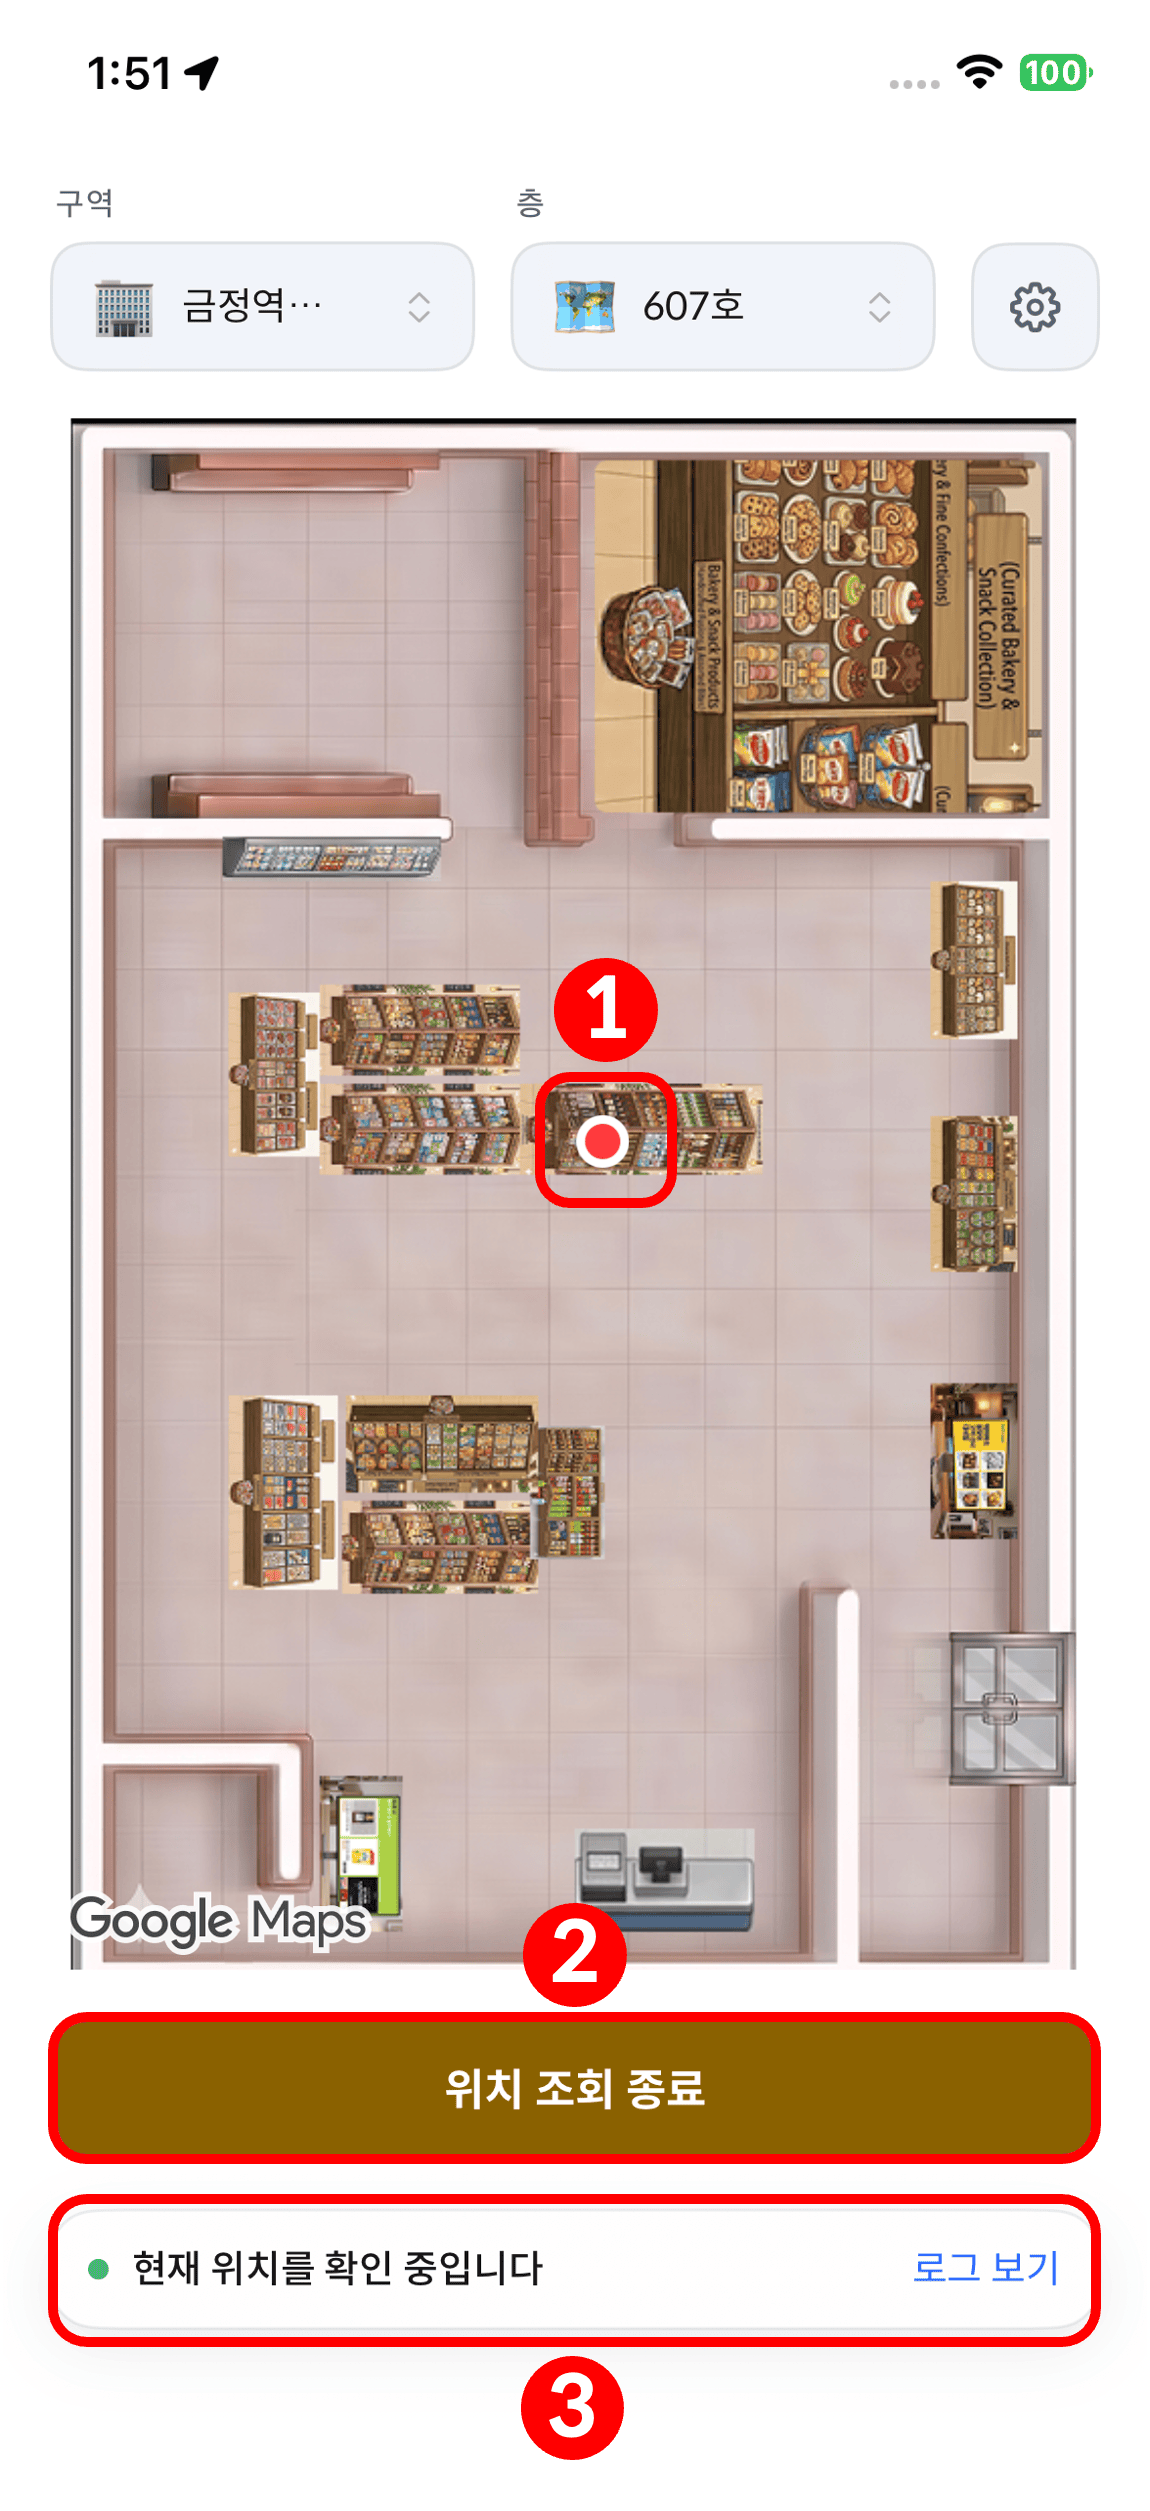
| **7** [Verification](/en/geospace/verify) | Check the whole chain with the verification app | On site + app | **Your position appears as a dot in the app** |
**Do not pick the master anchor and session ID in stage 5 yourself.**
OneS1ght provides these values separately when you adopt the service.
If you have not received them, contact `onesight-support@onecheck.co.kr`.
**Stages 1–7 require no code** — an operations owner can carry them out with console settings and on-site work alone,
and the check is done by **installing the verification app** you were given. Code only appears when you put positioning into
the customer app, in the [Developer Guide (SDK)](/en/sdk/overview), and that is an **optional stage** —
if you only take the coordinate data and use it directly in your own system, the journey ends before SDK integration.
## After positioning — putting the console to work
Once you finish stage 7, positions are being resolved and your real floor plan is connected in the console.
From here on it is about **what you do with that data**.
Draw the zones you want to detect on the floor plan. They are the basis for enter, exit and dwell events.
Issue the `ock_sdk_` key that goes into the app.
Add the positioning library to the customer app.
## Where people get stuck
These are **the three most common blockers** on a first build. Knowing them in advance saves time.
Issuing the key in GeoSpace and **registering** that key in the OneS1ght console are two separate jobs.
If you skip the registration, the console shows a **sample floor plan** instead of your store (simulation mode).
→ Do both the issuance and the registration in one pass in [6. Positioning Connection · Key Issuance](/en/geospace/connect).
The coordinate origin on the floor plan placement screen is **(0, 0) of the whole uploaded image, not the corner of the room**.
If the image includes margins or exterior walls, you have to add that offset to the values you enter.
For example, if the bottom-left corner of the room sits (0.6, 1.5) away from the image origin,
an anchor you measured as (0, 0) on site is entered as `(0.6, 1.5)`.
→ See [Floor Plan Placement](/en/geospace/placement#1-floor-plan-placement) for a worked example.
If the four anchors are bunched on one side or sit close to a straight line, position error grows sharply.
Place them as **a rectangle enclosing the detection area**, surrounding the target from four corners.
→ See [Anchor Installation](/en/geospace/install#2-anchor-installation-physical).
## Get started
Start by surveying the site and deciding anchor positions.
If you get stuck along the way, look up your symptom in [Troubleshooting](/en/troubleshooting) or
contact `onesight-support@onecheck.co.kr`.
**If you want to know what positioning is first,** read the [Positioning Integration Overview](/en/positioning-overview).
If the terms (anchor, UWB, zone) are unfamiliar, they are collected in [Concepts & Glossary](/en/concepts).
## What to prepare before you start
Without these three things you will stall partway through. **Secure them before you begin.**
Both services are **invite only**. There is no self sign-up, so if you have not been invited,
contact `onesight-support@onecheck.co.kr` first.
| Console | Used for | Role required |
| ---------------------- | ------------------------------------ | --------------------- |
| **GeoSpace** (partner) | Buildings, floor plans, anchor setup | `admin` or `operator` |
| **OneS1ght console** | Integration, zones, SDK keys | `owner` or `manager` |
The two consoles use different role names. GeoSpace uses `admin · operator · viewer`,
the OneS1ght console uses `owner · manager · viewer`.
| Item | Quantity | Notes |
| ------------------------------------ | ----------------------- | ------------------------------------------------------------------------------------- |
| AN-500 anchor | **4 or more** | Based on a rectangular placement enclosing the detection area |
| Power adapter · cable | One per anchor | USB-C · **5V/3A** · 3 m or longer recommended |
| Power strip | One per anchor position | For corners with no outlet nearby |
| Double-sided tape · ladder | — | For wall mounting (the default for a permanent install) — **either this or** a tripod |
| Tripod | 4 | For temporary installs and demos (no wall damage) — **either this or** wall mounting |
| Tape measure or laser distance meter | 1 | For measuring coordinates |
The AN-500 anchors and power adapters are **supplied by OneS1ght when you adopt the service** — confirm quantities and delivery dates with your contact.
You prepare the rest (power strips, tripods, tape measure, tape) on site. The full list is in [Before You Install](/en/geospace/site-survey#3-what-to-bring).
You need a floor plan in PNG or JPG. It must **match the real layout of the space**,
and it has to show a stretch of known real-world length — a wall or a column — so you can set the scale.
You do not need an existing plan — if the store is a simple rectangle, **drawing a single rectangle to the measured proportions in PowerPoint or Excel and saving it as a PNG** is enough.
The details are in [Before You Install · Prepare the floor plan](/en/geospace/site-survey#4-prepare-the-floor-plan).
| Item | Requirement |
| ------ | ----------------------------- |
| Device | iPhone 12 or later (UWB chip) |
| iOS | 27.0 or later |
Check the iOS version under **Settings → General → About**, and if it is below 27, update it under **Settings → General → Software Update**.
iPhone 11 and earlier have no UWB chip, so **positioning does not work.**
You will use this device for the verification stage, so have it ready in advance.
## The seven stages
Each stage is **a prerequisite for the next one**. Do not skip ahead — work through them in order.
| Stage | What you do | Where | Done when |
| -------------------------------------------------------------------------- | -------------------------------------------------------------- | ------------------ | ----------------------------------------------------------------------- |
| **1** [Before You Install](/en/geospace/site-survey) | Survey the site, decide anchor positions | On site | Width and depth are measured and four anchor spots are chosen |
| **2** [GeoSpace Setup (Account)](/en/geospace/onboarding) | Log in to GeoSpace, check the organization and license | GeoSpace | You can select a tenant and work in the UI |
| **3** [Build Spaces (Buildings · Floor Plans)](/en/geospace/spaces) | Create buildings and floors, upload the plan and set its scale | GeoSpace | The distance between two points on the plan matches reality |
| **4** [Anchor Installation · Coordinate Measurement](/en/geospace/install) | Register hardware → mount anchors → measure coordinates | On site + GeoSpace | 4 units registered and powered on, 4 coordinate pairs recorded |
| **5** [Floor Plan Placement · Cluster](/en/geospace/placement) | Enter coordinates, assign master and session | GeoSpace | You have clicked through `[Apply to devices] → [Done]` |
| **6** [Positioning Connection · Key Issuance](/en/geospace/connect) | Issue a partner key → register it in the console (SW pairing) | GeoSpace + console | The console badge reads **Connected** and your real floor plan is shown |
| **7** [Verification](/en/geospace/verify) | Check the whole chain with the verification app | On site + app | **Your position appears as a dot in the app** |
**Do not pick the master anchor and session ID in stage 5 yourself.**
OneS1ght provides these values separately when you adopt the service.
If you have not received them, contact `onesight-support@onecheck.co.kr`.
**Stages 1–7 require no code** — an operations owner can carry them out with console settings and on-site work alone,
and the check is done by **installing the verification app** you were given. Code only appears when you put positioning into
the customer app, in the [Developer Guide (SDK)](/en/sdk/overview), and that is an **optional stage** —
if you only take the coordinate data and use it directly in your own system, the journey ends before SDK integration.
## After positioning — putting the console to work
Once you finish stage 7, positions are being resolved and your real floor plan is connected in the console.
From here on it is about **what you do with that data**.
Draw the zones you want to detect on the floor plan. They are the basis for enter, exit and dwell events.
Issue the `ock_sdk_` key that goes into the app.
Add the positioning library to the customer app.
## Where people get stuck
These are **the three most common blockers** on a first build. Knowing them in advance saves time.
Issuing the key in GeoSpace and **registering** that key in the OneS1ght console are two separate jobs.
If you skip the registration, the console shows a **sample floor plan** instead of your store (simulation mode).
→ Do both the issuance and the registration in one pass in [6. Positioning Connection · Key Issuance](/en/geospace/connect).
The coordinate origin on the floor plan placement screen is **(0, 0) of the whole uploaded image, not the corner of the room**.
If the image includes margins or exterior walls, you have to add that offset to the values you enter.
For example, if the bottom-left corner of the room sits (0.6, 1.5) away from the image origin,
an anchor you measured as (0, 0) on site is entered as `(0.6, 1.5)`.
→ See [Floor Plan Placement](/en/geospace/placement#1-floor-plan-placement) for a worked example.
If the four anchors are bunched on one side or sit close to a straight line, position error grows sharply.
Place them as **a rectangle enclosing the detection area**, surrounding the target from four corners.
→ See [Anchor Installation](/en/geospace/install#2-anchor-installation-physical).
## Get started
Start by surveying the site and deciding anchor positions.
If you get stuck along the way, look up your symptom in [Troubleshooting](/en/troubleshooting) or
contact `onesight-support@onecheck.co.kr`.