> ## Documentation Index
> Fetch the complete documentation index at: https://docs.ones1ght.com/llms.txt
> Use this file to discover all available pages before exploring further.
# Build Spaces
> Register buildings and floors in GeoSpace, upload a floor plan, and use two-point scaling to match the plan to real-world dimensions.
This page covers preparation in **GeoSpace**, our positioning infrastructure partner. GeoSpace setup must already be complete. (See [GeoSpace setup](/en/geospace/onboarding).)
Building a space follows the order **building → floor → plan**. After uploading a plan, you set the **scale** so that pixels on the plan map to real-world meters.
## 1. Register a building
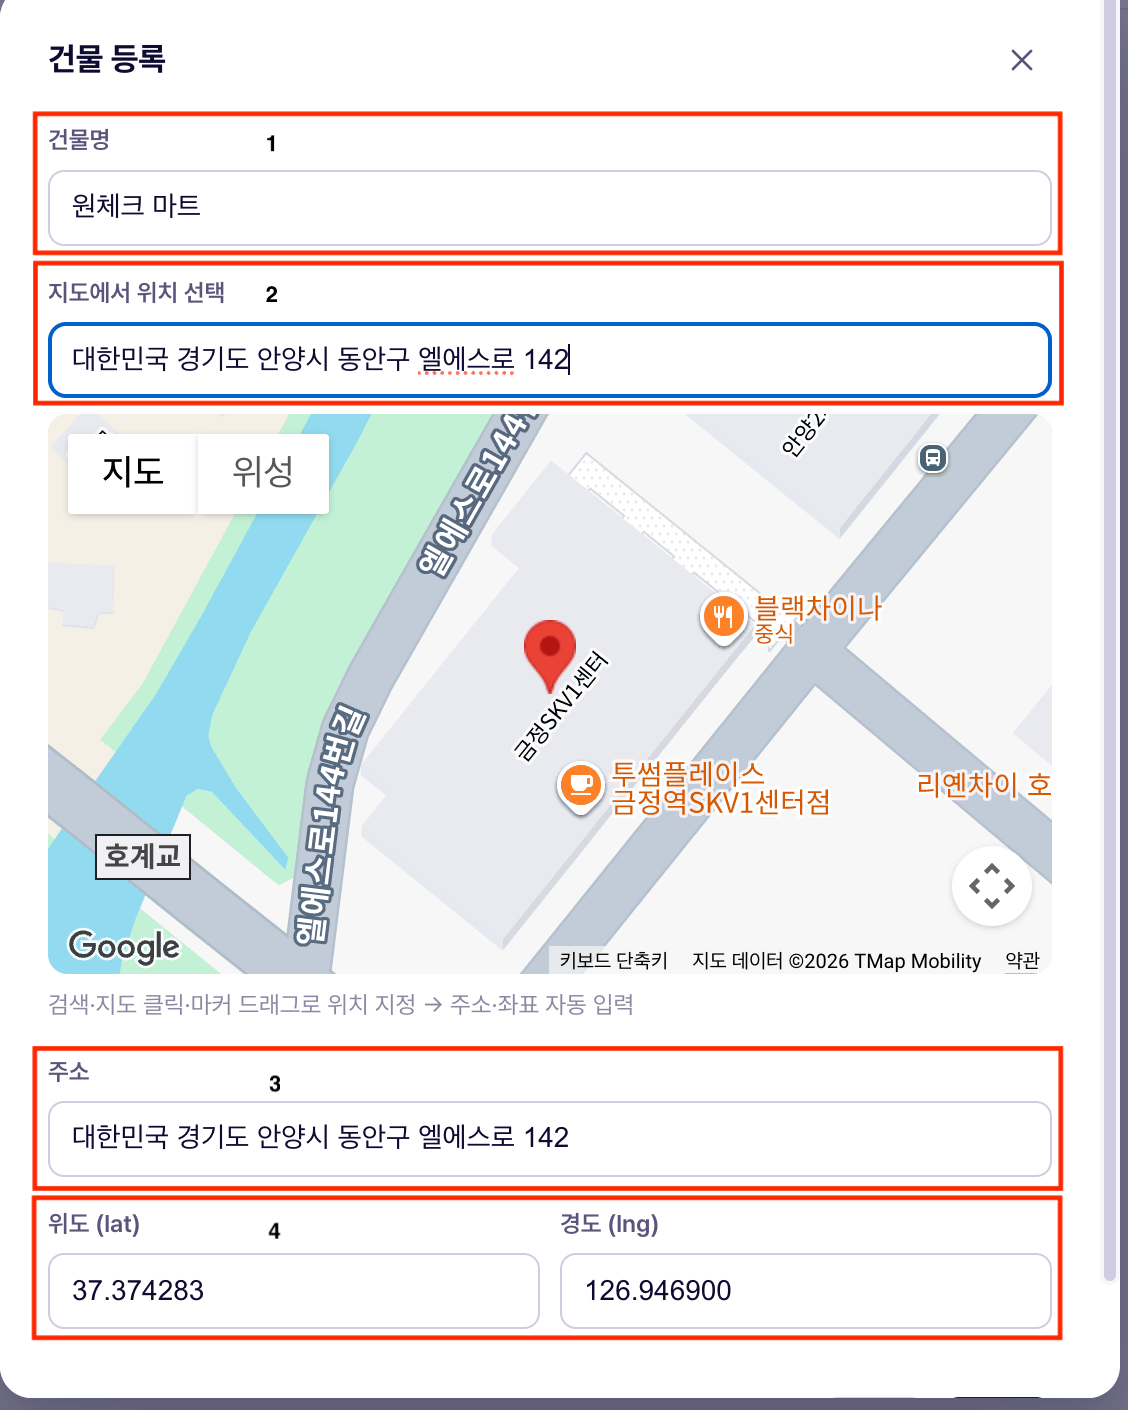
On the **Building list** screen, press **\[+ Register building]**.
* **Building name**: for example, Onecheck Mart
* **Pick the location on the map**: type an address and choose from the search results. You can also click the map or drag the marker.
* **Address, latitude, longitude**: filled in automatically once you pick a location.
 ## 2. Register floors
In the building list, press **\[Floor work]** for the building.
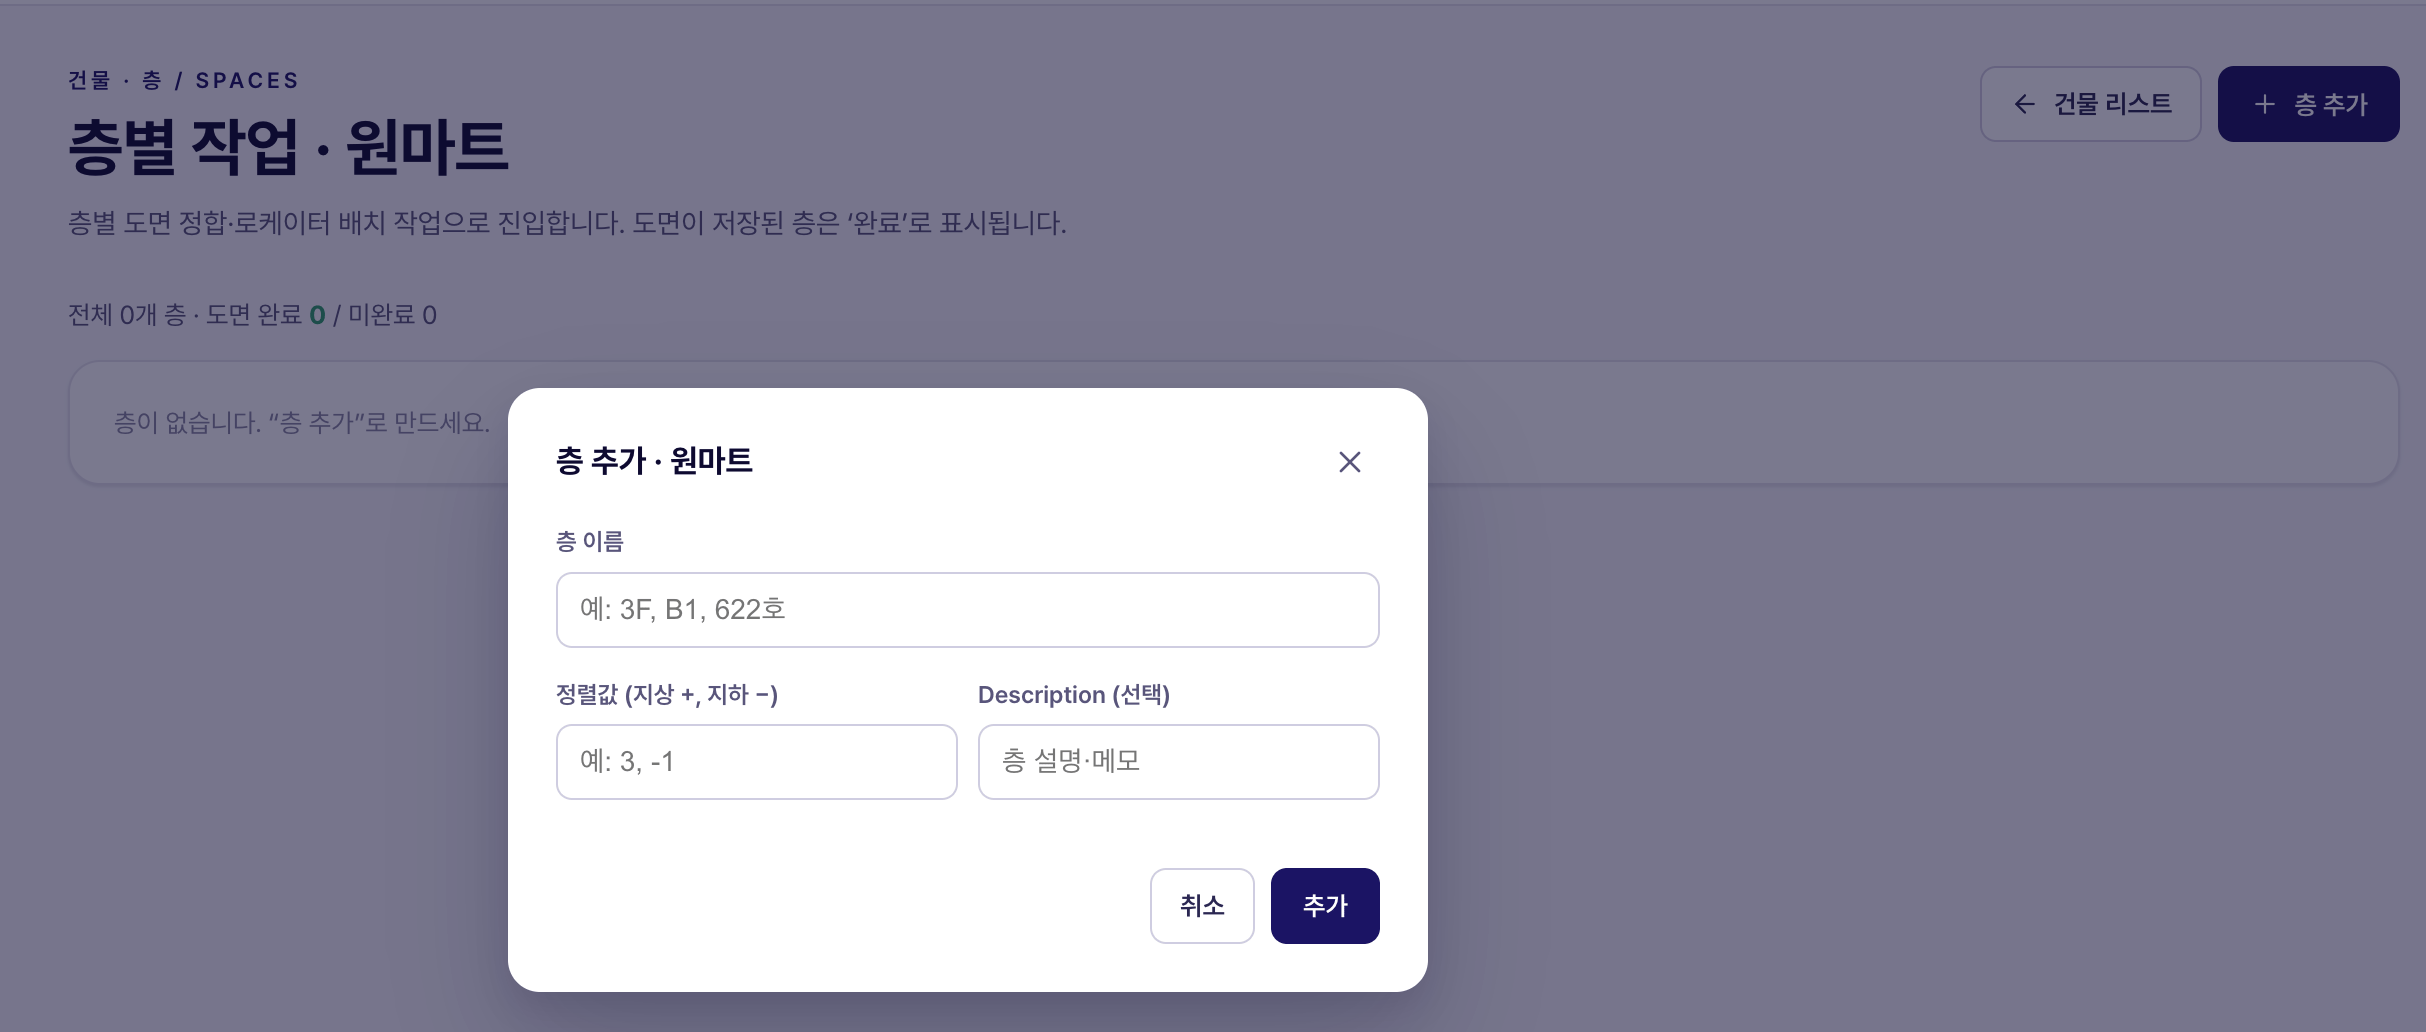
Press **\[+ Add floor]**, fill in the following, and press **\[Add]**.
* **Floor name** (for example 3F, B1, Room 622)
* **Sort value**: positive for above ground, negative for below (for example 3, -1)
* **Description** (optional)
New floors appear in the list. Floors without a saved plan are marked **incomplete**; press **\[Place plan →]** to continue.
## 2. Register floors
In the building list, press **\[Floor work]** for the building.
Press **\[+ Add floor]**, fill in the following, and press **\[Add]**.
* **Floor name** (for example 3F, B1, Room 622)
* **Sort value**: positive for above ground, negative for below (for example 3, -1)
* **Description** (optional)
New floors appear in the list. Floors without a saved plan are marked **incomplete**; press **\[Place plan →]** to continue.
 ## 3. Configure the plan (scale)
A floor plan image **carries no real-world dimensions.** Scaling tells the system "this length on the plan equals this many meters," connecting the plan to real-world coordinates. Locators, zones, and positioning coordinates all sit on top of this value, so set it accurately.
Press **\[Place plan →]** in the floor list.
Press **\[Image]** and attach the plan file (PNG, JPG, and so on). Use a layout that matches the actual space.
Press **\[Set scale with two points]**, then on the plan:
1. Click the **start point**
2. Click the **end point**
3. Enter the **real distance (m)** between them → **\[Apply]**
## 3. Configure the plan (scale)
A floor plan image **carries no real-world dimensions.** Scaling tells the system "this length on the plan equals this many meters," connecting the plan to real-world coordinates. Locators, zones, and positioning coordinates all sit on top of this value, so set it accurately.
Press **\[Place plan →]** in the floor list.
Press **\[Image]** and attach the plan file (PNG, JPG, and so on). Use a layout that matches the actual space.
Press **\[Set scale with two points]**, then on the plan:
1. Click the **start point**
2. Click the **end point**
3. Enter the **real distance (m)** between them → **\[Apply]**
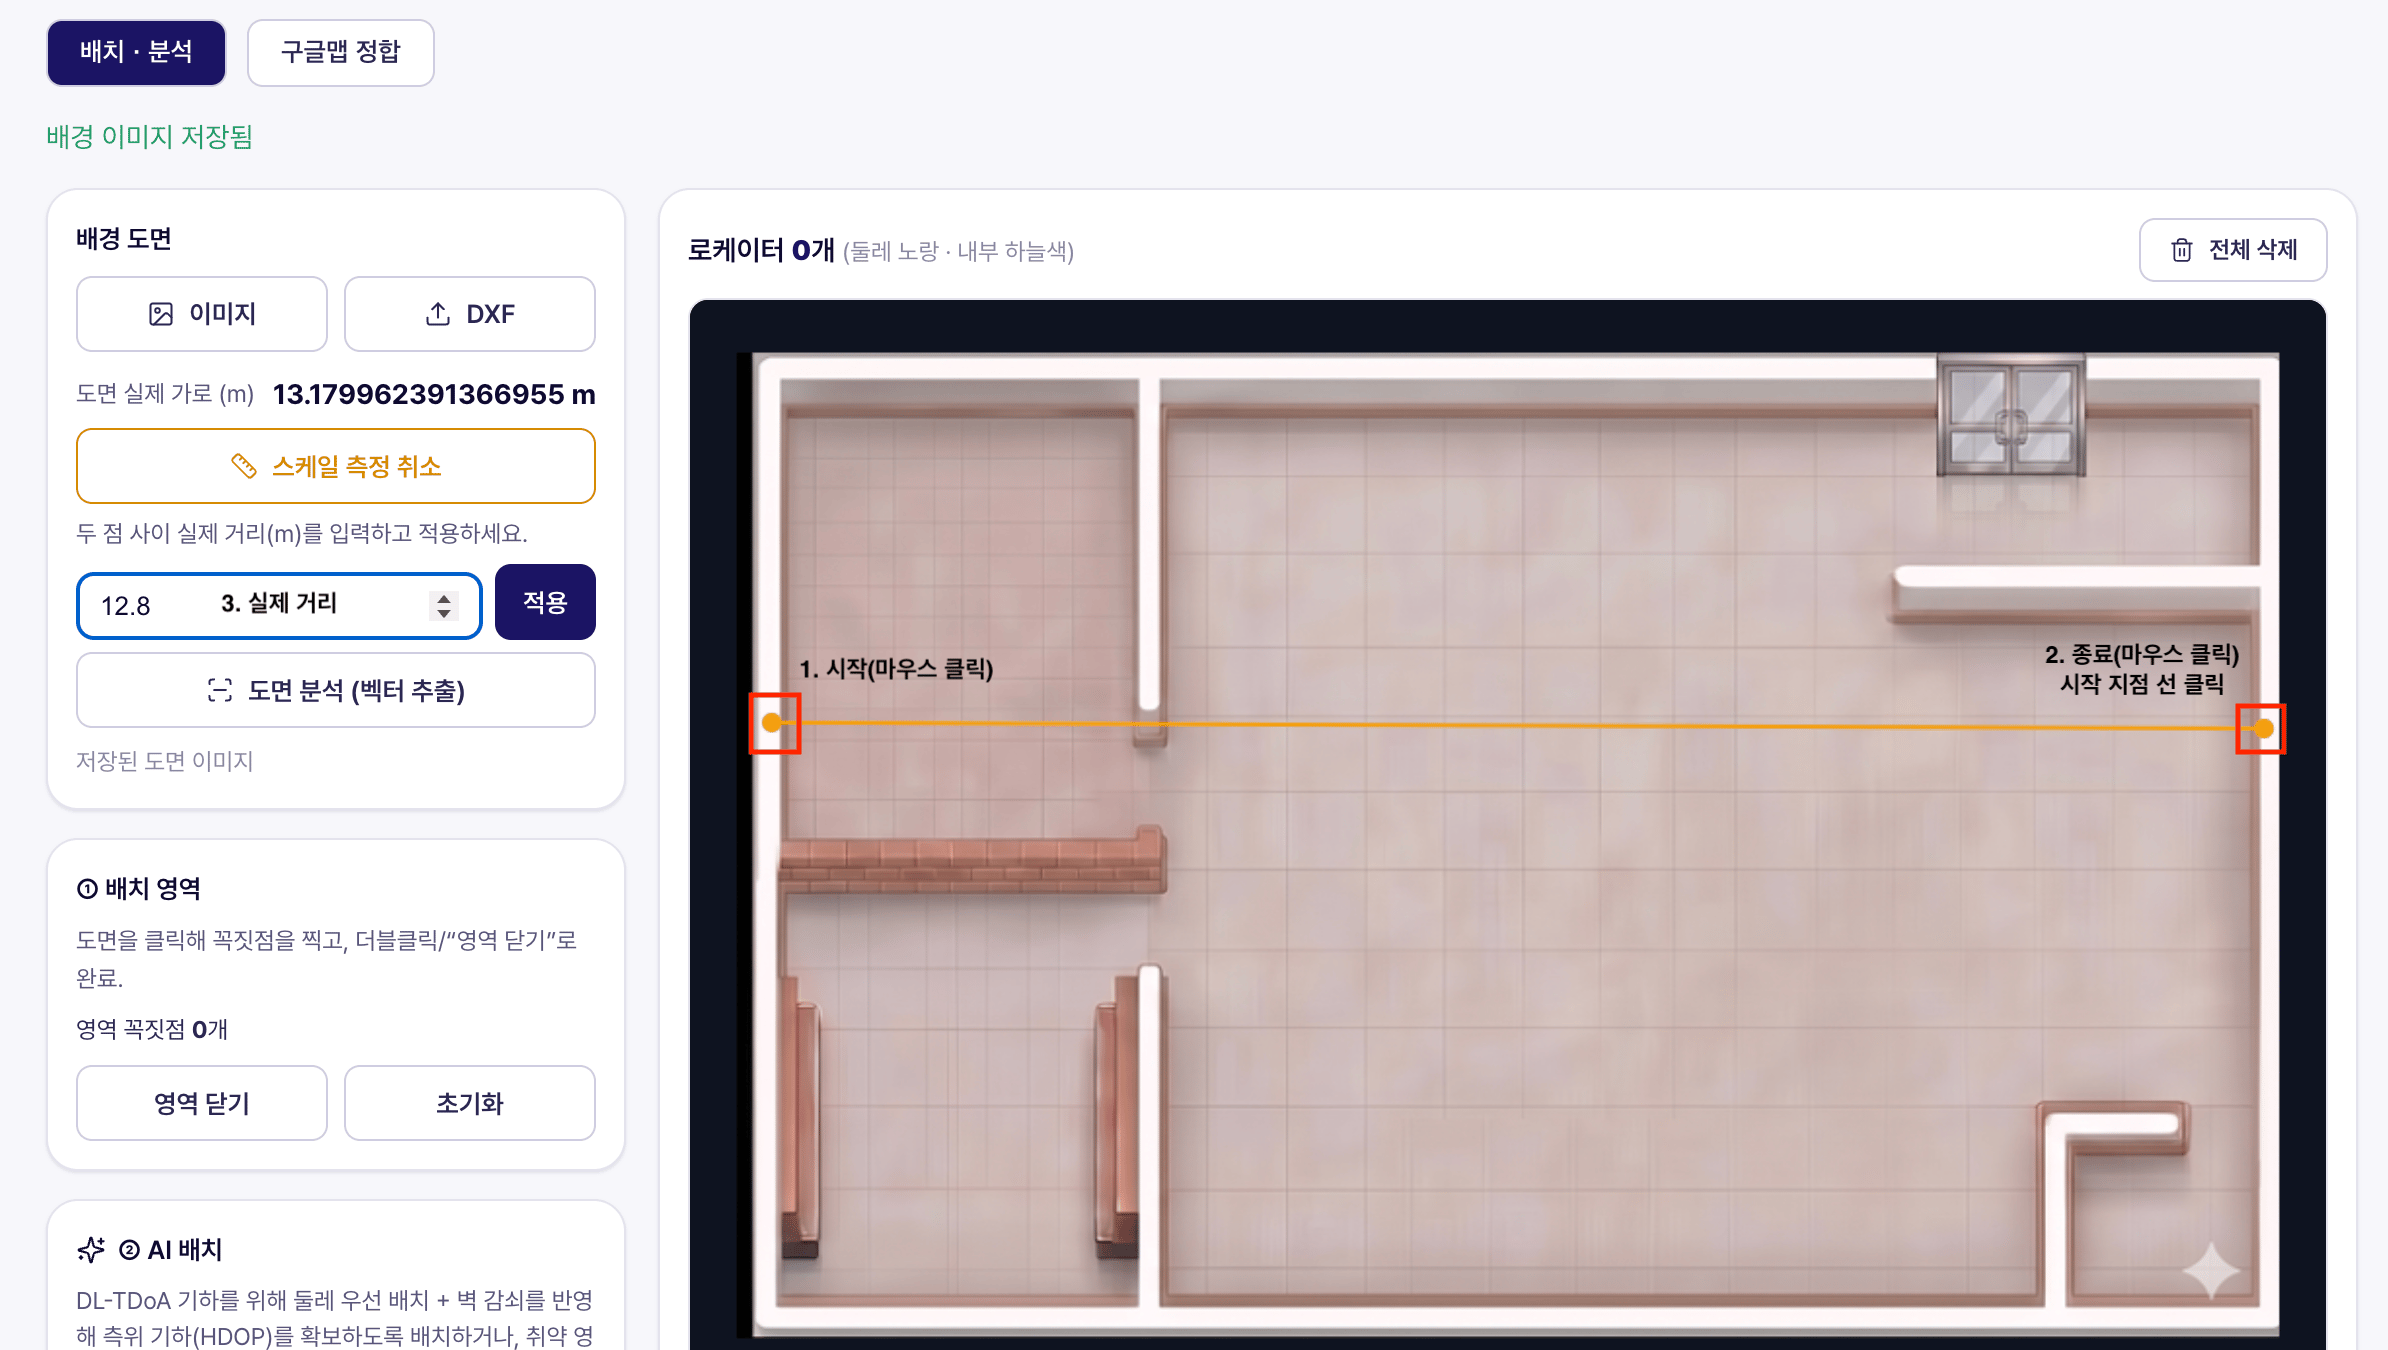 Choose two points across a span **whose real length you know precisely** (wall to wall, column spacing — measured with a tape or laser measure). The span you click and the distance you enter must cover **exactly the same stretch**.
The **"plan width (m)"** shown after applying is not your input — it's the **full image width converted to meters**. If your two points sit inside the image edges (because of margins or where you clicked), the value can appear larger than what you entered. This is expected.
## Next steps
Register hardware, install on site, and place it on the plan.
Back to sign-in, tenants, and partner keys.
Choose two points across a span **whose real length you know precisely** (wall to wall, column spacing — measured with a tape or laser measure). The span you click and the distance you enter must cover **exactly the same stretch**.
The **"plan width (m)"** shown after applying is not your input — it's the **full image width converted to meters**. If your two points sit inside the image edges (because of margins or where you clicked), the value can appear larger than what you entered. This is expected.
## Next steps
Register hardware, install on site, and place it on the plan.
Back to sign-in, tenants, and partner keys.