> ## Documentation Index
> Fetch the complete documentation index at: https://docs.ones1ght.com/llms.txt
> Use this file to discover all available pages before exploring further.
# 6. Positioning Connection · Key Issuance
> Issue a partner key in GeoSpace and register it in the OneS1ght console — the step that connects your positioning infrastructure to the console software.
**Where you work —** 🖥️ GeoSpace + 🖥️ OneS1ght console (no on-site work)
You must have completed everything through [5. Floor Plan Placement · Cluster](/en/geospace/placement).
The hardware work is already done — this step **connects the two pieces of software (SW pairing)**.
## 1. Issue a partner key (GeoSpace)
The **partner key** (`gpk_...`) is the tenant credential the OneS1ght console uses when it fetches
building, floor plan and zone data from GeoSpace. Follow the numbered order in the image below.
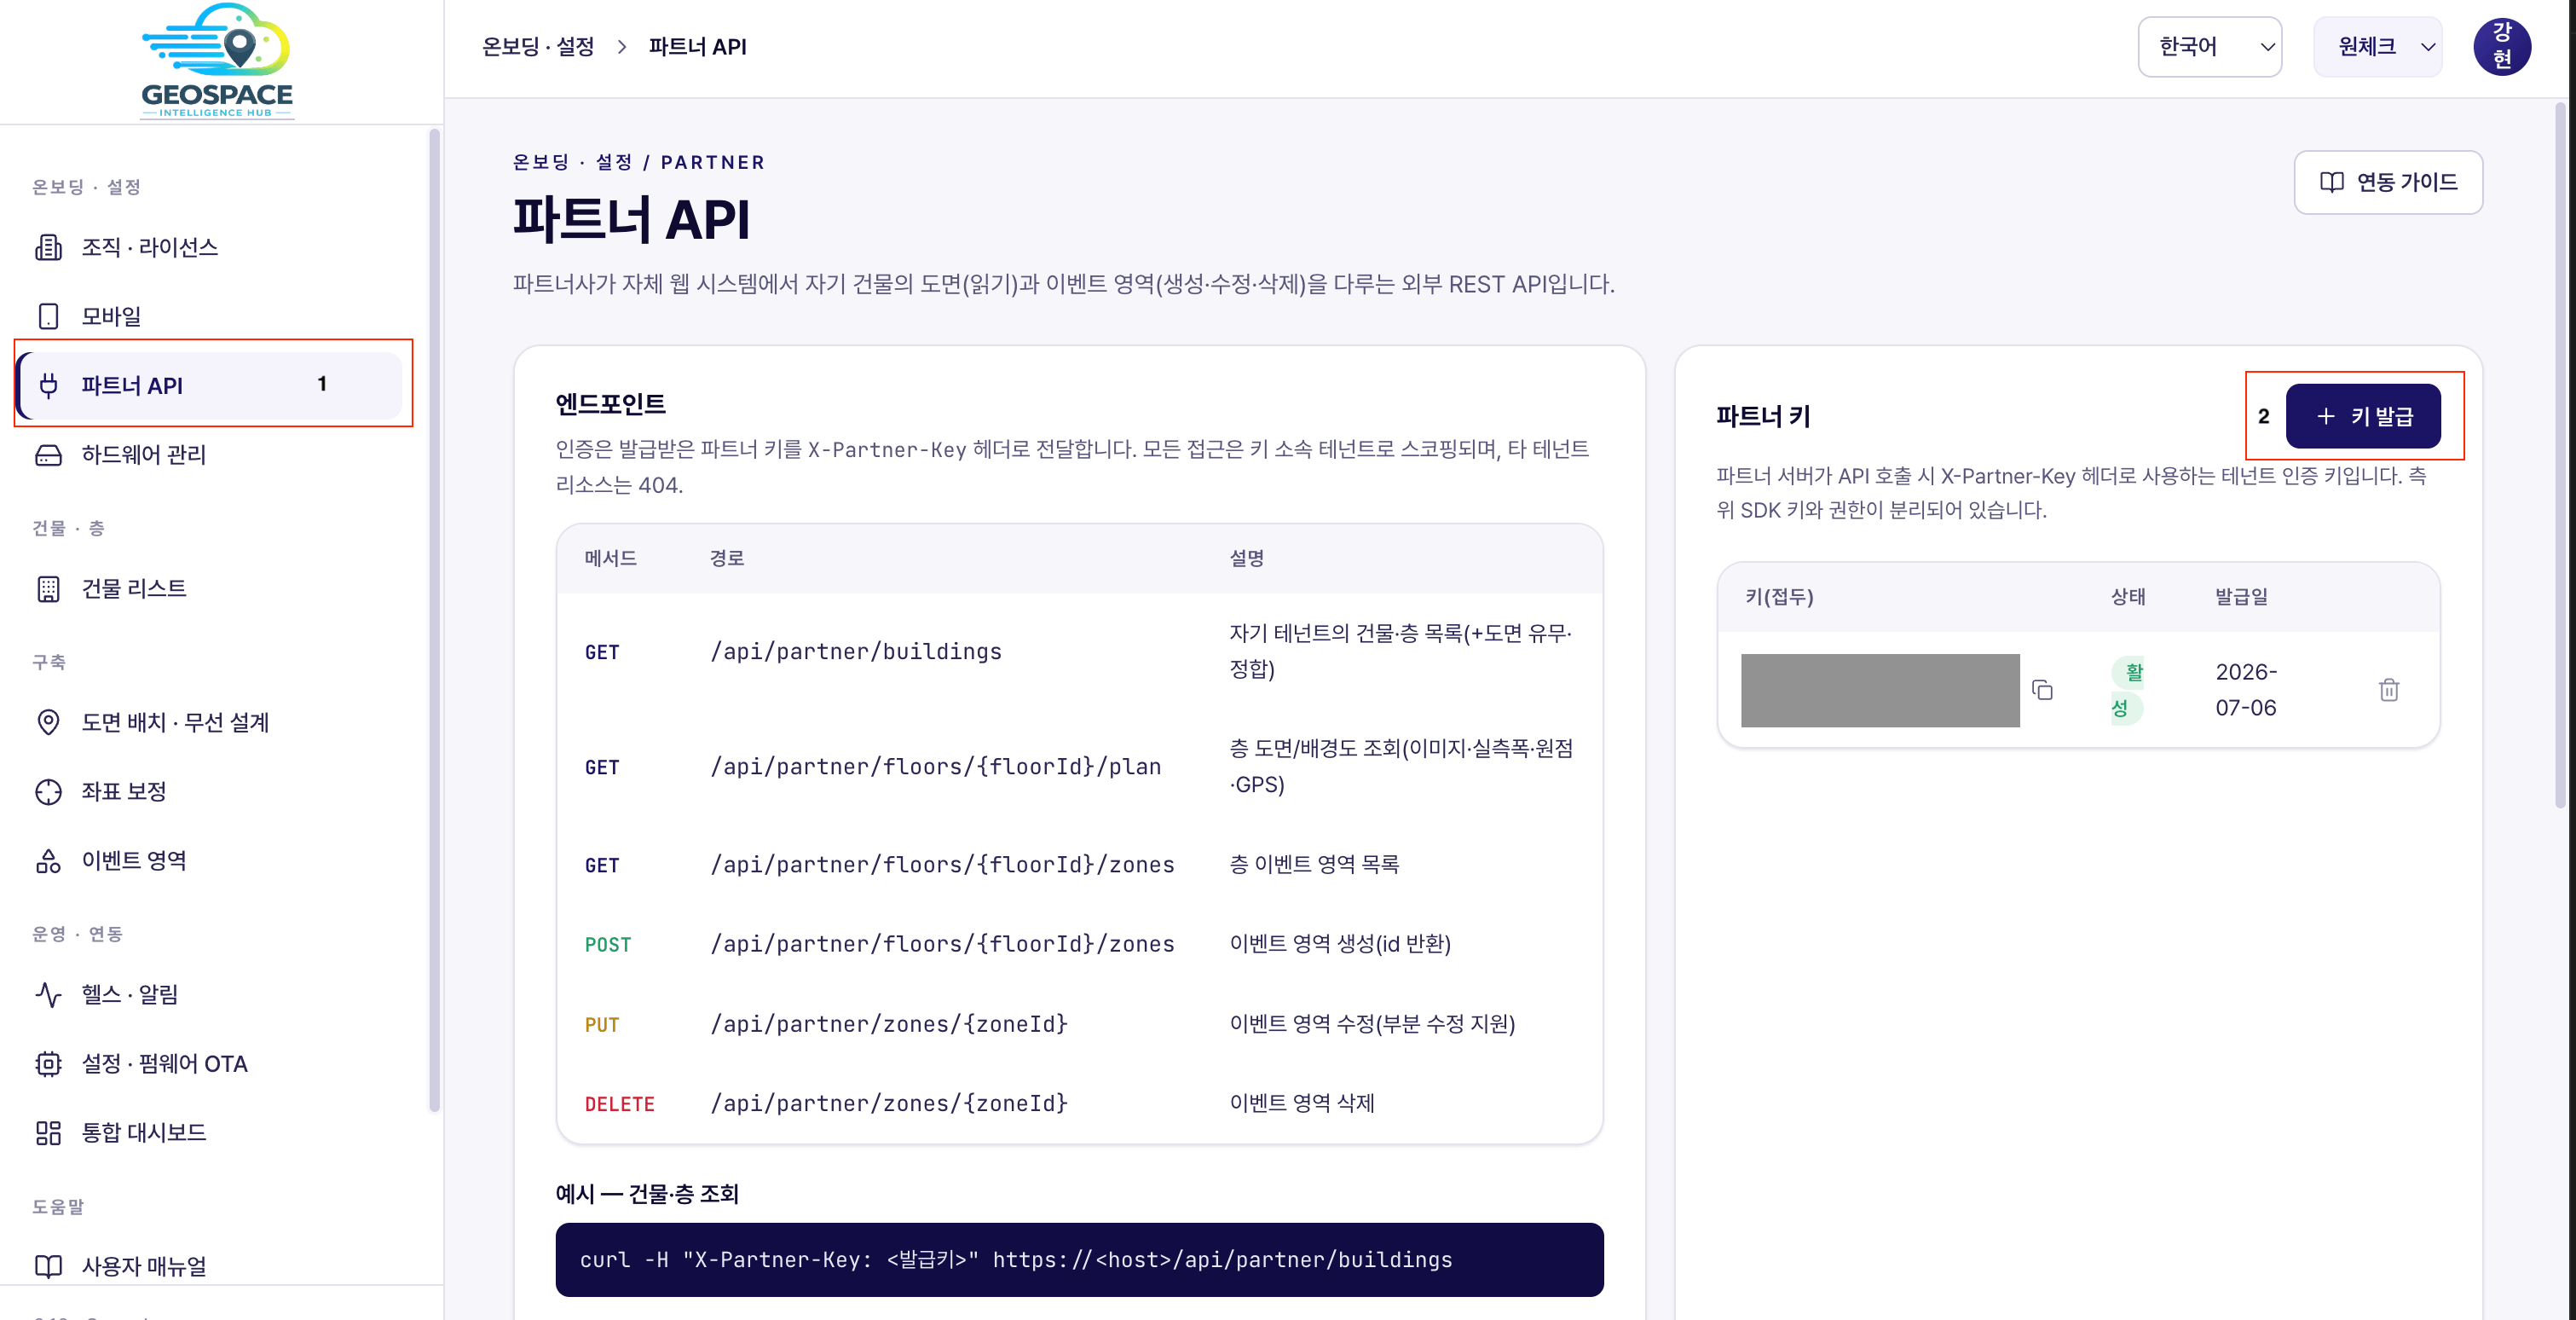 1. In the GeoSpace sidebar, go to **Onboarding & Settings → Partner API**.
(The endpoint table and curl examples on the left of the screen are for developers — ignore them and look only at the **Partner Key** area on the right.)
2. Click **\[+ Issue key]** in the **Partner Key** area on the right to generate a new partner key (`gpk_...`).
Copy the value and store it somewhere safe.
## 2. Register it in the OneS1ght console
The integration only turns on once you register the issued key in the console. Follow the numbered order in the two images below.
1. In the GeoSpace sidebar, go to **Onboarding & Settings → Partner API**.
(The endpoint table and curl examples on the left of the screen are for developers — ignore them and look only at the **Partner Key** area on the right.)
2. Click **\[+ Issue key]** in the **Partner Key** area on the right to generate a new partner key (`gpk_...`).
Copy the value and store it somewhere safe.
## 2. Register it in the OneS1ght console
The integration only turns on once you register the issued key in the console. Follow the numbered order in the two images below.
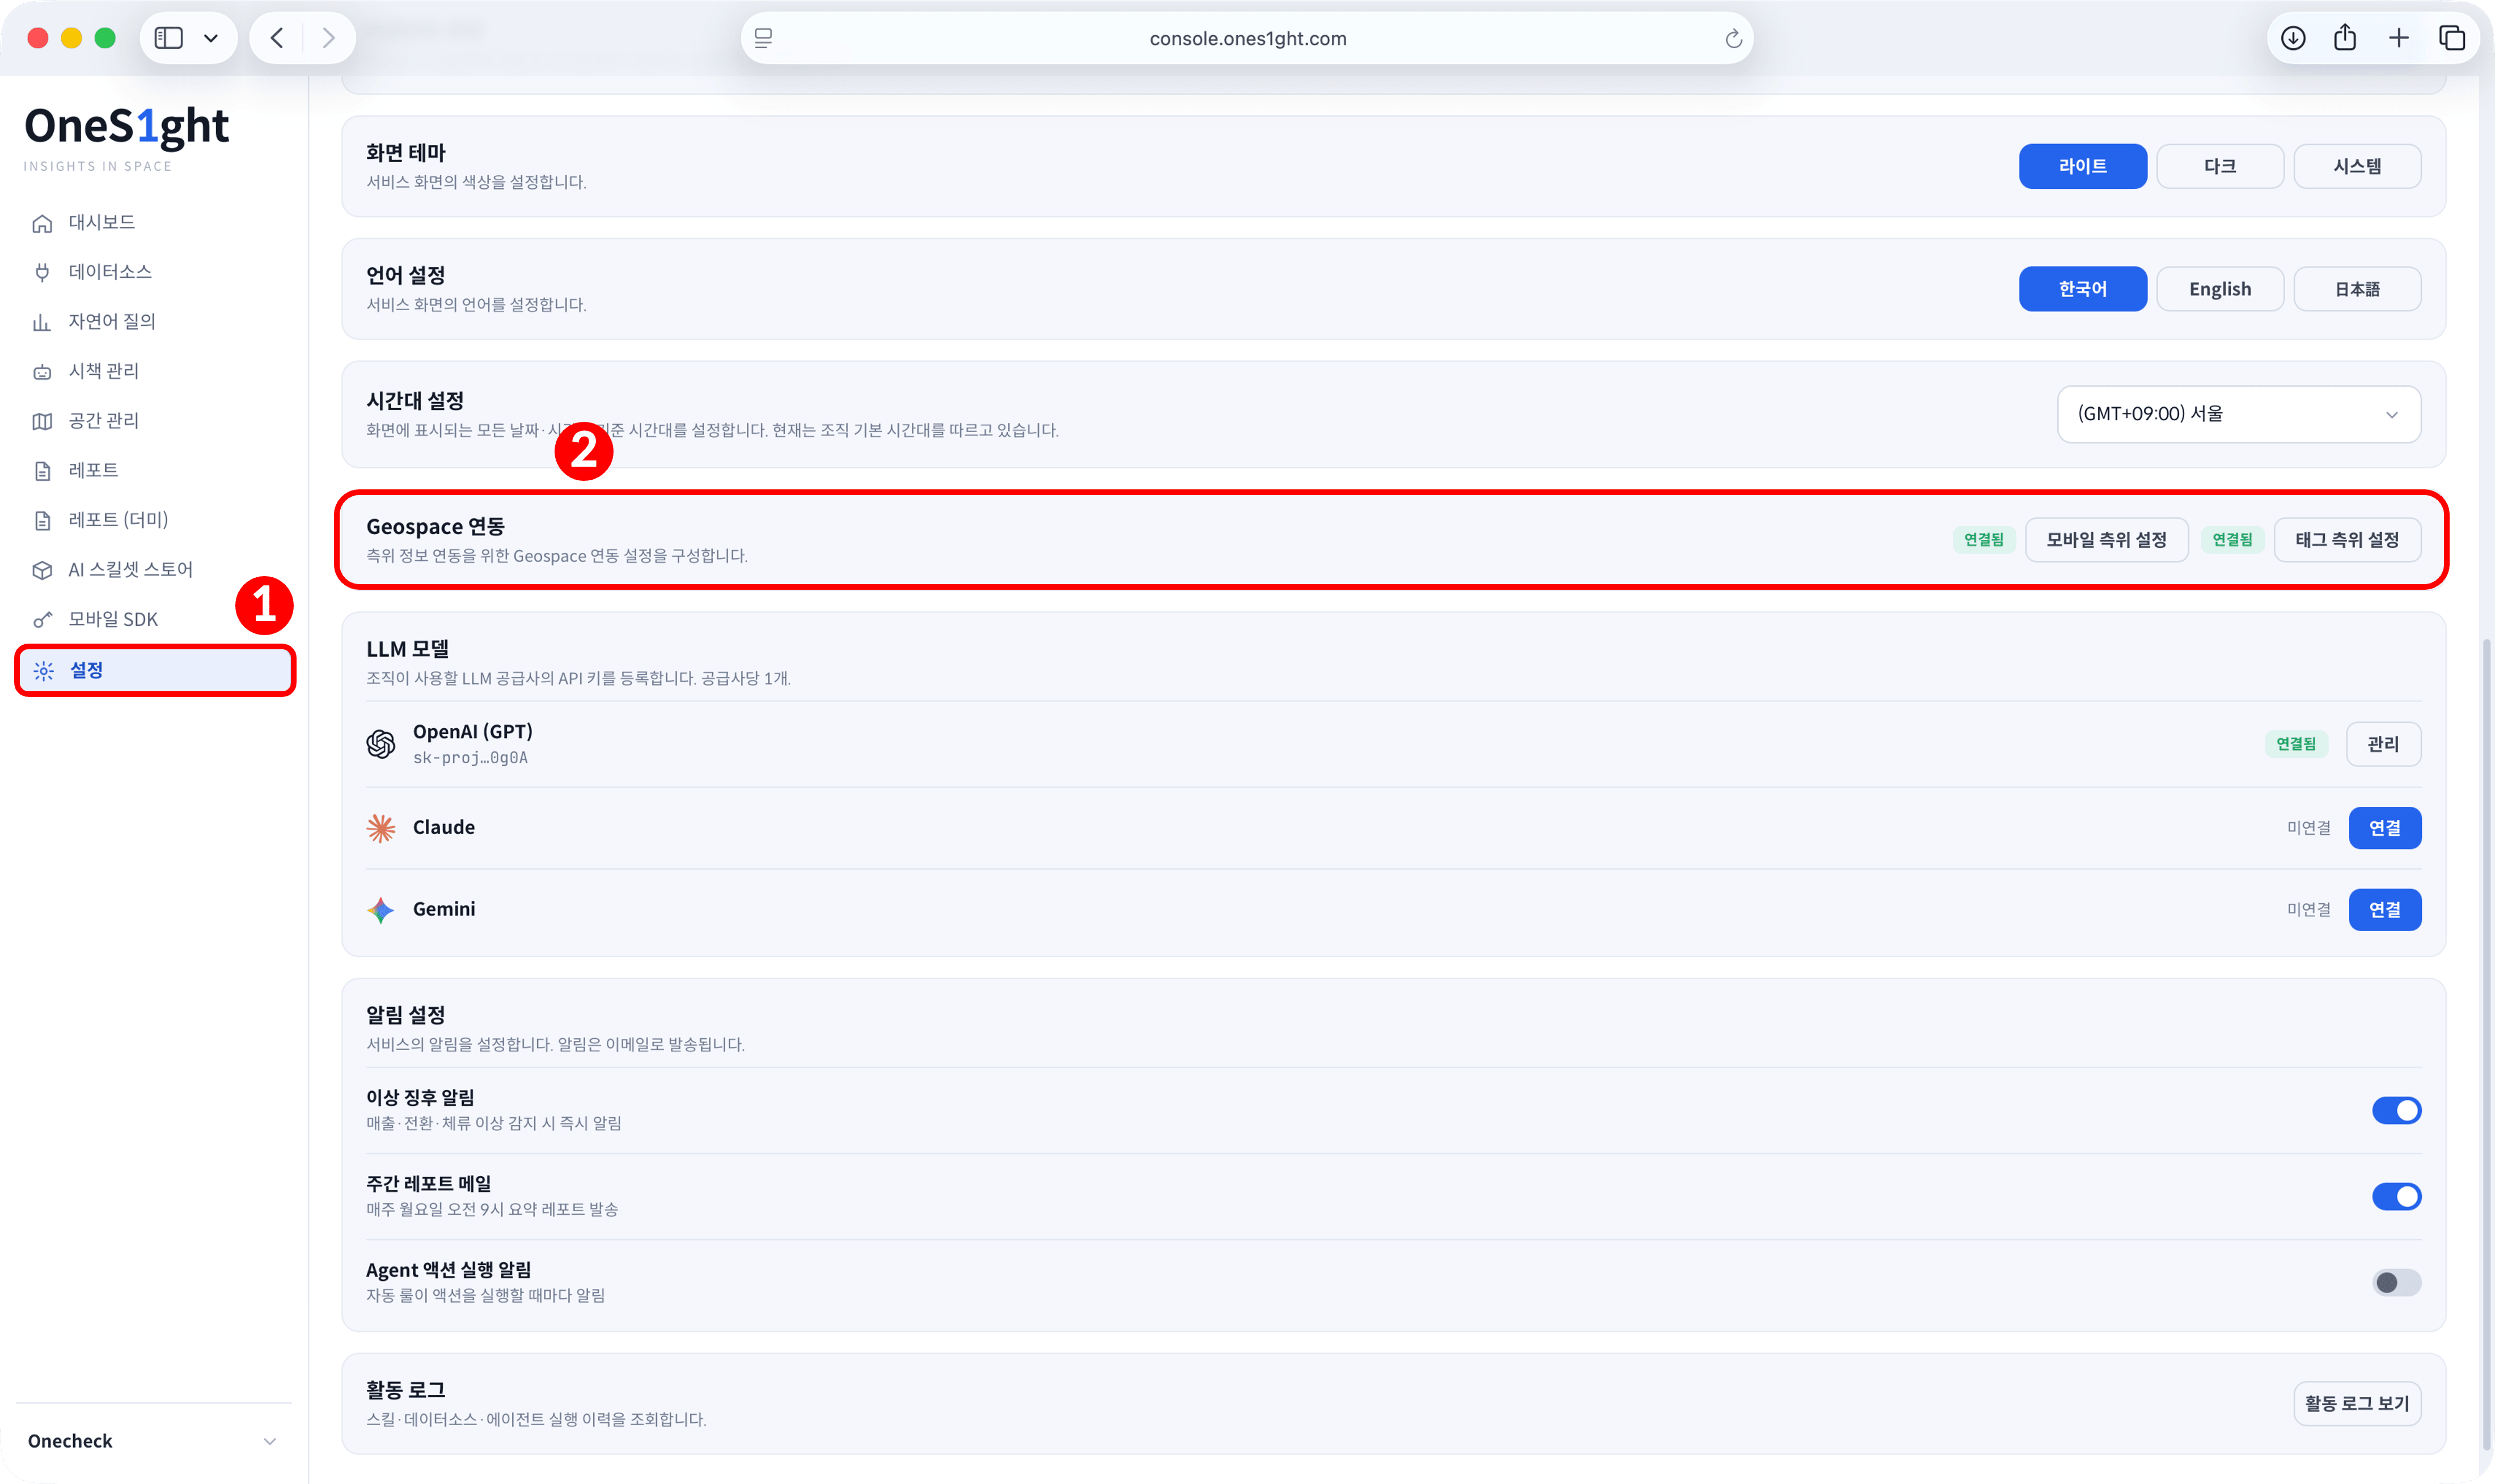 Sign in to the OneS1ght console (`console.ones1ght.com`).
If this is your first console sign-in, work through [Quick Start (console invitation · sign-in)](/en/quickstart) first.
1. Go to **Settings** in the sidebar.
2. Scroll down and find the **Geospace integration** card.
3. Click **\[Mobile positioning settings]** to open the integration management window.
Sign in to the OneS1ght console (`console.ones1ght.com`).
If this is your first console sign-in, work through [Quick Start (console invitation · sign-in)](/en/quickstart) first.
1. Go to **Settings** in the sidebar.
2. Scroll down and find the **Geospace integration** card.
3. Click **\[Mobile positioning settings]** to open the integration management window.
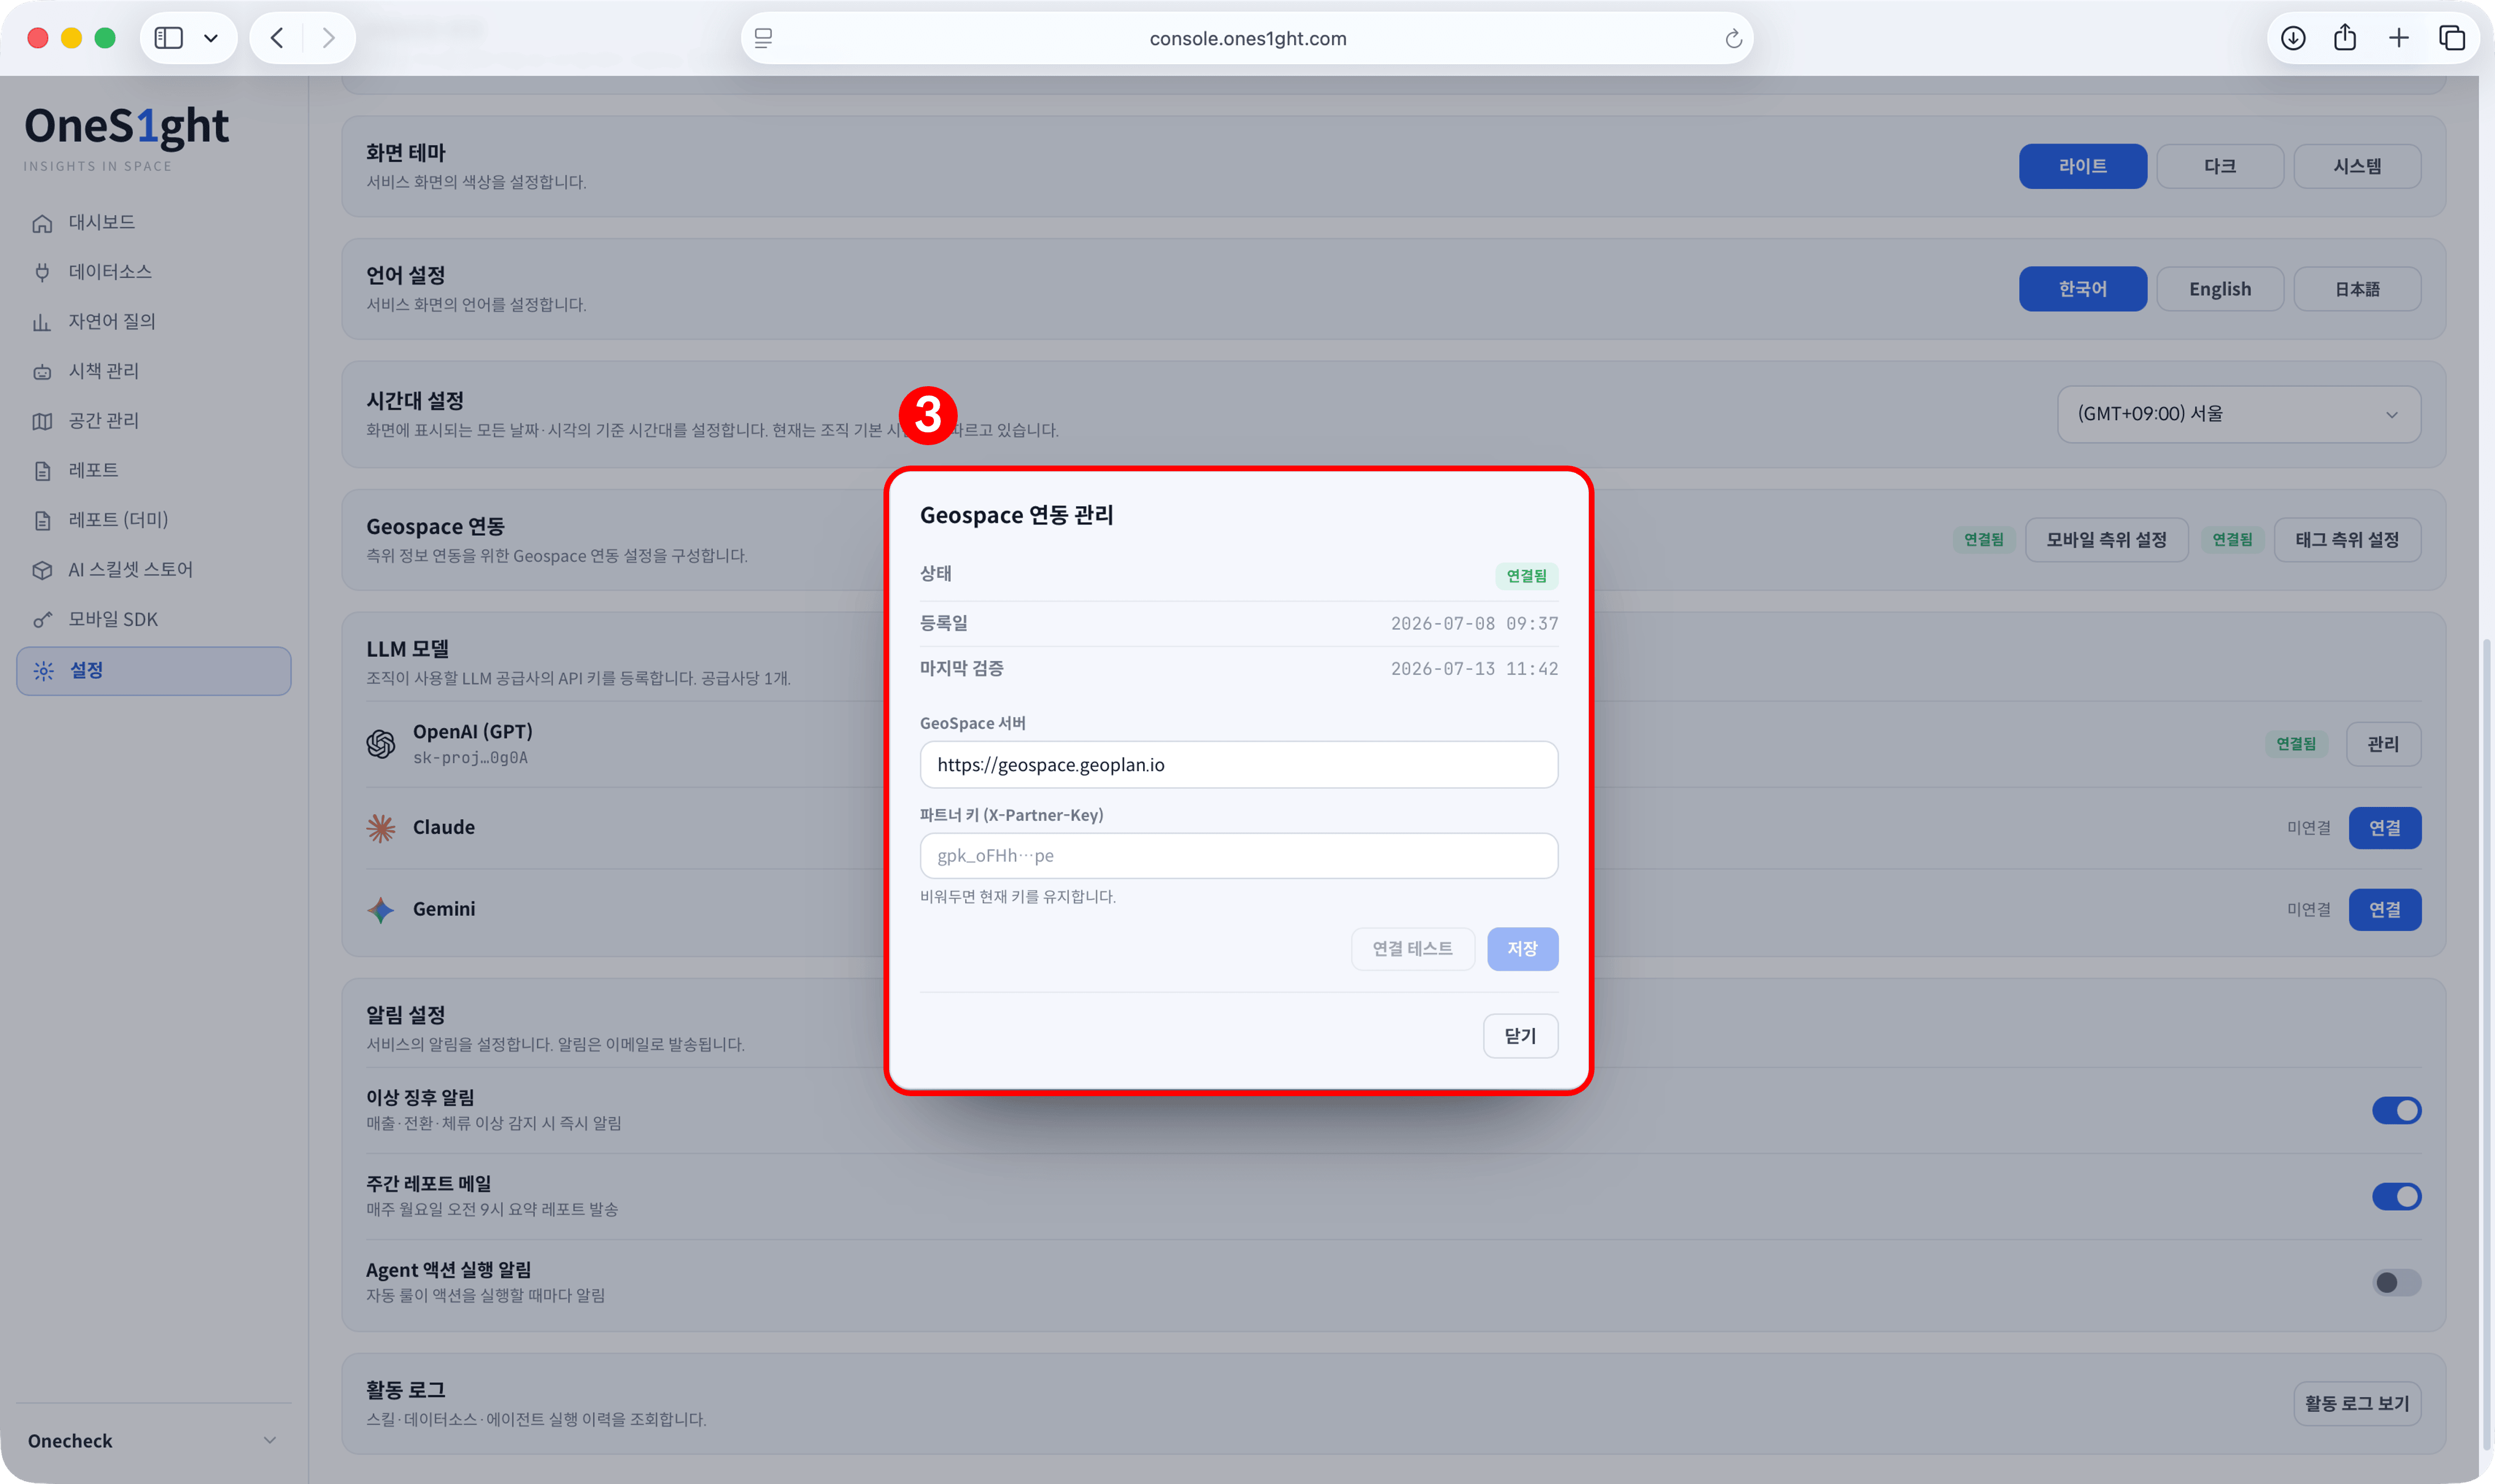 4. **GeoSpace server** — if `https://geospace.geoplan.io` is already filled in, leave it as is.
5. **Partner key (X-Partner-Key)** — paste the `gpk_...` value you issued and copied in GeoSpace.
6. Click **\[Test connection]** to confirm the key is valid first.
7. Click **\[Save]**.
8. Registration is complete once **Status** at the top of the window changes to **Connected**.
If your organization already has a key registered, the partner key field can stay empty — "leave blank to keep the current key".
**Issuing and registering are two different tasks.** Creating the key in GeoSpace is *issuing*;
pasting that key into the OneS1ght console and saving it is *registering*. Both together make one set.
If you only issue and never register, the console cannot fetch floor plans from GeoSpace, so
**an unfamiliar sample floor plan is shown instead of your own store's** — this state is called **simulation mode**.
**Check point —** the status in the integration management window and the badge on the Geospace integration card both read **Connected**,
and [Space management](/en/locator/areas) shows the **actual floor plan** you uploaded to GeoSpace.
## Next steps
Use the verification app to confirm in one pass that real positions are recorded and that the floor plan is linked in the console.
4. **GeoSpace server** — if `https://geospace.geoplan.io` is already filled in, leave it as is.
5. **Partner key (X-Partner-Key)** — paste the `gpk_...` value you issued and copied in GeoSpace.
6. Click **\[Test connection]** to confirm the key is valid first.
7. Click **\[Save]**.
8. Registration is complete once **Status** at the top of the window changes to **Connected**.
If your organization already has a key registered, the partner key field can stay empty — "leave blank to keep the current key".
**Issuing and registering are two different tasks.** Creating the key in GeoSpace is *issuing*;
pasting that key into the OneS1ght console and saving it is *registering*. Both together make one set.
If you only issue and never register, the console cannot fetch floor plans from GeoSpace, so
**an unfamiliar sample floor plan is shown instead of your own store's** — this state is called **simulation mode**.
**Check point —** the status in the integration management window and the badge on the Geospace integration card both read **Connected**,
and [Space management](/en/locator/areas) shows the **actual floor plan** you uploaded to GeoSpace.
## Next steps
Use the verification app to confirm in one pass that real positions are recorded and that the floor plan is linked in the console.